Bob Cotsford Posted November 8, 2018 Share Posted November 8, 2018 Recently I picked up a sad Maggie for the princely sum of £15, complete with 4 148 servos, appropriate wheels and a cowl. It was essentially soundly built - apart from a bit of twist in the fuselage, missaligned tail surfaces, a warp in one wing, failing fabric aileron hinges, nasty 1980s plastic clevises, blacksmith standard engine bearers and tank bay retrofit - as I said, a sad Maggie. Not beyond hope though! So far I've removed the tail surfaces, repaired a broken tailplane spar, patched up the covering and refitted it with the rudder in line with the rest of the model. I've removed the travisty that were hardwood engine mounts and tank supports leaving large holes. A 1/4" ply offcut covers the resulting hole. A 4248/650 Propdrive motor and 60A esc came out of a £20 used motor lucky dip selection box (leaving another 3 or 4 motors and escs still to find homes). A Liteply battery box went in from the underside with it's top corner poking through the top of the bulkhead to take a 4S pack up to 4500MAh. A can of Aldi's white paint, some black vynil and a spot of left over Flair Satin Clear and it's almost there. It's still a bit off-kilter here and there but £15 for the airframe recovering it to completely get rid of the warps would triple the price of the airframe, anyway why do you have trims on your transmitters if not to trim out the 'character'? All the servos are working and I'm guessing that surface movements are not going to be critical on a model like this, but I'd still be interested in opinions on how far everything should be moving. Does anyone have any recommendations? Pics to follow if anyone's interested. Quote Link to comment Share on other sites More sharing options...
Cuban8 Posted November 8, 2018 Share Posted November 8, 2018 I built a magnatilla years ago and it went very well - OS 46 or similar in it IIRC. Totally non-critical on the controls, 1/2 each way on the elevator, same on the ailerons, 1" each way on the rudder to start with, tune to taste. Might be worth getting an incidence meter on it to check how things are. Quote Link to comment Share on other sites More sharing options...
Bob Cotsford Posted November 8, 2018 Author Share Posted November 8, 2018 Thanks Cuban, that sounds near enough to what the setup as it came gives me. While it's wet out I'll titivate it a bit more, a clubmate (Ian) has printed me a rather splendid pilot complete with pickelhaube spiked lid so while I've got the enamels and acrylics paints out to do him justice I'll slop some silver over the fuselage front and wing centre. I don't think it's looking too bad as long as you stand well back. 1/4" scrap ply to fill the big hole up front, suitably perforated to let some air through. The top of the battery box needed the pre-existing hole extending a touch to get the battery as far forward as was practical. Lots of finger space when fitting a battery. I moved the servos forward about 3" to help with the balance. Finally, the nice shiny cowl that will go on it. It's almost too good for this one. About 2 weeks of very casual labour invested, mostly in the motor mount, battery box and paintwork. I wish I had taken some 'before' photos but too late now. Edited By Bob Cotsford on 08/11/2018 13:06:59 Quote Link to comment Share on other sites More sharing options...
Don Fry Posted November 8, 2018 Share Posted November 8, 2018 Give said pilot a REALY big scarf, it will distract to perfection on a low pass. Over 30 foot, who's got the eyes to complain. Quote Link to comment Share on other sites More sharing options...
Kevin Fairgrieve Posted November 8, 2018 Share Posted November 8, 2018 3D printed this fella for my Hannibal. Quote Link to comment Share on other sites More sharing options...
Bob Cotsford Posted November 8, 2018 Author Share Posted November 8, 2018 Good idea Don Kevin, that looks like a shorter version of the one Ian printed for me. He looks pretty sharp after painting, I need to see what paints I've got that are still liquid, some of the Humbrol tinlets are probably getting on for two decades old. Quote Link to comment Share on other sites More sharing options...
Roger Marshall Posted November 8, 2018 Share Posted November 8, 2018 Hi, Can`t help but think " Where`s the eyesore?" looks good to me. So much better than all red! My maggie really is rough looking on the ground (well used, fixed and patched) but in the air looks just fine. To me it does anyway, and it still flys well. Hows your pilot gonna see who he`s shooting at? Don`t forget to get some low pass photos Quote Link to comment Share on other sites More sharing options...
Don Fry Posted November 8, 2018 Share Posted November 8, 2018 Seriously, get a stub of old pencil, and shove it through a pencil sharpener. Now, work out where a mechanic would maul it. Engine Bay, wing tips, tail. And rub with the pencil debris, emulating the mauling. Rub in the direction of airflow over the wing and tail. And it will look very used, and to your audience, very nice. Not scale but dirty. Genuine scale winter mud on the wheels is treasured. Quote Link to comment Share on other sites More sharing options...
Kevin Fairgrieve Posted November 8, 2018 Share Posted November 8, 2018 Posted by Bob Cotsford on 08/11/2018 20:05:47: Good idea Don Kevin, that looks like a shorter version of the one Ian printed for me. He looks pretty sharp after painting, I need to see what paints I've got that are still liquid, some of the Humbrol tinlets are probably getting on for two decades old. There is another version of this with an extended arm with a joystick. Could be that one. Quote Link to comment Share on other sites More sharing options...
William Macleod Posted November 8, 2018 Share Posted November 8, 2018 my ebay Magnatilla. flew on glow ok but now converted to electric. flies on 4s 3200. will take some photos when the weather improves. Quote Link to comment Share on other sites More sharing options...
ken anderson. Posted November 9, 2018 Share Posted November 9, 2018 Bob,a magnatilla was my 2nd model all them years ago.i flew one for 18 months and then sold it(with hindsight, wish I hadn't),you'll enjoy flying it...mine had a Saito 40 in it... ken anderson...ne..1... magnatilla dept. Quote Link to comment Share on other sites More sharing options...
Bob Cotsford Posted November 9, 2018 Author Share Posted November 9, 2018 Roger - thanks, it didn't look that bad at first glance but the loose hinges, misalignment, twists and warps must have made for an interesting flying experience. Don, the camera hides a lot of the patina, it really doesn't need dirtying any more! Kevin, yes, that's the one, with the stick in his hand. He may be a little on the large side but Eindeckers (which the Maggie is said to be a cartooon of) was only small. Anyway, I'm going for a touch of the 'Magnificent Men' excess with it. I do wonder why it didn't get a Focker style rudder as the Baronette did. William, that makes a nice change from the usual red or linen ones. Can I ask where the battery is located, and did it need much lead in the nose? Now the big question - to buy a dummy engine and cut the cowl, or just fly the damn thing. The cowl is so nice it would be a shame to cut it. I do have a plastic cowl with moulded engine somewhere as a backup, but then I also have a cowl-less Puppeteer waiting for ressurection too. Quote Link to comment Share on other sites More sharing options...
William Macleod Posted November 9, 2018 Share Posted November 9, 2018 Hi, Not very pretty but I fit the battery though a hole in the front bulkhead and fit a wedge to secure it. Connect the red wire then connect the black when ready to fly. Battery was a 4s 3200 and it appeared to balance in the right place. Flew fine. Now I know it works I will tidy up the installation and may even fit a hatch to the front compartment underneath. Bill Quote Link to comment Share on other sites More sharing options...
William Macleod Posted November 9, 2018 Share Posted November 9, 2018 I still find it amazing that about 28 years ago I had this electric magnatilla with a maxim brushless motor. It weighed 8 Lbs with 17x2000 nicad cells and a 3:1 superbox turning a 14 x10 Master wood prop.. Now i get better performance, and much lighter!!!, on a 4s lipo. Might put another rear gunner on mine Bill Edited By William Macleod on 09/11/2018 16:55:44 Edited By William Macleod on 09/11/2018 16:56:39 Edited By William Macleod on 09/11/2018 17:23:38 Edited By William Macleod on 09/11/2018 17:29:26 Quote Link to comment Share on other sites More sharing options...
Geoff Gardiner Posted November 9, 2018 Share Posted November 9, 2018 This is the dummy engine and mounts that I printed for my Puppeteer. I did not have to cut the cowl. Geoff... Quote Link to comment Share on other sites More sharing options...
PatMc Posted November 9, 2018 Share Posted November 9, 2018 I converted my ic powered Maggie to electric about 11 years ago, the AUW was increased by around 1lb in the process but the overall performance hasn't suffered. Engine removed was an old ST 40, previous engine was an original version OS40 fs, both used an 11x6 Graupner prop. Replacement motor was fitted with a 12x6 prop run from 4s 4000 lipo. [I've never checked but have a feeling that the kv is probably less than stated on the label] Hole cut in the firewall to access the previous tank space... ...for the battery tray, which was glued in place. The tray bends a little whilst the battery is being inserted then snaps down to help the velcro straps in keeping the battery from moving in flight. Looks untidy without the cowl in place... ...not too bad when dressed. No extra nose weight is used & over the last year or so I've often flown it using 4s 2650 lipo instead of the 4s 4000 again with no added nose weight. You may notice that it was built with a number of cosmetic differences from the original however the actual tail areas etc are the identical. Quote Link to comment Share on other sites More sharing options...
Bob Cotsford Posted November 10, 2018 Author Share Posted November 10, 2018 Geoff, the Maggie usually has a segment cut out of the cowl bottom to make it resemble those used on Fockers, take a look at Pat's above. Do you have a link for the printed motor or did you draw it up yourself? I know Inwoods do one for about £14 but as everything else on the model is recycled I'm loath to spend as much on the dummy engine as the airframe cost. Nice adaptation Pat, more Bristol M1 or Morane-Saulnier N rather than Focker. It's reassuring to see these electric conversions not in need of a lead brick in the nose, I'll have to put mine together and see how it's looking on the balance front. Quote Link to comment Share on other sites More sharing options...
Geoff Gardiner Posted November 10, 2018 Share Posted November 10, 2018 I used this as the basis and added some bits and adjusted the size to fit. Quote Link to comment Share on other sites More sharing options...
William Macleod Posted November 10, 2018 Share Posted November 10, 2018 flew it this morning landed after 7 min 30 on a 4s 3200. Tried my 4s 3900 , a bit nose heavy, but flew ok. prop was a apce 13 x 8 Bill Amazing fun really as you can pick up the magnatilla and puppeteer airframes for less than £100. Mine was £35!!!! Edited By William Macleod on 10/11/2018 14:08:37 Edited By William Macleod on 10/11/2018 14:11:00 Edited By William Macleod on 10/11/2018 14:12:59 Quote Link to comment Share on other sites More sharing options...
William Macleod Posted November 10, 2018 Share Posted November 10, 2018 today's flight Quote Link to comment Share on other sites More sharing options...
Andrew Hammond 1 Posted December 30, 2018 Share Posted December 30, 2018 Hi Bill I do believe i own your old magnatilla as shown in pic I have had it since around 2002? It had been converted to electric when I purchased it. After 16 years been mothballed in my shed i have installed a 4stroke engine and had to rebuild the tail due to hanger rash and hope to be flying it again soon. I also have the float assy too it came with, it now has a red rudder, will post pics shortly Andy from York Quote Link to comment Share on other sites More sharing options...
William Macleod Posted December 30, 2018 Share Posted December 30, 2018 Hi Andy it flew very well and was a great on floats. Looking forward to your photos.billEdited By William Macleod on 30/12/2018 08:29:01Edited By William Macleod on 30/12/2018 08:29:33 Quote Link to comment Share on other sites More sharing options...
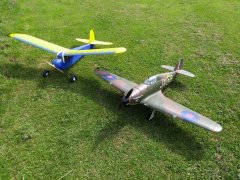
Andrew Hammond 1 Posted December 30, 2018 Share Posted December 30, 2018 pics of the magnatilla attached , as mentioned due to 16 years in storage i had to rebuild the warped tail assy hence the change in paint colour on the fuselage along with paint the rudder red The cowl still needs to be mounted properly. Had the 4stroke engine running today and runs lovely Quote Link to comment Share on other sites More sharing options...

Recommended Posts
Join the conversation
You can post now and register later. If you have an account, sign in now to post with your account.
Note: Your post will require moderator approval before it will be visible.