leccyflyer
-
Posts
5,382 -
Joined
-
Last visited
-
Days Won
52
Content Type
Profiles
Forums
Blogs
Gallery
Calendar
Downloads
Everything posted by leccyflyer
-
£3.49 for 200 on eBay - that's less than tuppence each.
-
Yep, every time I buy a cup of overpriced brown liquid from one of those chains I collect an appropriate number of these very useful stirring sticks, despite taking neither sugar, nor milk. They are so useful in many ways - perfect leading edge reinforcement for 6mm depron wings, superb paint and epoxy stirrers and applicators and clipping the end off makes for nice lightweight control horns. The chain doesn't lose out, since I'm partaking of neither sugar, nor milk and they would go in the bin anyway. I've nowhere near a shoebox full though, maybe a dozen on the go at any one time. Don't eat Magnums these days but a bulk buy of lolly sticks from eBay is very cheap, with hundreds in a pack and lasts a long time. These are useful as stirrers and applicators, plus local hardwood reinforcement - nice hardpoints for mini and micro servos into balsa and foam.
-

Spring is here again - who's been flying?
leccyflyer replied to GrumpyGnome's topic in Flying Field Reports and Chat
Big bad wind and rain yesterday, gusting over 40 kts and with Biblical rain, but while still windy this morning it was just showers and so managed a few enjoyable hours on the slope. Superb lift and just the one short, sharp, shower. That flying was a bonus, as the main part of the mission was to see if my Wannabee had been dislodged from the grasp of the mighty oak. Thankfully that was the case and damage was limited to a broken wing bolt plate and pretty soaked foam model. Nothing a dab of epoxy and a tickle with the covering iron won't cure. The RX battery was dead flat, so that has had it's leads clipped and gone into the pile for recycling. -
That's what confused me GG - you'd both posted pictures of what looked like the same model. I was doing the "Find five differences between these pictures" thing.
-
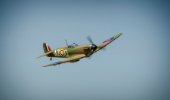
There's a heck of a lot of deep discussion on the actual colour of K5054, which was certainly, after the first few flights, finished in a kind of light grey/blue. For the first flight it's likely that the aeroplane was in a combination of polished aluminium and primer, but it was subsequently painted in that elusive bluish colour. Contemporary sources, including R.J.Mitchell's son, describe the colour as cerulean blue, but doubts have been cast on whether that is a general description or a specific paint shade.
-
I'm confused now - whose is the Hurricane sitting on the table with the checked tablecloth?
-
Beautiful job on the Hurricane Eric 😎 Like Spitfires, you can never have too many Hurricanes......
-
You'll love it - they are so manoeuvrable, so much fun to fly and do fly well on a 2s1p 800mah lipo, with a 1300kv pole and stator motor and 8x6" prop. I prefer to use a 3s1p 600mah pack, propped down to 7x6" and that gives a bit more speed, albeit over a shorter flight.
-
Spring is here again - who's been flying?
leccyflyer replied to GrumpyGnome's topic in Flying Field Reports and Chat
Try climbing out quite steeply then put in a bootful of left rudder and the SE5a will do a remarkable tucked under turn around into a tight spin, all on her own - it would be a brilliant evasive manoeuvre in combat - it's great fun though if you stop it after half a turn and come back towards yourself. -
Painting is historically the big hold up for me. Largely due to not having had anywhere to do it and never being fully satisfied with a brushed, rather than sprayed finish. I do now manage to do a little bit of airbrush work, but am so concerned about overspray that it puts me off any further attempts at an overall spray finish on all but the smallest models that can at least fit in the mouth of the airbrush "booth".
-
Warbird Replicas FW190 newbie build (or possibly some wellingtons)
leccyflyer replied to Lipo Man's topic in Warbird kits
Nice flying Lipo Man - I enjoyed watching that. 🙂 Finally made a start on my FW190 today, just marking the bits up and getting the fuselage doublers glued up to dry overnight. Very impressed with the quality of the laser cutting and rewatching the first few of Ron's build vLOgs. -
Well done David - I'm sure that your pal was delighted and really appreciates your help. A couple of glasses of Leffe after such a momentous occasion was most definitely the order of the day. 😎
-
These battery checkers were mainly for checking the receiver pack, so typically 4.8v packs, though some slightly fancier ones were switchable between 4.8v and 6.0v packs, with a wee button to put the pack under a fixed load.
-
It would be good if they did amend that advice. The thing is that 4-Max's authority in terms of dispensing advice is viewed with such reverence that if they told you to discharge your lipos immersed in soya milk, whilst wearing a traffic cone on your head, a blindfold and with your left trouser leg rolled up above the knee, it would be accepted as gospel, so it would be nice if they didn't advise wrapping spent lipos in newspaper and putting them in your general waste bin for collection.
-
Well the Hurricane fix up is finally completed. Applying the markings by airbrush and CNC cut vinyl masks took forever, with six colours and three mist coats of each, cleaning the brush between each coat. I'm quite pleased with the results, which worked fine with just a few wee glitches. With that done I set to with adding some panel lines, using my favoured method of HB pencil, accentuated with light grey water soluble artist's pencil prior to a little light weathering with pencil dust applied with the fingers and some localised aluminium dry brushing. Finally locked all that in place with a mist coat of matt WBPU varnish applied with the airbrush. Got the model all dialled into the transmitter today, added the radio antenna wire, set the control throws and sorted the velcro seatbelt for the 3s1p 3200mah pack. Add the prop and spinner for a final check of CG and with the battery in place and secured that is spot on, as per the plan, with no additional ballast needed. Just need the weather for a maiden flight now -and the bench is clear. 😎
-
Looks fine Chris, as a receptacle for the headlight bulb and assuming that the lipo is outside of the Kilner jar. In the early days of lipos some folks had suggested charging their lipos in a sealed Kilner jar, which would make a very effective source of glass shrapnel in the event that a lipo did "vent with flames", as the accepted term was back in the day.
-
Spring is here again - who's been flying?
leccyflyer replied to GrumpyGnome's topic in Flying Field Reports and Chat
JD8 - if you have sufficient excess length on your prop adaptor to move the prop arc back a little, you might find a dramatic decrease in noise from your Zgi - even 10mm can make a big difference. -
There is absolutely no need whatsoever for any form of bulb holder. The bulb is sitting in free air, supported by the leads, with a concrete slab beneath and the Belfast Sink planter above. I've no idea where you got the idea from that a Belfast Sink planter is inverted. It's just a convenient dry spot to put the discharging lipo under, whatever the weather.
-
Very neat that John, ideal if you use a number of different connector types.
-
Agree with the comments on AA sized NiMhs which have stated capacities >2000mah. I've never had much luck with those and at least a couple of those packs have fallen over and failed to deliver anywhere close to that claimed capacity in a very short time.
-
Warbirds Replicas Hawker Tempest V -Mass Build 2024(part two) .
leccyflyer replied to RICHARD WILLS's topic in Warbird kits
I'd hoped to have both the FW190 and Tempest completed in time for the 80th Anniversary of D-Day on 6th June, but since I haven't even started the FW190 yet, with the best will in the world that isn't going to happen, given the snail's pace that I usually build at. Have been supposed to have started the FW190 as soon as I'd cleared the bench, more than a month ago, but the Hurricane fix up has dragged on, with it taking forever due to airbrushing the markings and getting diverted onto some glider repairs for a slope competition which was cancelled. -
For a Deans connector it would be a simple matter to just make us a pair of short fly leads and solder those directly to the bulb body, as shown.
-
I prefer to use bulbs - they are more than adequate to discharge a 3 to 4 cell lipo, they don't need to be kept scrupulously clean, they don't get extremely hot, are essentially no maintenance devices and are just stuck in the drawer between times when they are used. The lipo being discharged is done outdoors, underneath a Belfast sink planter, in any sort of weather, shining away through the night - the wee voles might get a warm from them on a cold night. That's where the spent lipos sit until they have their leads clipped and go back under there to await transit to the tip.
-
For the majority of my lipos, from 2s1p 1000mah small ones up to 5s1p 5200mah larger ones I've standardised on 4mm gold bullet connectors, male pin on the nattery positive, female socket on the battery negative, to give a polarised set, with the red lead cut slightly shorter, by a connector length, so that no part of the two connectos can easily touch. Heat shrink tubing used to only leave the contact area of the male pin exposed, then sexured with a wrap of insulating tape to remove any possibility of connecting the battery to itself. The male pin is then shrouded with a length of blue Sullivan snake outer, which fits perfectly and encases the entire metal surface. These are coded green for charged, blue for discharged, to keep track of the packs in use. For my smallest packs I've standardised on the wee red JST plugs and sockets. My larger packs, 6s1p 4000-5200mah now have 5.5mm gold bullet connectors, using the same protocol as for the 4mm ones.
-
Very easy to solder a short piece of silicon coated wire, with a 4mm gold bullet connector onto the body and end terminal of a bulb. It's just a matter of abrading the surface of the bulb body with a fine file, or a Dremel, to make sure it's completely clean, then tin the surface contact point, tin the wire end and make the joint. Couple of pictures to illustrate - I've taken the wrap of insulating tape off one so that you can see the contact points.