Tim Mackey Posted November 22, 2011 Share Posted November 22, 2011 My main winter project is this Boeing beauty - The B52 - affectionately known as the BUFF, a PSSA / Aerotow glider from the Simon Cocker plan - which he kindly presented to me over dinner at one of our recent PSSA meetings. Thanks Si Here's Simon with his original, aging - but still terrific version. Pretty much all foam with a few ply sections for added strength, the model spans 8.5 feet, with a fuselage of around 7.5 feet, and AUW of between 10 - 14 lbs depending on how much glue is left in the bottlesHeres the main parts This ply section is the "spine" for the front section of the fuselage - approx 4' long. Nose cone and rear tapered section make up the total fus length. I modded the nose spine slightly to interlock with the main spine and transfer some of the towing loads when aerotowed - the towline attachment can be seen here epoxied to the spine, which will then be built up with 12mm balsa block and shaped. I have run the operating rod through to what will be the wing mounting bay, so servo can be retrofitted / maintained.Mock up of tow release. And the actual unit with nose spine mated to front spine. Fuselage is EPS hollowed section and balsa veneer, with a couple of main formers in the wing mounting section.The tail feathers are also veneered foam. Main work this past few days has been the engine nacelle mounting pylons - - four in all, which feature a simple but natty "break away" release system. Each pylon is in two pieces, a smaller fixed section on the wing underside, and a larger mating section carrying the engines. made of 12mm balsa, and laminated with ply at the mating facings, these are connected together by two, friction fit, stepped locating pins ( I used carbon fibre rod and tubes ). Upon landing, should one or more engine hit an obstruction, they are "knocked off" with no damage to the main structure. I made up ply templates first, and used small wedges to get the geometry of the pins and sockets correct. Here's the finished pylons, showing one in detached view - they will be sanded to final profile and covered in lightweight glass cloth and Poly-C later today. I've cheated on the main wings, having elected to get them done professionally by Barry @ foamwings of Scotland, but all the rest is home spun, with a little help from my friends on the foam cutting - which I hope to get done later this week .Edited By Tim Mackey on 30/11/2011 11:02:32 Quote Link to comment Share on other sites More sharing options...
Cyclicscooby Posted November 22, 2011 Share Posted November 22, 2011 Are you gonna leave it as a floater, or put 4 EDF's in it, or even 8 tiny ones for proper scale..!! Imagine the noise.. !! Luv Chrisie.. xx Quote Link to comment Share on other sites More sharing options...
Tim Mackey Posted November 22, 2011 Author Share Posted November 22, 2011 Would be good wouldnt it ! No plans to do so at the mo....but who knows what the future may throw up Quote Link to comment Share on other sites More sharing options...
David Ashby - Moderator Posted November 23, 2011 Share Posted November 23, 2011 ...will it go in the car Tim? Quote Link to comment Share on other sites More sharing options...
Tim Mackey Posted November 23, 2011 Author Share Posted November 23, 2011 Yup, as Im modifying the fus to be two piece arrangement.Wings.....just !! Quote Link to comment Share on other sites More sharing options...
Tim Hooper Posted November 23, 2011 Share Posted November 23, 2011 Stately, yet menacing..... tim Quote Link to comment Share on other sites More sharing options...
Tim Mackey Posted November 23, 2011 Author Share Posted November 23, 2011 Thats a good description Tim - I presume you mean the model not the pilot So...when we gonna get ya up that big rock mate? Quote Link to comment Share on other sites More sharing options...
Biggles' Elder Brother - Moderator Posted November 23, 2011 Share Posted November 23, 2011 Its going to get awfully crowded on top of that rock Tim I'd best stay away and make room for others - its OK, I'll make the ultimate sacrifice .....put others first and all that.... BEB Quote Link to comment Share on other sites More sharing options...
Tim Mackey Posted November 23, 2011 Author Share Posted November 23, 2011 LOL...you're a lost cause anyway BEB Quote Link to comment Share on other sites More sharing options...
Tim Mackey Posted November 30, 2011 Author Share Posted November 30, 2011 I've tidied up and re-titled this thread now that we've had our fun on the guessing game - time to make it a proper build blog. I have not been idle, and have now almost finished the engine pylons, and the ply work s shown above - next its foam cutting time, but I won't clog up the thread with blow by blow postings - I'll just post at the completion of each stage. Quote Link to comment Share on other sites More sharing options...
Phil Cooke Posted November 30, 2011 Share Posted November 30, 2011 ABS engine nacelle delivery still planned for Sunday, 8-Off - courtesy of the PSSA Edited By Phil Cooke on 30/11/2011 23:03:59 Quote Link to comment Share on other sites More sharing options...
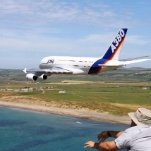
Phil Cooke Posted November 30, 2011 Share Posted November 30, 2011 a little more pictorial inspiration - you might recognise this back-drop Tim Quote Link to comment Share on other sites More sharing options...
Tim Mackey Posted November 30, 2011 Author Share Posted November 30, 2011 Oh yes .... I can see my old house there ! Nice shot Phil...or was it Sue's PS I take it Simon has already fitted the 8 x mini turbines he promised me too Edited By Tim Mackey on 30/11/2011 23:28:19 Quote Link to comment Share on other sites More sharing options...
Olly P Posted December 1, 2011 Share Posted December 1, 2011 An interesting project there Tim, I will get down the the rock next year and fly with you lot....might have to find a slope here first to learn on tho - it's a long way to go for just 10 minutes before tim chases me out of the sky. Quote Link to comment Share on other sites More sharing options...
Ian Jones Posted December 1, 2011 Share Posted December 1, 2011 Silently watching with interest Tim Quote Link to comment Share on other sites More sharing options...
fly boy3 Posted December 1, 2011 Share Posted December 1, 2011 Exellent flying shot Phil. Cheers FB3 Quote Link to comment Share on other sites More sharing options...
Tim Mackey Posted December 2, 2011 Author Share Posted December 2, 2011 Posted by Ian Jones on 01/12/2011 23:30:28:Silently watching with interest Tim Nowt to report since the last posting - still awaiting my mate with his fancy CNC cutter to make it over here. I might have a go at getting the tail end shaped up - Im thinking of using pink foam ( nice and dense - and I have a few big chunks laying around ) then laying it up with glass and resin for extra strength. I'll make it a separate removable section for easier transport and less hangar damage, CF rods and magnets should hold it on in flight. Quote Link to comment Share on other sites More sharing options...
Tim Mackey Posted December 2, 2011 Author Share Posted December 2, 2011 Found this rather interesting "tale" - groan - the other day whilst I was googling around for pictures of the tail end. This could save me a whole lot of work and some foam Edited By Tim Mackey on 02/12/2011 10:40:44 Quote Link to comment Share on other sites More sharing options...
Danny Fenton Posted December 2, 2011 Share Posted December 2, 2011 Just goes to show this c of g myth is rubbish Quote Link to comment Share on other sites More sharing options...
Tim Mackey Posted December 2, 2011 Author Share Posted December 2, 2011 Not so - I have read the whole thing, and apparently, the pilot had to move a LOT of fuel around, and drop his rear gear to compensate for the weight shift. It stayed flying for many hours before a successful landing. I particularly liked the bit where he recalled " after the last swipe ( it was severe turbulence that caused the damage ) I had the rudder pedal hard to the firewall, but couldnt regain control".Not surprised mate ! Quote Link to comment Share on other sites More sharing options...
Erfolg Posted December 2, 2011 Share Posted December 2, 2011 I guess you know that there is one in the Duxford IWM. Many years ago my wife and myself stood underneath the aircraft in total awe of the size. The shear size of the UC legs alone were incredible. Although Jumbos seem big, it seemed bigger, it could have been a result of being indoors, certainly impressive. I remember seeing a B52 flying low level along the Duddon Estuary, near Greenodd, as I was driving in the same direction along the side of the river. It was really low, just climbing to clear the hills, to fly on over Windermere. The next week or maybe a little later, I the same said thing happened this time with a Vulcan. On reflection, they were both surprisingly quite. That is after being surprised by low flying jets on various hillsides in Cumbria. Everything from a Phantom, and everyday Harriers, Hawks and Tucarnos doing the same run, week in week out. I do remember seeing a model B52 at Rivington Pike at least 12 years ago, which was impressive. Quote Link to comment Share on other sites More sharing options...
Tim Mackey Posted December 3, 2011 Author Share Posted December 3, 2011 Yup, the picture of the tail section is of that very one.Now, back to the model - my mate Richie came over tonight with his fantastic home built 4 axis hot-wire CNC cutting rig! Its quite a beast as seen below. General view. Utilizing readily available materials, the all steel construction comprises two vertical towers which can be clamped to the work surface at whatever distance apart you require, and the two horizontal legs are at right angles across the surface. Threaded rods carry the cutting wire in both axis, but of course, with each post being independently driven by a stepper motor - this can move in 4 axis if required. The horizontal drive rail size allows for massive wing chords to be cut if required. The stepper motors are driven by a separate unit housed in an old desktop PC case seen here below the base board. One end of the machine showing screw drives,motors and guide rails ( drawer runners ! ) The laptop and interface ....Full 3D simulation of the programmed cut can be run before any foam is actually cut. Heres the remains ( saddle ) after cutting one front fuselage section half Theres a short clip of the cutter in action below. I'll do one later of the whole process, so you can see the start up, and here all the whirring and clicking stuff....lovely Edited By Tim Mackey on 03/12/2011 00:39:47 Quote Link to comment Share on other sites More sharing options...
Tim Mackey Posted December 3, 2011 Author Share Posted December 3, 2011 The whole cut is done in one action, bottom, inwards, upwards, outwards, up, in, and down etc. The clip shows it on the way back down and ready to finish off. We were a little disappointed with the finish - but that's down to the poor quality foam - nothing that a little sanding before veneering wont fix. All in all, a fascinating evenings work. In the next few days, we shall do the tailplanes and fin, together with the tapered rear fuselage sections. Quote Link to comment Share on other sites More sharing options...
Phil Cooke Posted December 3, 2011 Share Posted December 3, 2011 Awesome stuff Tim!! What a fantastic machine! Quote Link to comment Share on other sites More sharing options...
Tim Mackey Posted December 3, 2011 Author Share Posted December 3, 2011 Isnt it ! The clever beggar made it all in a couple of days too ! Incidentally, if anyone has any cutting work that they need doing, Richie is happy to do so - but will of course charge a reasonable fee. All thats needed is a few basic details of the section, length of Leading and trailing edge etc...and away we go. Quote Link to comment Share on other sites More sharing options...

Recommended Posts
Join the conversation
You can post now and register later. If you have an account, sign in now to post with your account.
Note: Your post will require moderator approval before it will be visible.