Craig Thomas Posted March 9, 2016 Share Posted March 9, 2016 Wow. That cowl looks awesome. I love it. Think I will make an attempt at one like yours when I get that far. Only concern I have with a wooden cowl is once covered, how long will it take before the covering comes off. A combination of my poor covering ability, oil and wind getting underneath it makes me think not long. I think I will have to coat the cowl in balsaloc in the hope that it helps keep it on. Quote Link to comment Share on other sites More sharing options...
Bob Cotsford Posted March 9, 2016 Author Share Posted March 9, 2016 I was going for a 60'-70' stunter snout, but it ended up more Turbo-Raven. Grommet - of course! I've been sitting here trying to think where I'd seen that mug before Chris, just for you I've put it on the kitchen scales - 40gm exactly. I could probably get that down by 25% if I hollowed out some more of the 1/2" sheet, and the wood isn't the lightest grade being whatever I'd got to hand. If I'm film covering a cowl I usually put a coat of Balsaloc,PolyC or Solarlac Clearcoat around the edges to really bond the film to the wood, then seal the edges again with Clearcoat after covering. This time I'm tempted to try an epoxy/glass finish as I have both finishing resin and 30gm cloth. Quote Link to comment Share on other sites More sharing options...
Chris Barlow Posted March 10, 2016 Share Posted March 10, 2016 Thanks Bob. Looks similar to Peters construction so would be about the same weight. My GF cowl came out at 41g before paint so isn't really too heavy. Still, the Ballerina is so lightly loaded it won't suffer too much with another couple of grams on the tail. Quote Link to comment Share on other sites More sharing options...
Bob Cotsford Posted March 10, 2016 Author Share Posted March 10, 2016 The way I look at it is that the cowl will be first part to suffer when Terra gets Firma so the thicker, denser wood is only going to help at those times. Lead in the tail? It's a possibility, maybe I'll try a test balance before covering so that I can put a battery hatch behind the wing if need be. Or fit bigger/heavier servos Quote Link to comment Share on other sites More sharing options...
Bob Cotsford Posted March 14, 2016 Author Share Posted March 14, 2016 First attempt at painting the cowl = disaster. I'd covered it with glass and epoxy, rubbed down then given 3 coats of plastic primer flatted down between coats. The first coat of gloss black just showed up a load of defects that hadn't shown in primer - glass weave and pin holes , plus it crinkled in a couple of spots. I've sanded it back to the point where the glass is showing through and primed it again but this time using filler/primer. Once it's had a couple of coats flatted back I'll try the gloss again. Meanwhile, time to start covering. I've started by putting the background on the tail surfaces and the inside corners of the aileron cutouts. Then I drew around the wing onto a piece of heavy lining paper and drew up the trim pattern using a saucer for the radii. Once happy I cut out the templates. Next I'll cover the rear half of the wing and cut out the black top colour pieces using the templates. Progress is slow as apparently I've got blepharitis - sore eyes and eyelids. I thought it was conjunctivitis but the Doc reckons not. Either way I'm off work today as even sitting at the screen typing this post is making my eyes hurt. Pretty good state for a professional application support analyst to be in (quite literally!) Edited By Bob Cotsford on 14/03/2016 15:29:05 Quote Link to comment Share on other sites More sharing options...
Peter Miller Posted March 14, 2016 Share Posted March 14, 2016 The eyes are always the worst thing to have problems with. Hope it clears up soon Quote Link to comment Share on other sites More sharing options...
Bob Cotsford Posted March 14, 2016 Author Share Posted March 14, 2016 Thanks Peter, turns out that in addition to blepharitis (inflamed eyelids causing dry eyes) I now have a cyst under one eyelid, which is why it's so painful. As long as I'm not focusing on a screen or in bright light it's not too bad. So flying while I'm off work is out Quote Link to comment Share on other sites More sharing options...
john stones 1 - Moderator Posted March 14, 2016 Share Posted March 14, 2016 Is that Orange you're covering with Bob ? or you using Jacinth John Quote Link to comment Share on other sites More sharing options...
Bob Cotsford Posted March 14, 2016 Author Share Posted March 14, 2016 If I remember correctly it's what passes for Golden Yellow in China. I originally ordered some to repair a Dragon Lady expecting a dark Cub type yellow but got this - you may notice the KA in my Avatar ended up with it. Then I used some of the remainder of the 5M roll on the Mustfire, ran out and had to order more, which in turn covered large areas on the Thunderbird, but not enough. So yet another roll, the remainder of which is going on the Ballerina. My models seem to be going through an orange phase. Quote Link to comment Share on other sites More sharing options...
Chris Barlow Posted March 14, 2016 Share Posted March 14, 2016 Looks like Jacinth to me! Quote Link to comment Share on other sites More sharing options...
Bob Cotsford Posted March 17, 2016 Author Share Posted March 17, 2016 The good thing about being off work with eye problems is that there's no temptation to go flying, the bad thing is that covering involves a bit of guestimation. I like to patch the tricky bits first so on with some 'yellow'. Then it's on with the big bits. I've covered the wing bolt reinforcing plate separately as it makes life easier. Now I need to mark the fuselage where the black on the wings crosses it and cut the black sides to go on the front of the fuselage. I did the same with the fin/fuselage joint to get the bottom scallop to line up across the fillet. I found this chap while I was looking for a matching pair of wheels, I had to shave his shoulders but he fits quite nicely. I think he's still missing Barbie though. Quote Link to comment Share on other sites More sharing options...
Peter Miller Posted March 17, 2016 Share Posted March 17, 2016 Looking nice Quote Link to comment Share on other sites More sharing options...
Bob Cotsford Posted March 17, 2016 Author Share Posted March 17, 2016 Well, you reach a point when you just have to Quote Link to comment Share on other sites More sharing options...
Martyn K Posted March 17, 2016 Share Posted March 17, 2016 That's another cracking colour scheme Bob. One of the best bits about this has been the multiplicity of colour schemes. Very nice Martyn Quote Link to comment Share on other sites More sharing options...
Chris Barlow Posted March 17, 2016 Share Posted March 17, 2016 Excellent job there Bob. I agree Martyn. I've liked every colour scheme produced so far, and most of them have been different! Quote Link to comment Share on other sites More sharing options...
AndyD Posted March 17, 2016 Share Posted March 17, 2016 very nice indeed Quote Link to comment Share on other sites More sharing options...
john stones 1 - Moderator Posted March 17, 2016 Share Posted March 17, 2016 Look at that, the scallop even runs onto the fin fillets, very nice Bob John Quote Link to comment Share on other sites More sharing options...
McG 6969 Posted March 17, 2016 Share Posted March 17, 2016 Bob, please. One remark though, could you give Barbie's friend a bit of color to the F5 former just behind him? ... OK, right, I'm leaving the classroom right away... Great deco, by the way. Hakuna matata Chris BRU - BE / CTR Bob's Deco Control Quote Link to comment Share on other sites More sharing options...
Bob Cotsford Posted March 17, 2016 Author Share Posted March 17, 2016 Just done that Chris, a couple of coats of mahogany varnish. Tomorrow should see the tail surfaces glued in and the engine/radio installation started. The problem now is that when I varnished the cockpit I thought I might as well do the same for the Thunderbird while I was at it. Now both models are at the same stage so it will be an interesting comparison completing them side by side - 40cc petrol twin v .52 glow Quote Link to comment Share on other sites More sharing options...
Martyn K Posted March 18, 2016 Share Posted March 18, 2016 Thats just upset my OCD. I cant match all the bits up.. Quote Link to comment Share on other sites More sharing options...
Bob Cotsford Posted March 18, 2016 Author Share Posted March 18, 2016 Just to confuse matters Martyn - there's a set of wings for a Ta152 in there too! Quote Link to comment Share on other sites More sharing options...
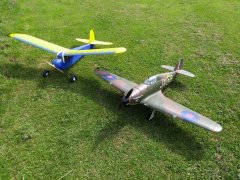
Bob Cotsford Posted March 21, 2016 Author Share Posted March 21, 2016 2S LiFe pack stuck to the former with sticky back velcro, with a packing foam security blanket: Everything tucked away nicely, more packing foam securing the tank: Tailwheel assembly, steering courtesy of a piece of old windscreen and 1/2" of fuel tubing: And all together: With a 2 1/4" Irvine plastic spinner it balances at about 3 1/4" back as against the 3" on the plan, an aluminium spinner would add about 45gm more to the nose bringing it pretty much to Peter's recommended start point. AUW 2.2Kg, or 4lb 14oz in old money. And a parting shot Quote Link to comment Share on other sites More sharing options...
john stones 1 - Moderator Posted March 21, 2016 Share Posted March 21, 2016 Looks classy n racy Bob John Quote Link to comment Share on other sites More sharing options...
Bob Cotsford Posted March 21, 2016 Author Share Posted March 21, 2016 What it needs is a nice Ballerina graphic to break up all the black at the front. Anyone able to help for costs? How about or Quote Link to comment Share on other sites More sharing options...
Peter Miller Posted March 21, 2016 Share Posted March 21, 2016 Very neat. Quote Link to comment Share on other sites More sharing options...

Recommended Posts
Join the conversation
You can post now and register later. If you have an account, sign in now to post with your account.
Note: Your post will require moderator approval before it will be visible.