

Jonathan M
-
Posts
1,968 -
Joined
-
Last visited
-
Days Won
8
Content Type
Profiles
Forums
Blogs
Gallery
Calendar
Downloads
Everything posted by Jonathan M
-

Smooth Operator designed by Pete Tindall
Jonathan M replied to David Hayward.'s topic in Build Blogs and Kit Reviews
I'm impressed that you went for an engine at the bottom end of the size range, which should be more than enough to fly smoothly using the full throttle range and the model's own kinetic energy. Useful offset tool too! I see you infilled the lightening-holes in the sides above the wing. I couldn't work out why they were needed there in the first place. -
Thanks chaps. I've now cut one from a thin cardboard lightbulb box.
-
Want to make a gasket for the silencer on a 2-str 46. Use any old paper, e.g. 80gsm printer paper, or something more specific?
-
From Balsa Cabin: Contest 3-6lbs per cubic ft Light 7-8lbs Medium 9-12lbs Hard 13-16lbs To convert g/cu inch to lbs/cu ft multiply by 3.8 Example: A sheet of 1/8" x 4" x 36" has a volume of 18 cu in It weighs 50g, therefore it has a density of 2.78 g/cu in Multiplied by 3.8 = 10.65 lbs/cu ft => middle of the MEDIUM range. If it weighed 35g then density = 7.46 lbs/cu ft => LIGHT If 70g = 14.92 lbs/cu ft => HEAVY
-
Great advice, thanks Jon, I'm going to do exactly that.
-
About to run-in my new OS MAX 46AXii. Would normally start with the instructions, but having read the MAN review (of the Mk1 but essentially exactly the same engine inside) curious as to which method to use...? OS Manual (here): Run the engine for one minute with the throttle fully open, but with the needle- valve adjusted for rich, slow "four-cycle"operation. Now close the needle-valve until the engine speeds up to "two-cycle" operation and allow it to run for about 10 seconds, then reopen the needle-valve to bring the engine back to "four-cycle" operation and run it for another 10 seconds. Repeat this procedure until the fuel tank is empty. Re-start and adjust the needle-valve so that the engine just breaks into "two-cycle" from "four- cycle" operation, then make three or four flights, avoiding successive "nose-up" flights. During subsequent flights, the needle-valve can be gradually closed to give more power. However, if the engine shows signs of running too lean, the next flight should be set rich. After a total of ten flights, the engine should run continuously on its optimum needle-valve setting, without loss of power as it warms up. Model Airplane News 2004 Review (here): Although the instructions recommend running the engine rich (4-cycling) during the break-in period, I used the preferred method for all ABC-type engines: run it at a fast 2-cycle (several hundred rpm less than peak) with a low-load propeller(*) about 1 inch smaller in diameter than a recommended flight prop. I ran the .46AX for 2-minute periods on the fuel that was intended for flight. I then shut it down and allowed it to cool to the touch before restarting. The total break-in lasted 20 minutes, at which time I decided the engine was ready for propellor rpm analysis. (* Prop - I'd probably be using an 11x7 for flying, so this method would imply running-in on a 10x6.)
-
Did you ever resolve this?
-
Draining / disposing of old Lipos?
Jonathan M replied to Witterings's topic in Batteries and Chargers
My ISDT charger has a 'destroy' function, which sucks the remaining charge out on a balanced basis. The inert lipos then just go in the same clear plastic bag containing normal depleted batteries which is left on top of the recycling or waste bin for normal domestic collection every week - that's the system in my area. -
Plywood types - what do I buy?
Jonathan M replied to Jon Chippindall's topic in Building from Traditional Kits and Plans
So a sheet of 1/8" birch will cover all these bases. -
Plywood types - what do I buy?
Jonathan M replied to Jon Chippindall's topic in Building from Traditional Kits and Plans
SLEC do Finnish Birch Ply in a range of thicknesses and sheet sizes, proper stuff. If you need a range of thicknesses, then consider buying thinner (e.g. 1/8") and laminating to finished thickness (e.g. 1/4") where needed. This also affords the opportunity to 'mirror-laminate' to cancel out any twist that creeps into the sheets. -
At first glance I thought you'd written "a bit of drinking time is required..." which wouldn't bode well in the morning! 😅 What tank type are you using?
-
Smooth Operator designed by Pete Tindall
Jonathan M replied to David Hayward.'s topic in Build Blogs and Kit Reviews
I agree with Geoff. Your presentation is also clear and concise, so a pleasure to follow. -
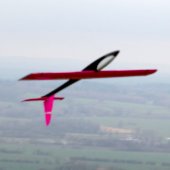
Don't dismiss FXRES as a simply competitive arena. It is if you want it to be, say BARCS 2025 League Events Calendar , but it is also an amazing thermal-hunting and -riding pleasure in its own right: flying RE on one stick, with spoiler on the other only if/when you need it, and motor on a switch if you're not using bungee for launching. Most folk who enter into the Monthly Duration Postal (this one for January so far) are just people who love getting out on their own with a lightweight 2m RES model for an hour or so when the weather is suitable, and post their times if they wish to.
-
Extra charger or parallel charge board?
Jonathan M replied to Declan's topic in Batteries and Chargers
Leccy, that all makes good sense, but why wait 3hrs, or with two independent chargers still 1.5hrs, to charge a set of four identical lipos? If one is going to be flying electric all day, say 3 models each with a set of 4 lipos, then that's an awful lot of charging time - and then discharging some of these back to storage afterwards if need be. I also have the SSDN Q8 which is a great piece of kit (with very similar touch-screen functionality to the Toolkit), but I use this mainly as a field charger for smaller 3s lipos used in my thermal soarers. -
Extra charger or parallel charge board?
Jonathan M replied to Declan's topic in Batteries and Chargers
I don't mess around any more with inadequate kit or time-wasting hacks. I have just one capable 4-outlet charger with sufficient power outlet to handle up to four sizeable (say 4s 5000mAh) lipos at a time. Takes about forty mins to charge a set from storage, go fly, come back and put the set on storage charge (you choose the exact voltage level per cell you want). https://www.4-max.co.uk/Toolkit-RC-Q6AC-charger.html provides up to 100W per channel with an AC supply, very flexible in terms of capability and functions. A less expensive version is https://www.4-max.co.uk/Toolkit-RC-Q4AC-charger.html but this only provides up to 25W per chan (100W total), so while that might be adequate for up to the usual 3s 2200mAh lipos it'd struggle with bigger packs. Read this for how to calculate what capacity charger you need for your likely packs: https://www.4-max.co.uk/pdf/charger-selection.pdf -
Best reason to not put servos in the tail is that the tail-moment is typically 2.5 to 3.0 times the nose-moment... so if the model comes out tail-heavy as a result of that decision, then that's a lot of unnecessary lead to be added to the front end.
-
Disaster! But how do you know this was the cause?
-
WOT4e flying v Junior 60 (with elec conversion)?
Jonathan M replied to 911hillclimber's topic in General Vintage R/C Chatter
Excellent contribution. Worth also noting that the further back the CG (ideally to almost but not quite neutral) the less elevator deflection that will be needed. So, as you move the CG progressively aft, dial down the travel slightly, else things could get hairier than ideal as you move towards neutral stability. But don't overdo this, you will want enough up elevator travel to flare out, etc. -
Interesting, thanks for the extra detail. Good luck with the next test flights.
-
Thanks both, I'm happy to have ignored the email. BUT presumably thousands and thousands of BMFA members will be in the same boat (i.e. emailed in error) and will be perplexed as to what they have to do. SURELY it is BASIC database management to only email those people who HAVE to do something?!
-
Portal shows my CAA is valid until end Feb 2026. I got the email from Andy Simmonds. Do I fall into the category of those who have to do the test now, or can I just ignore it? If I have to do the test now and fail some or all of it, how many times can I keep taking it until I get enough right to pass?
-
Sorry to hear this was your experience. But I'm not sure your diagnosis of the problem or the solution is correct. One has to assume that the designer knew what he was doing and that numerous other examples of this model have flown perfectly well with the top wing at 2° and the lower one at 0° as specified. (I've made several small free flight biplanes powered by rubber, electric, CO2 and diesel, which have all had the upper wing set at a slightly higher angle than the lower one - and they've all been stable and gently self-correcting if disturbed by a gust or similar.) It's difficult to discern from your description why the model flew briefly as it did, but there could have been other complicating factors: did you build in any or enough down-thrust? how accurately did you measure and build the upper wing angle - perhaps there was some extra error that crept in? was the weight of the model within specification, and - importantly - was the centre of gravity in the right place (not too far forward or back)? was the powertrain (motor, lipo, prop) correctly specified? were the control throws adequate? etc As indicated above, I come from a free flight background. Here if one small change is made in trimming a model (say power, prop, side- or down-thrust, nose- or tail-weight, wing warp, rudder deflection, etc) then everything else is effected. The process of trimming is therefore a careful one of changing only one factor at a time then carefully observing the flight behaviour before increasing or decreasing that change if necessary, then making a small change to any of the other factors that could be effected.
-
Smooth Operator designed by Pete Tindall
Jonathan M replied to David Hayward.'s topic in Build Blogs and Kit Reviews
Great David, interesting to see. I should at least extract the instructions from my box for some parallel study! -
Smooth Operator designed by Pete Tindall
Jonathan M replied to David Hayward.'s topic in Build Blogs and Kit Reviews
I have one of these for a NIB Laser 100, which I'm assuming will be just right for the model. Not sure when I'll eventually get round to opening the still-sealed box let alone making a start, but good to see what looks like a very neat kit of parts. Will you be posting your progress here? -
Is this LIPO all right to use?
Jonathan M replied to Michael Dearden 2's topic in Batteries and Chargers
Two dodgy lipos, one very basic charger... what's the common denominator?!

