Tim Flyer Posted June 8, 2020 Share Posted June 8, 2020 Hi Ron great job !as was said earlier. My La7 is 4.8 kg (10.5lb) so quite heavy with the flaps etc. I used a Sarik Hobbies Mosquito spinner due to the flattish profile , the spinner diameter is 4inches. I think my wheels are just 3 inches. Once I get started on the spit I will definitely start a thread. It’s still in thinking and planning stage at the moment as I just opened the box today. I will need to make various adjustments to accept my Laser 180 so there is a fair bit before I start ...but I will put that on another new thread 😊 Quote Link to comment Share on other sites More sharing options...
Ron Gray Posted June 8, 2020 Share Posted June 8, 2020 Thanks Tim, never thought to look at Sarik for the spinner, if mine annoys me I will change it, but it’s ok for now. I‘Ve got some 3 1/2” low bounce wheels on their way so should be able to finish off the legs when they get here. Looking forward to seeing your spit build. Quote Link to comment Share on other sites More sharing options...
john stones 1 - Moderator Posted June 8, 2020 Share Posted June 8, 2020 Top job Ron. Quote Link to comment Share on other sites More sharing options...
Peter Jenkins Posted June 8, 2020 Share Posted June 8, 2020 +1 on top job! Quote Link to comment Share on other sites More sharing options...
Nigel R Posted June 9, 2020 Share Posted June 9, 2020 Very nice Careful it doesn't disappear with that blue underside! Quote Link to comment Share on other sites More sharing options...
Ron Gray Posted June 9, 2020 Share Posted June 9, 2020 @Nigel - blue on grey should be OK? let's face it, we don't have many blue sky flying days do we? But you are quite correct on that losing sight of it is a concern of mine hence why I went for this colour scheme with the yellow nose (and tail later on today). Quote Link to comment Share on other sites More sharing options...
Bob Cotsford Posted June 9, 2020 Share Posted June 9, 2020 That light/dark earth scheme really suits it, but then I like anything in desert camo. The metal work showing through around the nose really brings it to life too. Printed leg covers Ron? Will you shape them to match the wing underside? I might have to scrounge the print files off you if you'd be so kind, I'm sure someone in the club will have a printer . When I had intended using IC power I'd thought of using the gun stubs as fill and vent tubes connected to the tank. Quote Link to comment Share on other sites More sharing options...
Nigel R Posted June 9, 2020 Share Posted June 9, 2020 Ha! too true. I'm only semi serious. The yellow tail should do wonders for visibility anyway. Bob is right, the desert camo looks ace. Quote Link to comment Share on other sites More sharing options...
Ron Gray Posted June 9, 2020 Share Posted June 9, 2020 @Bob - The printed leg covers are not shaped as where they sit is flat (ish). If you want a pair, wait until you've seen them!, let me know and I'll send you a pair plus brackets to fit them to the oleos. Like you, I thought of using the barrels as fill and vent but decided against it in the end and will run them out under the fuse. I also had contemplated building a Robarts Super Fueler into one of the gun blisters but decided that was too much faff. Just printing off the decals now. Quote Link to comment Share on other sites More sharing options...
Ron Gray Posted June 10, 2020 Share Posted June 10, 2020 Starting to look a bit worn / tired / tatty now Quote Link to comment Share on other sites More sharing options...
Ron Gray Posted June 10, 2020 Share Posted June 10, 2020 3D printed UC doors fitted. Whilst they fit flat to the surface the angle of the legs means that there is a gap around etc wheel wells. Not sure if I'm going to heat and bend them to meet the surface, I'll sleep on it! Quote Link to comment Share on other sites More sharing options...
Bob Cotsford Posted June 10, 2020 Share Posted June 10, 2020 Better than the ply doors supplied with a lot of ARTFs Ron. The only ones that have been close were on the Black Horse Macchi 200, and those were plastic. Probably why that's the only model that I've used them on. I like the clips to the legs, Robart used to sell something like that but I've not seen any for a while. This morning I put my OPID on the Panic, wrapping up that build. This afternoon I looked at the La7 wing and what I thought was the veneer splitting looks to be just the brown paper bubbling along a join in the veneer, there were also a couple of bubbles on the wingtip blocks. I suppose that's only to be expected when it was left in the shed for 3 months half primed. A rub over with a warmish covering iron has flattened the bubbles, sealing them down onto the wood. A quick rub down means I need to spray the wing grey - again - but has reassured me that the next coat of primer should come out ok ready for the dark camo areas to be added. Quote Link to comment Share on other sites More sharing options...
Ron Gray Posted June 10, 2020 Share Posted June 10, 2020 The great thing with the 3D printer is being able to make the clips to any size I need, different diameters for different oleos and different stand off heights. Glad to see that you're getting back into the LA-7, I'll certainly miss building mine when it's over (end of the week?). Post piccies up when you've painted it. Quote Link to comment Share on other sites More sharing options...
Bob Cotsford Posted June 10, 2020 Share Posted June 10, 2020 My wheel wells look to have a bit more curvature to them. I have a variety of leg options, some nice 10mm units that are really smoothly damped or some 12mm ribbed HK types. Decisions, decisions. Quote Link to comment Share on other sites More sharing options...
Ron Gray Posted June 10, 2020 Share Posted June 10, 2020 I used the oleos that Richard sold for the kit, nice and plain. The only thing I've done is cut down the springs a bit so that they are softer. Didn't sleep on it so went out and applied some heat, resulting in this: Looking at yours, I regret having used the plastic wheel wells, never mind. Quote Link to comment Share on other sites More sharing options...
Bob Cotsford Posted June 11, 2020 Share Posted June 11, 2020 That's better. I used the well liners but cut them off flush with the veneer after bonding them in with Gorilla. I used the cut-off from the excess depth dropped in as a 'floor' (roof?) to the well. Soooo, you could turn out a set of clips with a 10mm ID? Happy to pay materials/time + post I think the legs I'm using are the E-flite P47 or ME109, supposedly good for 120 size models if that's what they are. Edited By Bob Cotsford on 11/06/2020 00:05:21 Quote Link to comment Share on other sites More sharing options...
Ron Gray Posted June 11, 2020 Share Posted June 11, 2020 No problem with the brackets, I just need the standoff dimension (in red on picture below) and will make the flange length (yellow in picture) so that you can cut to suit your doors. I will also do a range of IDs (10, 10.1, 10.2, 10.3) to ensure that you get a good fit on the legs. Mine are an interference fit so no glue necessary. I'm assuming that you would like 2 pairs? Quote Link to comment Share on other sites More sharing options...
Bob Cotsford Posted June 11, 2020 Share Posted June 11, 2020 Standoff will be roughly 3mm Ron. I was looking at the sit of the retracts last night and may need to do some final shimming on the retract mounts to get the wheels sitting comfortably and the retracts locked but have Permagrit can adjust as they say. My leg channels are 22mm wide so 20mm max width on the flange would be good. I bought some 1.5mm or so ABS sheet that I planned on using for the door skins so that I could shape them to match the wing contour using a heat gun, then add some balsa stiffening across the wheel section. Quote Link to comment Share on other sites More sharing options...
Ron Gray Posted June 11, 2020 Share Posted June 11, 2020 I'll print them off tonight as I'm working today and will be in tomorrow's post to you (PM me you address will you as I've 'lost' it). Quote Link to comment Share on other sites More sharing options...
Ron Gray Posted June 11, 2020 Share Posted June 11, 2020 Engine (Laser) air baffle fitted Quote Link to comment Share on other sites More sharing options...
Bob Cotsford Posted June 11, 2020 Share Posted June 11, 2020 I took the wing out to the shed ready for some rattle can action and only then noticed the bubbles are back. I think I really do need to lift the affected area of brown paper and reglue it or just strip and recover that wingtip, though I'm tempted to just ignore it and pretend the bubbles don't exist. I think I'm suffering lockdown/shield building fatigue, time for a day off! Quote Link to comment Share on other sites More sharing options...
Ron Gray Posted June 11, 2020 Share Posted June 11, 2020 If the bubbles aren't too bad then leave them, but if you're anything like me it will annoy you so you'll end up fixing them! Day off is a good idea, mine has taken the form of work for today, tomorrow and Monday and Tuesday so I need to finish the LA-7 off this weekend! Quote Link to comment Share on other sites More sharing options...
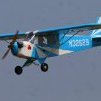
Ron Gray Posted June 12, 2020 Share Posted June 12, 2020 Well we got there in the end, all major painting now done, just some odd bits of touch needed plus fuel proofing. Control linkages still to be fitted as is the radio. 1 Quote Link to comment Share on other sites More sharing options...
Bob Cotsford Posted June 12, 2020 Share Posted June 12, 2020 it's looking good Ron. Did you cut the canopy in segments or is that just a clever paint illusion Quote Link to comment Share on other sites More sharing options...
RICHARD WILLS Posted June 12, 2020 Share Posted June 12, 2020 Super job Ron , Shes looking well used . I'd get a drip tray under that sharpish before she ruins the grass . Jon would say that Lasers dont drip Where is he anyway ? Hello ! Jon ! can you here us ? Quote Link to comment Share on other sites More sharing options...

Recommended Posts
Join the conversation
You can post now and register later. If you have an account, sign in now to post with your account.
Note: Your post will require moderator approval before it will be visible.