Ray Ball Posted November 15, 2019 Share Posted November 15, 2019 Hi Martin, Thanks for all your time and trouble, This as helped me an awful lot. Best Wishes Ray Quote Link to comment Share on other sites More sharing options...
Martin Gay Posted November 15, 2019 Author Share Posted November 15, 2019 Ray, Glad to help! Martin. Quote Link to comment Share on other sites More sharing options...
Andrew Edmead Posted November 15, 2019 Share Posted November 15, 2019 Hi Martin, I have started my build, well the wing jig anyway. I've been following other peoples blogs and I noted that some of them have left the bottom skin slightly wider to allow for the shape of the ribs etc. On your build, am I right in saying that you simply made the wing skin to cover the false leading and trailing edges and then marked all the positions on the skin whilst on the plan before putting it onto the jig, and you didn't make the skin wider than the plan? Hope this makes sense. Andy Quote Link to comment Share on other sites More sharing options...
Martin Gay Posted November 15, 2019 Author Share Posted November 15, 2019 Hi Andy, I made the wing skins oversize, placed them on the jig and weighted them down so they conformed to the curve of the jig. I then marked the positions of the ribs, false LE and TE onto the skins, in situ. Once marked, I removed the skins from the jig and carefully trimmed them to the false LE and TE lines. As I made each wing separately I only trimmed the root end of the skins when I had glued R1 into place and added the spars and shear webs. Does that make sense? Martin. Quote Link to comment Share on other sites More sharing options...
Andrew Edmead Posted November 15, 2019 Share Posted November 15, 2019 Thanks Martin, makes perfect sense. I can start the wing now, I've only built one or two kits and neither used a wing jig. Andy Quote Link to comment Share on other sites More sharing options...
Harry Twist Posted November 15, 2019 Share Posted November 15, 2019 Hi Martin, thankyou for all the recent posts they're very very helpful. My build currently slightly stalled, I'm full of an awful cold! Quote Link to comment Share on other sites More sharing options...
Martin Gay Posted November 15, 2019 Author Share Posted November 15, 2019 Three Tequilas will sort it out. At least, you won't notice the cold until you wake up again. Works for me! Quote Link to comment Share on other sites More sharing options...
Harry Twist Posted November 17, 2019 Share Posted November 17, 2019 Hi Martin, just preparing my fuselage pieces, please can I ask, ref F10, should the upper slot be deepened to 6mm to accommodate the spine or does the spine sit high here? Also ref lower spine, is it recommended to scarf joint two pieces from sheet or curve one piece? Thanks in advance! Quote Link to comment Share on other sites More sharing options...
Martin Gay Posted November 17, 2019 Author Share Posted November 17, 2019 Hi Harry, The top slot of F10 does not need to be 6mm for the upper keel, as you will be cutting the upper keels, between F9 and F10 away to fit the fin. The lower keels on the prototype and Gamma biulds were cut from balsa sheet - I was being lazy. The plan shows 3x6mm balsa strip. If this does not want to bend then use two lengths of 3x3mm strip. Fit the first one and then glue the second one to it. Quote Link to comment Share on other sites More sharing options...
Harry Twist Posted November 17, 2019 Share Posted November 17, 2019 Hi Martin, thanks for your reply. I'll use F10 as it is, also thanks for the lower keel detail. Regards H Quote Link to comment Share on other sites More sharing options...
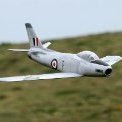
Martin Gay Posted November 21, 2019 Author Share Posted November 21, 2019 Gordon is making steady progress on the colour scheme - despite suffering from a nasty bout of "man flu". Quote Link to comment Share on other sites More sharing options...
Martin Gay Posted November 21, 2019 Author Share Posted November 21, 2019 Latest copy of RCM&E (December 2019) contains part one of the build article! Quote Link to comment Share on other sites More sharing options...
Phil Cooke Posted November 21, 2019 Share Posted November 21, 2019 Yes a very well timed article guys - excellent stuff! The second Sabre looks awesome as she starts to come to life with the colourscheme and details! Quote Link to comment Share on other sites More sharing options...
Alan Gorham_ Posted November 21, 2019 Share Posted November 21, 2019 I'm going to have to don the scale Police uniform (feel free to get revenge next time we meet on the slope...): The font for the reg number isn't the proper RCAF post-1946 font which is freely available on the tinterweb Quote Link to comment Share on other sites More sharing options...
Alan Gorham_ Posted November 21, 2019 Share Posted November 21, 2019 Like so..... Quote Link to comment Share on other sites More sharing options...
Martin Gay Posted November 21, 2019 Author Share Posted November 21, 2019 Al, Agreed! I believe it is RCN_80_ATH and is what was available on the laptop at the time of creating the paint masks! We decided against an FAI F4 scale model, as it is a PSS glider, and may not last too long! Your challenge of revenge is accepted - but might not happen "next time" All said in jest - of course!! Martin. Quote Link to comment Share on other sites More sharing options...
Martin Gay Posted November 21, 2019 Author Share Posted November 21, 2019 Al, Which police uniform should you be wearing in your "scale police" role? There are some risqué ones in the link that I REALLY do not want to see you wearing! **LINK** Edited By Martin Gay on 21/11/2019 09:47:18 Quote Link to comment Share on other sites More sharing options...
Alan Gorham_ Posted November 21, 2019 Share Posted November 21, 2019 Quote Link to comment Share on other sites More sharing options...
Andy Meade Posted November 21, 2019 Share Posted November 21, 2019 You've got to make allowances for these plastic kit fiddlers Martin - they don't get let out the basement very often Great camo, hope Gordon feels better soon Quote Link to comment Share on other sites More sharing options...
Chris Barlow Posted November 22, 2019 Share Posted November 22, 2019 Posted by Martin Gay on 21/11/2019 09:12:06: Gordon is making steady progress on the colour scheme - despite suffering from a nasty bout of "man flu". Look at that storage and organisation in the window reflection Alan! That should take your mind off the fonts! Looking very good there Gordon. Those yellow crosses should stand out well. Quote Link to comment Share on other sites More sharing options...
Alan Gorham_ Posted November 22, 2019 Share Posted November 22, 2019 Posted by Andy Meade on 21/11/2019 11:04:22: You've got to make allowances for these plastic kit fiddlers Martin - they don't get let out the basement very often Great camo, hope Gordon feels better soon Plastic kit fiddler indeed....Your name will also go on the list... Quote Link to comment Share on other sites More sharing options...
Alan Gorham_ Posted November 22, 2019 Share Posted November 22, 2019 Posted by Chris Barlow on 22/11/2019 01:28:37: Posted by Martin Gay on 21/11/2019 09:12:06: Gordon is making steady progress on the colour scheme - despite suffering from a nasty bout of "man flu". Look at that storage and organisation in the window reflection Alan! That should take your mind off the fonts! Looking very good there Gordon. Those yellow crosses should stand out well. I have spotted the storage Chris, don't worry, but it looks like Gordon has more space in his workshop than you do, that's why I was so impressed with your very efficient use of the space. I do still like this scheme very much. A nice balance between camo and gaudy. Looking forward to seeing it in the air. Edited By Alan Gorham_ on 22/11/2019 16:34:22 Quote Link to comment Share on other sites More sharing options...
Martin Gay Posted November 28, 2019 Author Share Posted November 28, 2019 Here is the weathered/worn cockpit view! Quote Link to comment Share on other sites More sharing options...
Martin Gay Posted November 28, 2019 Author Share Posted November 28, 2019 The new canopy looks much better than that on the prototype. Many thanks to Steve at Vortex Vacforms for his hard work. Quote Link to comment Share on other sites More sharing options...
robk Posted November 28, 2019 Share Posted November 28, 2019 Looking for a little advice on my first PSSA build. Anyone have any advice on servos? It looks like you have used micro sized ones - I was thinking of using this size, metal gear about 2kg. Sound OK? Also, I am planning to install elevator, flaps and ailerons but maybe missing out the rudder (the control snake is a bit unsightly). Any views on this? Quote Link to comment Share on other sites More sharing options...

Recommended Posts
Join the conversation
You can post now and register later. If you have an account, sign in now to post with your account.
Note: Your post will require moderator approval before it will be visible.