Nev Posted June 2, 2014 Share Posted June 2, 2014 Well maybe not everything but I am expecting this to take up most of my building and thinking time for quite a while. I always liked to paint my AIRFIX pilots and was very proud of my wheels when I found that buffing the mat black paint with pencil lead gave a good rubber tyre look, it also added that bit of weathering in the form of exhaust stack stains. But that is about the extent of my scale detailing. Like many others I started aero modelling in my early teens with control line models and a brief but unsuccessful attempt at RC with a KK mini Super. Then the almost inevitable 30 year layoff, until a welcome return to modelling a few years ago now. Having revisited the mini super ( MK2 flier very nicely) and having found that I do like a good project to get into, this chipmunk build looks like a great way to learn some new skills. Also the fact that it is a joint build is a big attraction as I think it will help enormously to keep the enthusiasm going, I found that out with the mass builds. I have slowly been acquiring a few bits, nice shiny motor, some wheels, just to get things started and I already have a 5S, Lipo pack so that’s practically a Sign !! So today I placed my order for plan, wood pack, canopy and cowl. Roll on October. Nev. Quote Link to comment Share on other sites More sharing options...
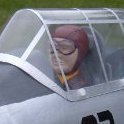
Nev Posted June 2, 2014 Author Share Posted June 2, 2014 I did originally post a photo of another Chippy in the main thread as my chosen subject, a nice black job, very smart. Having thought about it though I have settled on this one. I think if I am going to put the effort in to add some scale detail I want it there for all to see and this version will show of the detail better than an all black paint scheme. My only other "fun scale" model is an AT6 Texan from RBC kits. A nice build I enjoyed very much but I didn’t add any detail (apart from the pilot of course, that’s him on the left) and the paint scheme is only an approximation but it looks great in the air. So how far do we go with this one, well I want it to be practical, so no fine detail but cockpit certainly, panel lines yes, navigation lights trim tabs etc. yes, rivets No, but I would consider larger panel fasteners. Basically it has got to stand being handled and not take forever. Not that I actually know what I am talking about with any of this stuff but we will see. Quote Link to comment Share on other sites More sharing options...
Glenn Stratton Posted June 2, 2014 Share Posted June 2, 2014 Nice one Nev, I had about 4 schemes on the short list, this being one of them was near the top! I think there are a fair few participants with the same thoughts and ideas as you. Quote Link to comment Share on other sites More sharing options...
Nev Posted June 2, 2014 Author Share Posted June 2, 2014 Cheers Glenn. Yes I think we are going to have a lot of fun with these and I bet no 2 look the exactly the same. Quote Link to comment Share on other sites More sharing options...
john stones 1 - Moderator Posted June 2, 2014 Share Posted June 2, 2014 Another nice colour scheme, I like it Nev I've just done two silver models, mine could end up yellow, I fancy a few rivets myself, its easy they come in a bottle John Quote Link to comment Share on other sites More sharing options...
Nev Posted June 2, 2014 Author Share Posted June 2, 2014 Bookmarked your blog already John, I'll be watching with interest. Do they come in both flush and domed ? Quote Link to comment Share on other sites More sharing options...
john stones 1 - Moderator Posted June 2, 2014 Share Posted June 2, 2014 Yes mate John Quote Link to comment Share on other sites More sharing options...
Danny Fenton Posted June 2, 2014 Share Posted June 2, 2014 Nice clean scheme that one Nev, you better get that red stripe straight, I will be checking Sorry to upset but only domed rivets available in the bottle, needless to say there arent many flush rivets on a Chipmunk....... However Tony's blown canopy version may have a few more flush ones than ours But he is a glutton for punishment Cheers Danny Quote Link to comment Share on other sites More sharing options...
Nigel Day Posted June 3, 2014 Share Posted June 3, 2014 I'm looking forward to October Nev. Quote Link to comment Share on other sites More sharing options...
Nev Posted September 29, 2014 Author Share Posted September 29, 2014 I’ve never been in the ATC, of have links with any particular Chipmunk. So I thought it would be fun to make up a little mascot, just so I have a sight of the finish line. Well that was a bit of a shock, I used to be able to make a pretty reasonable job of these, or so my memory tells me. First thing I found out, my eyesight isn’t as good as it used to be and the second is I need to brush up on my painting skills. Still I think it will do for now, maybe I will revisit the painting later but we will see. PS. I get the new reading glasses on Saturday. Quote Link to comment Share on other sites More sharing options...
Nigel Day Posted September 30, 2014 Share Posted September 30, 2014 Lovely Nev and great idea. Quote Link to comment Share on other sites More sharing options...
Terry Walters Posted September 30, 2014 Share Posted September 30, 2014 Good on you Nev - I often wonder how well I would do if I put a plastic kit togther now!! I used to have 100 or so but that was a long, long time ago! Terry Quote Link to comment Share on other sites More sharing options...
Nev Posted October 1, 2014 Author Share Posted October 1, 2014 What no balsa ! I don’t get a lot of time to build, maybe an hour or so white the soaps are on. I was going to start with the tailplain but realised I was soon going to need the hinges, so spent the time cutting them out with a dremel and cleaning them up. (should have done this earlier). I didn’t have 10 BA screws but did have 2mm ones so drilled them out at 2mm, a nice free hinge and I think it still has plenty of meat around the hole. Then I notice 4 of the hinge pieced are about 1mm wider that the others, which is the one I drilled a test hole in. Still it’s a start. Quote Link to comment Share on other sites More sharing options...
Kevin Fairgrieve Posted October 1, 2014 Share Posted October 1, 2014 It is the small things joined together that make the big thing. Good start. Kev Quote Link to comment Share on other sites More sharing options...
Danny Fenton Posted October 1, 2014 Share Posted October 1, 2014 Well done nev, perhaps i should have mentioned the 10BA bolts before hand. If anybody is looking for some Macc models is a source I use. In case you haven't figured it out the set of 4 hinge plates that are slightly wider are for the Rudder, the other set of eight are for the elevator. Don't forget to lock the nuts, you dont want them coming loose! I cut my hinge parts free as i need them with an old razor saw, makes light work of the job and is less agressive than a spinning disk, well at least its safer in my hands! Cheers Danny Quote Link to comment Share on other sites More sharing options...
Nev Posted October 1, 2014 Author Share Posted October 1, 2014 If I'd looked earlier I would have seen the 10BA bolts myself. Model fixings have 1.6 mm ones, I'll get some of them and re drill the other end of the hinge. The wider rudder ones can stay at 2 mm. I have thread lock. Edited By Nev on 01/10/2014 21:45:28 Quote Link to comment Share on other sites More sharing options...
john stones 1 - Moderator Posted October 1, 2014 Share Posted October 1, 2014 A handy pair of drills those Nev, never got around to buying any yet John Quote Link to comment Share on other sites More sharing options...
Nigel Day Posted October 2, 2014 Share Posted October 2, 2014 Some great tips here, thanks gents. I only hope that I'll remember them when I start up in a week's time. Quote Link to comment Share on other sites More sharing options...
Nev Posted October 2, 2014 Author Share Posted October 2, 2014 Balsa at last. I had already decided on Terry's Christmas tree approach, I'm sure I've seen it done like this before somewhere. The ribs are thin and you need the patience of a saint. I used alphatic which was also thin to took an age to dry. another thing is you run out of blocks and things to hold the ribs while they dry. Still it's all finished now although I admit in the end i did resort to some small filets and CA to keep everything in place. While I was waiting for the ribs to dry so i could do the next batch, I made one of these. The wire is a tad thick. 14 swg would have been good but I didn't have any so went for the next size up. Its not heavy though, less the 10g. probably wont get anything done tomorrow but will try and finish the tailplain at the weekend. Nev. Edited By Nev on 02/10/2014 21:34:57 Quote Link to comment Share on other sites More sharing options...
john stones 1 - Moderator Posted October 2, 2014 Share Posted October 2, 2014 Nice start Nev, is the horn silver soldered ? John Quote Link to comment Share on other sites More sharing options...
Nev Posted October 2, 2014 Author Share Posted October 2, 2014 It's not silver solder I don't have an iron hot enough for that. I can't see it parting though but if you think it needs to be I'm all ears. Quote Link to comment Share on other sites More sharing options...
john stones 1 - Moderator Posted October 2, 2014 Share Posted October 2, 2014 On a job you can't get at once fitted I would be happier with silver solder, you not got a mate who could do it ? John Quote Link to comment Share on other sites More sharing options...
Nev Posted October 2, 2014 Author Share Posted October 2, 2014 I take your point, I'll have a think Quote Link to comment Share on other sites More sharing options...
Danny Fenton Posted October 2, 2014 Share Posted October 2, 2014 That really needs to be silver soldered Nev, I am afraid to say. You can buy them ready made for a couple of quid, Balsa Cabin do them, they are made by Flair. Cheers Danny Quote Link to comment Share on other sites More sharing options...
Charles Galloway Posted October 2, 2014 Share Posted October 2, 2014 I bought some silver solder from Mick Reeves. It's very fine and really easy to use with a small blowtorch. There's a section on his website showing it being used to solder forkends (Nothing to do with the two Ronnies). Quote Link to comment Share on other sites More sharing options...

Recommended Posts
Join the conversation
You can post now and register later. If you have an account, sign in now to post with your account.
Note: Your post will require moderator approval before it will be visible.