Graeme Poke Posted September 16, 2016 Share Posted September 16, 2016 Bad flying resulted in a bad landing which resulted in the fuselage breaking clean away just in front of the fin. Balsawood fuse, arf any suggestions please? Thanks Graeme Quote Link to comment Share on other sites More sharing options...
gangster Posted September 16, 2016 Share Posted September 16, 2016 Hi Graeme. Although it's hard to say without seeing it. If it a matter of the tail having broken off it might be as simple as just sticking it back together with epoxy especially if the balsa is quite thick ie 3mm or more with a good surface area of jagged edge. You might feel happier bridging the joint with thin balsa cut in such a way to spread the load. Ie cut on a slant. Careful not too add too much weight at the back end and inspect carefully for othe cracks. Take heart most crashes are repairable Quote Link to comment Share on other sites More sharing options...
Geoff S Posted September 16, 2016 Share Posted September 16, 2016 A photograph would help, as would information on the model in question - ie size etc. In general balsa models can be repaired though it's often not worth the time and effort. You need to remove the covering first then either replace or splint the broken parts. Is it a sheet or open structure? Geoff Quote Link to comment Share on other sites More sharing options...
Cuban8 Posted September 16, 2016 Share Posted September 16, 2016 If you've got all the bits the structure (covering removed) can be put back together 'jigsaw fashion', with thin cyano wicked into the joints and possibly a touch of epoxy here and there. A club mate who seems to spend alot of his time putting wood ARTFs back together after crashes, has worked miracles using this method on what to me is just a pile of matchwood - so it can be done. Edited By Cuban8 on 16/09/2016 10:56:40 Quote Link to comment Share on other sites More sharing options...
kc Posted September 16, 2016 Share Posted September 16, 2016 The important thing is to get the tail plane aligned correctly and secondly to ensure it doesn't fail in flight. Appearnce comes last! If pushing the severed parts back to together and applying thin cyano doesnt work well then consider making a new rear fuselage to replace all the shattered parts and re-use the old tailpale & fin. A compromise that works well is to glue the shattered bits back and get the tail aligned. Then if it doesnt seem neat enough consider inserting a new piece of balsa to replace the tatty part. Do one side at a time to keep alignment. Cut the replacement balsa to size and tape it over the bad part and cut around the new part into the old balsa. Result should be a hole that exactly suits the new balsa. Then glue it in. Quote Link to comment Share on other sites More sharing options...
Biggles' Elder Brother - Moderator Posted September 16, 2016 Share Posted September 16, 2016 If it is snapped into two clean parts - ie not shattered into a 1000 bits - then I'd strongly advise doing absolutely nothing to prepare the joint. Simply remove the covering and push the joint back together - using the jagged edges of the break as actual relocators if you see what I mean. Once its together, then wick thin CA into the joints. This produces a very strong repair that is accurately aligned. Its strong because the farctured joints offer large gluing areas. Its aligned because it will only go together completely if the alignment is correct - the rough fracture surfaces effectively acting as a locating key. Of course - this doesn't work if what you have is a "bag of bits" - but it will still work even if there are a few loose bits - as long as the there are plenty of "mating surfaces" between the two main parts. BEB Quote Link to comment Share on other sites More sharing options...
Graeme Poke Posted September 17, 2016 Author Share Posted September 17, 2016 Well that was quick. Thanks everyone for all the suggestions.This forum is great. I have had this plane for 12 years and except for the occasional scratch and scrape it has never been damaged till now. It is my all time favourite and i want to hang onto it. Its an Ace R/C Staudacher 60, I don't believe they are made anymore, and a wonderful flyer. Until 2 years ago i had a Saito 90 in it but upgraded to a Saito 115. Really good fun! It has snapped into 2 clean parts, jagged balsa edges and a good 90% fits perfectly. I intended to do as suggested by BEB and Cuban8. But then i worried that it would not be strong enough, considering the silly aerobatics i sometimes get up to. So i thought i would place a balsa doubler across the joins as suggested by gangster. However i cant figure out how to get the doubler nice and tight against the fuse. I can glue one end of the doubler ok into, say the rear section then slip it into the front fuse.My lovely wife Kathy suggested i drill a 10mm hole through the fuse and thread cotton/string through the doubler and pull tight. This could work but maybe the doubler is not needed ......but i think there should be something.Kc suggestion is a good idea too. Glue it all up,then cut bits out and replace with new. I think i will take the plunge, cyno it and see what happens. Again thanks all for your input. Graeme Quote Link to comment Share on other sites More sharing options...
Piers Bowlan Posted September 17, 2016 Share Posted September 17, 2016 Once you have the fuz glued back together and it is all nice and smooth, a bit of filler might help here, personally I would use some glass cloth and epoxy to reinforce the joint. That way the joint is reinforced all around the circumference of the fuselage and will be much stronger (and neater) than a couple of doublers fixed either side. Cut some strips of glass cloth, wrap round the fuz and smooth some epoxy into it. Just my 2p worth. Quote Link to comment Share on other sites More sharing options...
Rich too Posted September 17, 2016 Share Posted September 17, 2016 That's what I was thinking. Or join it using cyno and then reinforce using carbon fibre strips/rods spliced in.... Edited By Rich2 on 17/09/2016 06:27:14 Quote Link to comment Share on other sites More sharing options...
Piers Bowlan Posted September 17, 2016 Share Posted September 17, 2016 For a balsa model if you want to use carbon I would personally use carbon cloth/epoxy but carbon strips/rods/cyno when reinforcing a broken EPO fuz. Quote Link to comment Share on other sites More sharing options...
Denis Watkins Posted September 17, 2016 Share Posted September 17, 2016 In fairness to your flying Graeme, we often think one poor landing caused a catastrophic snap, but other than a high speed collision, with fuselage tail, it is the weakest, thinnest loadbearing part of the model, I think it starts with a small crack, and over time, the next knock and its off. We then hold our hands up and cannot beleive that the recent action could cause so much damage, and perhaps it didn't, perhaps regular use caused the damage to progress little by little Edited By Denis Watkins on 17/09/2016 08:00:22 Quote Link to comment Share on other sites More sharing options...
Biggles' Elder Brother - Moderator Posted September 17, 2016 Share Posted September 17, 2016 I know that it is very tempting to add all sorts of reinforcement. But before you do consider this, a close CA joint of the type I describe above, interlocking jagged faces, is stronger than the original wood! If the joint is well made, then if this thing fails again, it won't be at the joint, it will be in the wood. Its your call clearly, but in my view all a load of cloth, carbon and resin is going to do is add weight to the back end!BEBEdited By Biggles' Elder Brother - Moderator on 17/09/2016 09:04:37 Quote Link to comment Share on other sites More sharing options...
Dave Bran Posted September 17, 2016 Share Posted September 17, 2016 At 12 years old be very careful of loss of strength due to oil ingress! Quote Link to comment Share on other sites More sharing options...
ken anderson. Posted September 17, 2016 Share Posted September 17, 2016 over the years some of the wrecks I've seen come back to life.....I would agree with young BEB...and say the repair will be the strongest part of your model,,,,after its had a re-maiden give it a fair old going over....to check the repair.. ken Anderson...ne..1 ..........young BEB/repair dept. Quote Link to comment Share on other sites More sharing options...
Biggles' Elder Brother - Moderator Posted September 17, 2016 Share Posted September 17, 2016 LOL! Good to know I've reached that venerable age in life! Also what an honour - to feature in a Ken Anderson sign off line! Wow! An ambition realised!! BEB Edited By Biggles' Elder Brother - Moderator on 17/09/2016 12:22:34 Quote Link to comment Share on other sites More sharing options...
IanN Posted September 17, 2016 Share Posted September 17, 2016 Posted by Biggles' Elder Brother - Moderator on 17/09/2016 09:03:40: I know that it is very tempting to add all sorts of reinforcement. ............................................... Its your call clearly, but in my view all a load of cloth, carbon and resin is going to do is add weight to the back end! BEB +1 for that. Don't build in unnecessary strong points. All that will happen is that the next breakage will be right next to that point I had a tail come adrift from the rear end of a sports model ( a Super Air, I think). Rather than be content with just gluing it back into it's seat, I added a couple of small external balsa triangular fillets and - for good measure - put a dowel each side of the fin down through the tailplane into the fus. Result? Next time I had an "arrival" there was no way that tailplane was going to simply "pop off" again, so what happened? The whole fus snapped just in front of the tail assembly. Doh! There used to be a saying. Every time you have a crash, look at everything that DIDN'T break and next time make it lighter Edited By IanN on 17/09/2016 12:34:30 Quote Link to comment Share on other sites More sharing options...
Martin Harris - Moderator Posted September 17, 2016 Share Posted September 17, 2016 It's not just over strengthening you need to consider but also avoiding building in stress raisers. If you need to replace wood you need to spread loads correctly e.g. scarfing joints (diagonal joins) instead of just butt joining spars, longerons or sheeting. If you add a reinforcement, it helps to taper the edge of the over (or preferably) under laid part to avoid a sharp edge (think of snapping a piece of wood over the edge of your bench against doing the same on the sofa...) Quote Link to comment Share on other sites More sharing options...
ken anderson. Posted September 17, 2016 Share Posted September 17, 2016 Posted by Biggles' Elder Brother - Moderator on 17/09/2016 12:21:13: LOL! Good to know I've reached that venerable age in life! Also what an honour - to feature in a Ken Anderson sign off line! Wow! An ambition realised!! BEB ............................................................................................................................................... well done BEB...after a long period of consideration etc...it was decided to award you your own mention for service's rendered etc...the problem was finding a nominee to vouch for you...so at a bit of a risk...we took a chance... no doubt young Asher's nose will be out of joint now...because you've jumped the queue.... so be it etc.. ken Anderson....ne...1...... Awards dept 2016. Quote Link to comment Share on other sites More sharing options...
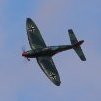
Graeme Poke Posted September 18, 2016 Author Share Posted September 18, 2016 Thanks Dennis for attempting to absolve me of stupidity. However it was my own silly fault. One end of our 70metre strip (its seems very short at times especially when I'm trying to land my Spitfire) drops away to a gully and it gets very turbulent there especially when the wind is from that direction. I landed into the wind, (as you do) towards the gully a bit quickish, and with the end of the strip and the gully quickly approaching I stupidly pulled a bit of up elevator. Then things happened very quickly, well so it seemed to me ('m getting on a bit and my reactions are not what they used to be) It jumped back into the air and the breeze coming up the gully got under the wing. The Staudacher went up at about a 40degree angle, came to a stop about a metre in the air and dropped onto it's tail. What a crock! Thank for the warning Dave. I checked and there is no oil ingress. Another quick question. A mate reckons I should use aliphatec resin or Deluxe Super'phatic. My problem with those is holding it all together while it drys. I think cyno would be easier. Thanks everyone for your help. I'll jam it back together, glue it up and hope for the best. Cheers Graeme Quote Link to comment Share on other sites More sharing options...
Martin Harris - Moderator Posted September 18, 2016 Share Posted September 18, 2016 Just make sure you use the thinnest CA glue - it travels along the cracks by capillary action...take time to align the parts as accurately as possible before applying the glue - you won't need to coat the length of the crack as it will work its way along a closely fitting join. Quote Link to comment Share on other sites More sharing options...
onetenor Posted September 18, 2016 Share Posted September 18, 2016 Tack it with Cyano then use the phatics Quote Link to comment Share on other sites More sharing options...
Martin Harris - Moderator Posted September 18, 2016 Share Posted September 18, 2016 Any reason to prefer aliphatic over cyano? While aliphatic is very good for building, I find cyano far more efficient for piecing together "jigsaws" especially where cracks run along the grain. It's light enough to flood the inside of unreachable areas and the result is almost certainly a lot stronger than the original wood. Quote Link to comment Share on other sites More sharing options...
Biggles' Elder Brother - Moderator Posted September 18, 2016 Share Posted September 18, 2016 No I disagree about using aliphatic here. If this fracture is as described aliphatics are not the best at all. As has been described put the mating fractured surfaces together into a really close, interlocking, jaged, fit. Then drop very thin CA (as Martin says) onto the "crack". If this works the drop will sit there for an instant and then suddenly seem to "dissapear". What has happened is that capillary action has sucked the glue deep into the fracture zone where it will form an excellent bond - as i say stronger than the original wood and definitely stronger than aliphatics could in this case. Aliphatics are great adhesives, I'm a big fan, but they need some space to work in - not much true, but definitly some. CA thrives where the space between the components is almost molecular in size!! The smaller the better! So if the parts fit back together closely - use CA. BEB Quote Link to comment Share on other sites More sharing options...
kc Posted September 19, 2016 Share Posted September 19, 2016 I suggest PVA such as Evostik Wood Glue ( Resin W ) rather than aliphatic or cyano would make the strongest joint.. No point in debating whether BEB is right or I am right .......just break a piece of balsa into a jagged cut and glue with cyano and another with PVA. When fully dry -24 hours with PVA - test to destruction. The result may vary with different cyano makes and wood type. Some cyano stick like anything others don't stick to really dry balsa. Evostik Resin W seems very consistent while other similar looking 'PVA' such as cheap supermarket makes have very little strength. Maybe the cheap stuff is diluted to look a better deal. Again a test to destruction with scrap wood tells it's own story. If the wood does not fail before the glue then it's not as good as Resin W! By the wood failing before the glue joint I mean softwood or hardwood not just balsa - the grain of a hardwood such as beech will fail before the joint if glued properly. with a good PVA. My idea of replacing the shattered wood with a new balsa ( after first getting the jagged parts glued back into shape ) might also allow access inside so a doubler can be glued in first. Also consider a two different adhesives - a spot of cyano can be used to hold a doubler in place whilst the main coating of PVA or even epoxy drys. Maybe something ingenious for special jobs - a piece of cotton through a pinhole with something like a button on the end could pull a doubler in place internally and be cut off after the glue drys. Or use a bent piece of thin piano wire to pul linto place and then nip the wire off after it's done its job. Or a screw into a piece of ply could pull the joint into place and the screw removed from outside when dry without leaving much of a hole. ( use sellotape to cover any temporary packing that needs to remain unglued ) Quote Link to comment Share on other sites More sharing options...
Old Geezer Posted September 19, 2016 Share Posted September 19, 2016 kc - it's only Monday and you're already top contender for 'Lateral Thinker of The Week!'🤔 Quote Link to comment Share on other sites More sharing options...

Recommended Posts
Join the conversation
You can post now and register later. If you have an account, sign in now to post with your account.
Note: Your post will require moderator approval before it will be visible.