Leaderboard


Popular Content
Showing content with the highest reputation on 29/11/21 in Posts
-
Evening all, Over the weekend, our tech guys have been working to improve the log on situation between the main RCM&E site and the forum. Both the magazine website and forums are now configured to use the forums user system for all logins and authentication, so one single location for logging in, resetting passwords, and entering your subscriber ID for reading the archives. We hope this reduces confusion about previously having to log into two accounts. Beth3 points
-
Progress on the Hurricane, now going to be BoB colours, I used card for the fillets at the tail end . My next model will be all black apart from the invasion stripes.2 points
-
Looking good, but don't forget to carefully remove the covering film from the areas of the tailplane and fin that will be glued. By carefully, I mean that you should use minimal pressure when cutting through the film to avoid damaging the balsa structure underneath.2 points
-
So, heeding the expert advice on this forum, I started off by adding additional mylar hinges to my elevators, a process I did not enjoy. I then made the decision to glue them in and cover in one piece. Before that i sanded the fuselage and ran another two coast of varnish over the front end to ensure it will be as fuel proof as possible. Then to covering, which was a bit tricky, especially as I have started with the tail plane and rudder which both feature lots of curves. I confess I don't have the patience for taking it very slowly, but despite that I enjoyed doing it and after several hours I had those both completed, not very neat I confess but it will do. I could then do one side of the fuselage before running out of time. That went a bit better and faster and looks better - mind you it is much easier. So pause again, hopefully i will get some time this week in the evenings or if not the end of next weekend. Plan is to finish the fuselage and do the wings, then final assembly.2 points
-
Slight delay as I had run out of wood dye. This time we are on David Dickinson orange. The decision has been made to build it for ic, as it would be easier to convert to electric than the other way round. It will also be fitted out to take electric retracts as the original had a fixed undercarriage.1 point
-
Sorry it’s not r/c related but just heard that Sir Frank Williams has died. A Formula One legend and a true gentleman. David1 point
-
Hi Manish, I got mine from Traplet publications these plans are available from Sarik Hobbies, Bristol Beaufighter (70") Plan(MW2605), they have the cowls and canopies all £56.76. I asked Bel air to make me a short kit from the plans and done very well too. Hi Leccyflyer, one day, one day, I promise myself they will all have at least one flight before I hang up my transmitter still plenty of time to go, I hope. Regards Robert1 point
-
There are many videos online showing the optimal way to solder Deans connectors. There's no need for any holes to be drilled in the blades. Some people drill a hole in the plug itself to us a pair of circlip pliers or similar to get the plugs apart. I tried Deans for a short time but never really got on to them and reverted to my preferred 4mm bullet connectors, which have always performed perfectly and have a nice slim form factor.1 point
-
Get the C of G right and it should fly.1 point
-
. . . and less than 10% chance of rain!1 point
-
Gents, I grew up seeing bright orange/red and white airplanes out in the 1950s-1960s high desert of Southern California, and with this Skyhawk build I'd like to tap into those vague but absolutely fantastic memories. So I'm wading into the fray here with a California-based A4D-1 Skyhawk, either a Weekend Warrior with the US Navy reserves circa 1960 at NAS Los Alamitos, or one that served as a weapons test aircraft with the US Navy and US Marines out in the high desert of Naval Air Facility (NAF) China Lake and over water with the Pacific Missile Test Center (PMTC) at Point Mugu. So, I'll need to modify the PSSA A-4E/F Mass Build design just a bit to represent an earlier Skyhawk, the A4D-1, a designation that was later changed to the A-4A. These Skyhawks are identifiable by their shorter nose, no refueling probe, and lack of external stiffeners for the rudder. The next development, the A4D-2 (later designated A-4B), incorporated a refueling probe and the rudder stiffeners. Next came the A4DN-2 (later designated A-4C), which brought a longer nose that housed advanced avionics. Next came the A-4E and F variants with the more familiar Skyhawk shape we see in Matt and Phil's PSSA design. Unfortunately the photo here of a PMTC A4DN-2 and A4D-1 at sea off Point Mugu is lo-res, but compare the two nose shapes in that photo and you see the most prominent difference between the two marques, as well as general colour & markings for reserve and test aircraft in California during that era. The AD4N-2 is in the foreground, and behind her is an A4D-1. And I just had to include the early 1960s photo of an Point Mugu A4D-2 (A-4B) because of her fabulous AQM-37 target drones. That's a lot of aero-enthusiast mojo right there!1 point
-
Thanks Danny, all sorted now with some prolonged fettling. I haven’t achieved quite as much rudder movement as I would like but 30mm each way should do fine. Had a trial fit of the main legs and wheels today and put her together for a few quick photos. Next task is gear doors and pneumatic actuators.1 point
-
Hi All, I have made the tail plane, wing tip floats and cut out the fin/rudder. The tail plane was straight forward, a simple fully symmetrical built up structure built flat on the board with the upper most side being the underside to give it some dihedral and then the tips added to it and shaped and sanded. I forgot to photo the open structure before the sheet went on. The wing tip floats are made up of laminations of 1/2" balsa and shaped. Front view A matching pair, these will slot into the wing, only 5g difference in weight. The fin/rudder is from solid 3/8" balsa, shaped and sanded to profile when done I'll cut out the rudder. This then will slot into the fuselage after the tail plane is fitted and the closed loop guides installed. Next, I'll be fitting the tail feathers to the fuselage and hinging the rudder and elevators. That's all for now, Regards Robert1 point
-
This has been about 15 years in the making. David Boddington 1/5 scale. about 70". Myself and modelling friends built it, despite being not quite finished, it had one flight on a 914st. Ended up in storage and recently a burst of enthusiasm came on to get it finished. Reworked a few things, including a recover and repaint in a different scheme, and a conversion to electric due to the infrequency at which it might fly, and avoiding fuelproofing. Flies brilliant on 5s, and is acutally quite easy to fly. Plan now on Outerzone, because I put it there. https://outerzone.co.uk/plan_details.asp?ID=134061 point
-
The fuz shouldn't be any problem.You will need to know what type resin is used for a good repair , epoxy or polyester then use the same type for the repair. Keep it light and only use enough epoxt to wet the glass enough to adhere to the repair area . cosmetic finishing can be made with a two pack filler like Ronseal woodfill . sets very quik , sands very easily and is lighter than car filler . I would start on the fuz by making a light glass fiber cone joiner long enough to bridghe a couple of inches either side of the break . Make from some glass cloth as Cloth is stronger and easier to use in these small repiars . Once hard this can then be slid down the front half making a tight fit and fixed with appropriate resin. When set the rear half can be aligned and fitted to the protruding part of the cone . Any cracks or tears in the fuz can be aligned and tacked with cyano then backed up with some glass cloth and resin . Not sure about that wing though ! Perhaps worth checking first as it looka as though the wing tube might have been torn loose . I would open it up if possible to check on damage and if worth doing. The fuz on model below a , Kyosh Illusion was smashed really badly . Wing was replaced with a foam veneered job and fuz repaired as described above . I did go over the ypop with the paint though and used two pack automotive adding a little bit of weight ? .1 point
-
Hi all! Tonight i painted the inside of the mould after the waxing and a coat of pva. The white paint i used is a polyurethane 2C product from HP textiles called IMC (in mould coating ) . It will connect with the following resin and glass so when the fuse exits the mould it will be like it's painted white...I hope !!? I'm going to let it cure for two days so it's hard for saturday . The second marathon starts 4pm !1 point
-
So I went to my local indoor flying meeting today and captured this large Vulcan. What a cracking job the builder has done of it powered by two EDF units and it has working undercarriage. Steve.1 point
-
The Douglas Tech Rep has some concerns, too...1 point
-
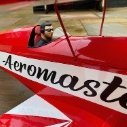
Titebond II Gone Bad, and its Partners in Aeromodelling Crime: I'm trying SUPER-PHATIC for the first time, on the advice of friends. I hear nothing but GOOD things about the stuff. For USA modelers: http://www.horizonhobby.com/super-phatic%21-dlmad21 I bought these four from Horizon Hobby and service was VERY fast from Illinois to here in Boston. They get special air treatment, these Mass Build participants...1 point

.thumb.jpg.507e8e41f64a8a0ae8fbd699d456cbca.jpg)