Leaderboard


Popular Content
Showing content with the highest reputation on 29/12/22 in all areas
-
HI, The plane was just collected. Thanks for the help getting it back to the owner, this seems like a nice community of helpful people. Have a happy new year and happy flying Bob7 points
-
If you do send the article, please consider a little bit of editing to remove the notion that before Lipos it was impossible to get decent performance out of an electric model and that they all needed to be hand launched, because ROG take offs were impossible. That simply isn't true. In the late nineties and early noughties there were marvellous fly-ins all around the country where electric models were routinely taking off and landing powered by NiCds and NiMhs, as Lipos simply didn't exist. I know that several of the prominent electric flight contributors to RCM&E and this forum were successfully flying electric then, because I had the great pleasure of flying with them. Lipos and brushless models did certainly give a performance boost when they arrived but, just like there was football before the Premier League, there was viable electric flight before the invention of the Lipo - it was possible to ROG and to convert I/C models to electric flight - we even used to have our own magazine!3 points
-
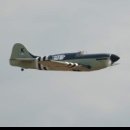
Mds power 🤢so it was a lame duck shooting spree, did any actually get into the air ?.2 points
-
I'd be inclined to balance the model in a level attitude at the 80mm balance point and fly it, before removing any manufacturer inserted weight.2 points
-
I totally agree. However. As far as I can tell every Ripmax Wot 4 variant appears to be labelled (on the model itself) "by Chris Foss". This infers that Chris Foss actually designed that particular model, not that he designed the original Wot 4 from which it is derived. His input into the development of the Chinese product is also well documented, both by Ripmax and the various magazines in which they have been advertised. I think if anyone was to take issue with his attitude that it is nothing to do with him, then he could be on a sticky wicket. Lending (or selling) your name to a brand is a 2 way street. That doesn't detract from the fact that he took a Scandinavian control line design (allegedly) and produced an excellent radio controlled model that in its original form at least has stood the test of time (and many bad landings !). His input into our modelling world over many years is also something to be recognised.1 point
-
Had my NX8 for about a year now and it's bloody excellent! PROS USB Charging Wifi Updates Easy to move models on and off. Decent SD card provided and enough internal memory for loads of models too. Pre made Model Templates. Good quality sticks and switches. Easy to use telemetry. Excellent support from Spektrum with some worthwhile shortcuts. BD Tennessee Youtube Channel shows loads of step by step videos on how to use all the best functions. The method of typing stuff into the screen is better than the DX models. More intuitive menus. CONS The colour screen is neither here nor there....You need to set a Hi-viz colour scheme to see it properly on summer days. A bit pricey. It's been no trouble.1 point
-
Spanish inquisition to come .... ? Would be interesting and informative to find out the why's and how far it flew from take off location, all done very quietly of course.... Maybe we can all learn something .....1 point
-
Hello Thanks to Graham calling me, I have identified one of our members who has lost the plane. He has spent hours trying to find it. I've contacted the person who started this thread and hopefully we can re-unite our member with his plane. Thanks for all the messages1 point
-
I first flew electric in the mid 1970s. The model in my avatar dates from 2002. At that time it was powered by a "buggy" motor, geared 4:1 supplied from 10, 2000mAh NiCds. It did full ROG and was (is) fully aerobatic. The model itself was built quite lightly, the 52" span wing weighs only 9 oz, complete with 3 servos (2 aileron and 1 for split flaps). I had the flight timer set for 8 minutes. In 2007 I fitted a brushless motor, and changed to using 12, 3000mAh NiMh, which gave even better performance. It does now use a 4 cell, 3000mAh LiPo, although being somewhat lighter than when using NiMh it is slightly worse in windy conditions. So I agree that the history in the article is not accurate. Mike1 point
-
Hi Leccyflyer - I was also flying electric BL (before LiPos) in fact the large club I was with at that time were all electric only, plus slope gliders. In fact I have never flown an i/c model. I didn't say decent performance was impossible - the early Multiplex pusher Pico-Jets were virtually mini-rockets - and there were some small Balsacraft warbird models in the club too, but none with retracts. But we flew off a grass sports field and I never saw an ROG take-off at the Club until LiPos and brushless motors arrived. Some GWS styrene foam models came with spindly plastic fixed wheels but hardly anybody fitted them. Clearly personal experiences will vary, but In any case the brief history is not the main purpose and thrust of the article, and it provides an adequate flavour of early electric flight and the essential contrasts between electric and i/c in those early days.1 point
-
An infrared heat gun is invaluable to check the heat of your covering iron to find out where the dial needs to be to give the 140°.1 point
-
Hi Erflog as laminating film is far more heat resistant than our model covering films and can tolerate far higher temps I have e found that setting iron to 1/2 for tacking then go to between 3/4 to nearly full for shrinking. The thinner grades need slightly lower temps. For final shrinking I prefer using a hot air gun ( the modelling type not the DIY type). Make sure you keep a hot air gun moving as if you are a bit close or slow it can still burn a hole. Any holes are easily and almost invisibly mended with a patch ironed on and are almost impossible to peel off without applying heat unlike model covering. Once fully shrunk I go over the covering wherever it touches ribs or spars as this really stiffens the model . With wings etc make sure there are no unwanted twists in the wing before doing this. The adhesion to the frame can be increased if needed by applying Deluxe Materials Cover Grip or similar prior to covering; I'm still using Clearcote as have a small supply left . I have only used the matt version as I have an inbuilt dislike for clear or see through models so can't comment on the clear laminating film re shrinkage and paint adhesion .1 point
-
Maybe they were looking to simulate a Dodo hunt…! 😉1 point
-
Looks like he’s been on the sauce again.1 point
-
You should aim to balance the model in a level flying attitude, not sitting nose down. 80mm from the leading edge, at the wing root, seems to be the recommended CG position, which differs from that stated in the manual, which has been noted as incorrect by multiple retailers.1 point
-
The fin and rudder seemed to be fairly simple to progress; not a lot of material required and all was to hand. Photos of the Vega Gull show that it was produced with a straight leading edge to the rudder as well as with an aerodynamic balance. Some also had a shrouded hinge line, some with exposed hinges. Perhaps the prospective owners could specify what they wanted and were prepared to pay extra for. Being a glutton for punishment I decided that the aerodynamic balanced rudder and shrouded hinges would be worth the additional work to obtain a smoother finish to the control surfaces. It was also the option that was on VP-KCC, Beryl Markham’s record-breaking aircraft, which I believe I’ve settled on for the finish – that’s a long way off but might as well build in the options now. The fin & rudder ribs weren't computer drawn, but French curves are pretty useful when it comes to reproducing diminishing sections. I started out using 2mm tufnol for the hinges, then decided that 2mm was too heavy and as there wasn’t any 1.5 or 1.6mm tufnol lying around, 1/8 ply would work just as well and offer a small reduction in weight. The dual pivot sits in the fin tail post and the single (rounded) pivot sits in the rudder tail post. A 1.6mm diameter length of piano wire hinge runs up from the bottom of the rudder through a plastic tube, to act as a guide, and will then be retained by a solder tag screwed to the chamfered part of the rudder. Having the rudder detachable primarily aids getting the bits painted but will also help with storage as my hangar is a wooden shed with a pitched roof. The internal height at the eaves is 80” so with the rudder removed the model should be able to just about stand upright – it’s getting congested in there. I’m reliably informed that the ideal number of aircraft to own is always dictated by the size of the shoehorn. The tailplane will have a similar shrouded arrangement for the elevators, although I've not go to that stage yet. The curved tips have been laminated with 1/32 ply between 1/8th balsa. The ply is there to offer a bit of protection from the inevitable hangar rash. With the basic bits coming on, I couldn't resist getting a picture of the parts assembled. Beginning to look like an aeroplane. Unlikely to fly the Atlantic but I can pretend!1 point
-
I wrote a booklet on the Basics of Electric Flight which can be downloaded from our Club website. The link is here:- https://dmfc.org.uk/downloads/electricFlight.pdf1 point
-
some work done on the centre section, bit of a challenge but if you stick at it it’s ok1 point