Ron Gray Posted May 20, 2020 Share Posted May 20, 2020 Next the construction of the aileron servo boxes. As per the retracts I first marked out the area where they were to be located, then cut through the veneer and cut out the foam using the soldering iron foam cutter. The plywood servo boxes were assembled and stuck together with cyano but I made a stupid mistake of glueing them in upside down into the wing! I just wasn’t thinking correctly and it was late in the day but still a pretty dumb thing to do. So I cut them out, which was quite an effort as I had used Gorilla Glue but at least I now know how strong that stuff is! But this did make me rethink the method of fixing the servos in place so I 3D printed the cover and fixings. I think that the end result is much neater than a ‘traditional’ ply construction. Having cut out the servo pockets I then decided to tackle the cable routes for the aileron servos and the retracts using a sharpened length of CF tube to core the channel out. I also cut another channel at an angle to the one shown above exiting at the bottom of the wheel well. I want all of the cables to exit the top of the wing in one place as I will be using a Maxloc 4 way connector so that I only have one thing to plug in when I mount the wing on the fuse. More by luck I managed to get the channel to exit right at the back of the servo pocket. Edited By Ron Gray on 20/05/2020 08:51:42 Quote Link to comment Share on other sites More sharing options...
Ron Gray Posted May 20, 2020 Share Posted May 20, 2020 I’m going to post more build photos tomorrow but whilst I was waiting for some glue to dry I experimented with some work to the canopy. Quote Link to comment Share on other sites More sharing options...
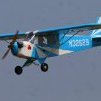
Peter Jenkins Posted May 20, 2020 Share Posted May 20, 2020 Beginning to look very nice Ron. Could be an interesting formation coming up when we can all be down at the patch. Lavochkin, P47, Spitfire IX and Mustang IV! Darn, no enemy! Quote Link to comment Share on other sites More sharing options...
Tim Flyer Posted May 21, 2020 Share Posted May 21, 2020 Very good looking canopy😊 Quote Link to comment Share on other sites More sharing options...
Ron Gray Posted May 21, 2020 Share Posted May 21, 2020 Thanks Peter and Tim, the canopy was only an experiment to see what it would look like using aluminium tape but I must say that I rather like it so will continue with it when the next lot of glue is setting! Quote Link to comment Share on other sites More sharing options...
RICHARD WILLS Posted May 21, 2020 Share Posted May 21, 2020 Ron , that is excellent . Ive done the same myself a few times . You could leave it factory fresh or mask the windows and spray it in situ with the rest of the airframe , either grey or green , But when its really dry and still leaving the masking tape on , give the edges a very light rub with the back of a brillo pad . You end up with all the edges shining which looks great and well used canopy . Either way , well done . Richard Quote Link to comment Share on other sites More sharing options...
Ron Gray Posted May 21, 2020 Share Posted May 21, 2020 Thanks Richard, that was the plan, glad I got it right. Despite all of the building I've done over the years I've never really done anything 'scale'. Back to the build. Before I forgot, the next job was to fit end ‘plates’ on the ailerons to cover the foam. (At this stage I was still planning on covering it with brown paper) Now over to the concealed hinges and fitting the Robarts which was not that straightforward given the varying taper on the hinge line. I first cut a short length of barbecue skewer and sharpened one end to act as a marker. After marking the centre line, shallow holes were made in the wing using a rat tail Permagrit file and the marker inserted. I then pushed the aileron into position and the hole positions were transferred via the sharpened marker. I could then form the holes in the ailerons using the Permagrit file Slots were then filed in the LE to allow the hinges to pivot. And a trial fit to make sure it all lined up and worked, it did! Just got the end plates to put on the outer ends of the ailerons, hence the gap. Edited By Ron Gray on 21/05/2020 08:57:59 Quote Link to comment Share on other sites More sharing options...
Ron Gray Posted May 21, 2020 Share Posted May 21, 2020 I started to cut / carve the wig tips to shape. They were quite a big lump of balsa so I started with rough cuts using a hand saw, then used the razor plane followed by the Permagrit block. Hard points in ply were let into the ailerons, these will be the mounting blocks for the control horns. Now it was all about sanding and sanding and yet more sanding, not ideal if you suffer from Asthma as I do! Notwithstanding that as it’s one of my favourite jobs, I donned the face mask and off I went. It certainly helps to have some good tools to help and to this end I used both of my Great Planes Easy touch sand bars, one is about 10” long, the other is about 2' I also use their self adhesive sand paper which is really good (all of these bits came from the USA about 3 years ago). It’s amazing how much these sanding bars remove in a short space of time. After a few hours the wings looked like this and were ready for joining. usually use epoxy for joining veneered foam wings but this time, having seen how strong it was, I used Gorilla Glue. Once dry and the ply brace fitted I can then use glass cloth and epoxy resin to strengthen the joint. Quote Link to comment Share on other sites More sharing options...
Ron Gray Posted May 21, 2020 Share Posted May 21, 2020 Posted by Peter Jenkins on 20/05/2020 23:50:20: Beginning to look very nice Ron. Could be an interesting formation coming up when we can all be down at the patch. Lavochkin, P47, Spitfire IX and Mustang IV! Darn, no enemy! I'm not too sure about that Peter, there are a BF110 and an ME109 waiting in the wings (well in their boxes at the moment!) Quote Link to comment Share on other sites More sharing options...
Ron Gray Posted May 21, 2020 Share Posted May 21, 2020 Things that aren’t quite right really bug me and here was another one. The LE of the wing has a forward rake where it meets the fuselage and the kit provides some shaped balsa to add to the front of the LE to form this rake. The problem is / was that when I was sanding the wing to get the wingtips and LE to the correct profiles I didn’t realise, until too late that by following the wing section near the root resulted in the LE getting sanded to a triangular section and in my opinion too short. The answer was to glue some balsa to both the top and bottom wing surfaces so that I could form a new profile. Pictures are worth a thousand words and I think this one shows what I mean. I was then able to form better profile and then was in a position to glass the wing join using epoxy resin. The next shots show how the balsa ‘filler’ pieces have been sanded back to give me a more pronounced forward rake. Whilst that first coat of epoxy was curing I continued with work to the tail pieces starting with the hard point for the rudder. Up to this stage I had been planning to cover the LA-7 with brown paper and diluted PVA but after a conversation with a good friend in which he reminded me that I had a good size roll of document lamination film I changed my mind and decided to go down that route instead. Not only is it cheap and easy to apply it needs no sealing or filling before painting plus it adds strength, something that the brown paper option did not. I had already decided that I wanted to give the impression of fabric covered control surfaces so using the elevators as the test bed I proceeded to apply strips of film to represent rib tapes. To give it some ‘depth’ I applied 2 layers to form the strips but as you will see in the next photo, once primed they are not that prominent. So for the rudder I used 3 layers of film. Then rubbed down with some very fine sandpaper (mine is actually used sandpaper that now feels like flour grade) This keys the surface of the laminating film as the base for the primer. The rib tapes are a little bit more in evidence on the rudder thanks to that extra layer of film, even if it does take a long time to apply. Next up the ailerons were given the same treatment. By this time the wing was ready for the joining bandage to be rubbed down and a second coat of epoxy applied. Quote Link to comment Share on other sites More sharing options...
Bob Cotsford Posted May 22, 2020 Share Posted May 22, 2020 I didn't like that swept forward leading edge as it would end up razor sharp without a fair bit of building up so I simply pretended it doesn't exist. It's actually fairing in the air inlet ducts on the full size so it should have a little bit of depth. If anyone pulls me over missing this feature I'll be absolutely amazed. I've covered my control surfaces with some Solartex scraps I had lying around and made rib tapes and edging by tearing 1/4" strips from that. Once the wind drops a bit I might have to blow some primer over that lot to see how it compares with yours. I take it the doculam has heat sensitive adhesive like Solarfilm and similar? Quote Link to comment Share on other sites More sharing options...
Nigel R Posted May 22, 2020 Share Posted May 22, 2020 That is looking good, Ron. The long sanding bars look like brilliant bits of kit. Quote Link to comment Share on other sites More sharing options...
Ron Gray Posted May 22, 2020 Share Posted May 22, 2020 Hi Bob, you've got it spot on with that forward sweeping bit and it really annoyed me! The lamination film has heat sensitive backing like standard covering film but no backing plastic to remove first! It also goes on really easily and can be pulled and stretched quite a bit, will also take higher temps than standard film. I have used it before on my foam wings where it gives a lot extra strength and ding proofing but also stops muck getting into the foam. I suspect your Solartex tapes will look better as they have been torn and will probably be more prominent than mine so very interested in what your look like after primer. Going back to the laminating film, will take paint if keyed with fine sandpaper and if you need holes just heat a piece of copper tube and push it through! Oh, and did I mention that it is very cheap! The thing that I didn't expect, having applied the rib tapes, is that the brain now tells me that these are built up structures so I handle them differently! Weird or what. Edited By Ron Gray on 22/05/2020 10:59:11 Quote Link to comment Share on other sites More sharing options...
Ron Gray Posted May 22, 2020 Share Posted May 22, 2020 @ Nigel - yes they are really good. I bought them directly from the US about 3 years ago the long one for use on wings to ensure even sanding. Great Planes also used to do various different shaped Easy Touch bars but I just couldn't find any for sale and have been looking ever since but still no luck. Quote Link to comment Share on other sites More sharing options...
Ron Gray Posted May 22, 2020 Share Posted May 22, 2020 Just had a sudden light bulb moment, I want a multi contour sand bar so why don't I just 3D print one - right that's tonight's job sorted. Quote Link to comment Share on other sites More sharing options...
Ron Gray Posted May 22, 2020 Share Posted May 22, 2020 Little odd jobs to do now to finish off the wing starting with scrap balsa infill to the retract pocket. Wing mounting bolt T nut ply plate (I know Richard only uses 1 but as there were 2 in the kit...) Made a start on the wing / fuse fillet. I used some small section triangular stop to give the balsa sheeting something to stick to on the fuse And once that was dry I stuck the balsa sheeting to the fuse. And again after that was dry I removed the wing and wet the balsa sheet and bent it to the profile of the ply base. As you may appreciate there was a lot of gluing, leave to dry, glue leave to dry so in the drying times I went back to the canopy and continued with the experiment. It seems a shame to paint it but it will be given a coat of grey then rubbed back to see what it looks like weathered. Quote Link to comment Share on other sites More sharing options...
Peter Jenkins Posted May 22, 2020 Share Posted May 22, 2020 My goodness Ron, you are really cracking on. Makes my efforts look pedestrian! Well done mate. Quote Link to comment Share on other sites More sharing options...
Ron Gray Posted May 23, 2020 Share Posted May 23, 2020 Thanks Peter, but things will slow down a bit now as I need to re roof a summer house in the garden and the timber for that was delivered a couple of days ago! Quote Link to comment Share on other sites More sharing options...
RICHARD WILLS Posted May 23, 2020 Share Posted May 23, 2020 I really like your work Mr Gray , you've done some nice little detail touches . I feel a little bit guilty that all of the kits you have from me are prototype production runs . I know the Spit is too small for you but there is whole lot more "spit" and polish in that one. I think this one exemplifies the advantages of foam veneer compared with built up construction . The foam wings for example , give strength, accuracy , easy "repairabilty ", great shock absorption for the undercarriage and reduced cost on larger models . Ignoring "man down the pub expert " they are light too. The downside is cutting retract holes etc . However with a longer production run , it would justify this being incorporated by the manufacturer . Anyway , so the lady wife is going to remain talking to you , you had better go and earn some brownie points on the summer house .Well done Ron . Quote Link to comment Share on other sites More sharing options...
Ace Posted May 23, 2020 Share Posted May 23, 2020 Ron, very useful tweaks and like the attention to detail Regarding the laminating film - how well does the primer adhere to the keyed surface, ie. will it scratch off with a finger nail or will the final fuel proofing be relied on to offer finish resistance to hanger rash? (Sorry if jumping the gun) Quote Link to comment Share on other sites More sharing options...
Ron Gray Posted May 23, 2020 Share Posted May 23, 2020 @Richard - personally I wouldn’t want the kit changing, well maybe the wing profile to flow more into the LE taper (but that’s me beIng finicky), because I like having to adapt and add things, so for me the kit gets a 9 out of 10! I’m also pleased to be able to report that many brownie points have been accumulated on the basis of the long shift I put in yesterday on the summer house, just need to finish it today, if the wind and rain (yes, rain) will let me. @Ace - if the film is well keyed with abrasive, in my case very fine (flour) grade sandpaper then the paint adheres really well. I’ve got a piece of balsa that I use as my experiment piece so will try and demonstrate its resilience later on today and will post the resulting photos for you to see. But as you have indicated, the fuel proofing, in my case Sadolins PV67, will also provide extra resilience. Quote Link to comment Share on other sites More sharing options...
Ron Gray Posted May 24, 2020 Share Posted May 24, 2020 Well it's finally finished, I spent at lot of time on it over the last couple of days and today saw the covering go on plus paint, Sara even helped out on that one too. So I was able to get back to the LA-7 (what, you didn't think I meant I'd finished the Lavochkin did you? I was referring to the summer house). I ember something Bob said about the wing failings being a little bit fragile so I took the opportunity to glass them both which has certainly given them strength. Which leaves the gap under the fuse, where the cowl meets the wing, to fill. I'm a bit undecided about my approach to this one, but will probably use soft balsa scraps stuck to the cowl. Quote Link to comment Share on other sites More sharing options...
Tim Flyer Posted May 25, 2020 Share Posted May 25, 2020 Well done Ron that’s looking good. The “cowl meets wing” bit I remember well as I think it wasn’t properly provided for in the kit. I found some balsa blocks a stuck them to the wing and traced the curve of the cowl on them. I then carefully filed out the line to meet flush with the cowl. I’m sure the blocks could be stuck to the cowl instead but remember you might want a bit of wiggle room when you put the cowl on in order to clear your exhaust etc. The tapered balsa blocks also add a little support so the cowl slots in nicely. Edited By Tim Flyer on 25/05/2020 09:33:43 Edited By Tim Flyer on 25/05/2020 09:38:04 Quote Link to comment Share on other sites More sharing options...
Ron Gray Posted May 25, 2020 Share Posted May 25, 2020 Thanks Tim. With the blocks stuck to the wing is there a problem when fitting the wing as that has to go in at an angle? I don't think I should have a problem with wiggle room as the cowl will be fitted before the wing. Still not 100% that I've done this the best way but I can always cut it off later. Quote Link to comment Share on other sites More sharing options...
Bob Cotsford Posted May 25, 2020 Share Posted May 25, 2020 That was a secondary reason that made leaving off the LE extensions an easy decision! I remember my seagull Sea Fury had a similar (but more extreme) issue with the LE radiator mouldings, it needed a gap to be left at the fuselage junction to allow for the necessary wiggle room. Without the extension I just rebated the existing LE strip for F2. If you make the front of the fairing a part of the cowl as per Richard's plan there shouldn't be much of a problem. Quote Link to comment Share on other sites More sharing options...

Recommended Posts
Join the conversation
You can post now and register later. If you have an account, sign in now to post with your account.
Note: Your post will require moderator approval before it will be visible.