brian wood Posted February 21, 2023 Share Posted February 21, 2023 started a build on a mossi so will show progress up to date,first i built the uc if i couldnt get this right it wasnt worth doing it because its such a big part of the character took prob about 2 months to complete hopefully the pictures tell the story also cast my own tyres which have a dia of 6.5 inch they are operated by a screw jack affair which i made. 3 Quote Link to comment Share on other sites More sharing options...
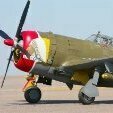
Kevin Fairgrieve Posted February 21, 2023 Share Posted February 21, 2023 My favourite aircraft of all time. I shall be following with interest. Quote Link to comment Share on other sites More sharing options...
Martian Posted February 21, 2023 Share Posted February 21, 2023 Got to love a mossie Quote Link to comment Share on other sites More sharing options...
brian wood Posted February 21, 2023 Author Share Posted February 21, 2023 u/c nearly done just req some more work on the door guards the axle cover will be fitted when final assembly occurs,next to receive attention were the moulds for the cowls and canopy,forgot to mention its a scaled up bt design with a 100"span giving it a scale of6.5:1,once i got the difficult bits done moved onto the airframe.fuz was done first with lots of planking built in 2 half shells then joined much like the full size the tailcone is a glass moulding unlike brians which is balsa,great care was took to build the tailplane and fin as light as possible due to cg concerns,wing is conventional construction with the addition of the nacelles. 12 Quote Link to comment Share on other sites More sharing options...
david tilbury Posted February 22, 2023 Share Posted February 22, 2023 Good to see you on here Brian.....about time....LOL......fantastic build!.... Catch up soon Dave Quote Link to comment Share on other sites More sharing options...
Mike T Posted February 22, 2023 Share Posted February 22, 2023 Superb! I like your approach to airframe construction: take a huge lump of balsawood and remove anything that doesn't look like a Mosquito 😁 (seriously - I hope there are more 'construction' posts to come?) Quote Link to comment Share on other sites More sharing options...
Chris Freeman 3 Posted February 22, 2023 Share Posted February 22, 2023 Stunning Build Brian, this is a lot of work, I built the BT version. If you thought the balsa costs were high, I have an article of the Avspecs resoration of the real one and they say a hobby shop in Auckland supplied the 410 100mm wide sheets of 12.7 thick balsa! Quote Link to comment Share on other sites More sharing options...
Martin Harris - Moderator Posted February 22, 2023 Share Posted February 22, 2023 Cracking looking build. I'd love to see some details of the tyre mould production and casting... Quote Link to comment Share on other sites More sharing options...
alan p Posted February 22, 2023 Share Posted February 22, 2023 Could you let us know your preferred powerplant IC or electric? Quote Link to comment Share on other sites More sharing options...
brian wood Posted February 22, 2023 Author Share Posted February 22, 2023 Regarding the tyres, firstly a master is req this is turned from mdf and the treads are thick paper cut on a cutter to the correct design then given coats of sanding sealer sanded and painted,next a mould has to be made out of silicon this is made in a hinged box with clips on,the polyurethane foam is mixed and poured into both half of the mould then its clamped shut,you have to be quick because it starts to rise in about 40 seconds, i found after a few not very good trials that it was better to do in a warm room ,i did mine in the conservatory in summer and it was hot! leave for 30 then open mould i should say i dusted talc powder in the mould before pouring to aid removal,all thats left is trim and mount on a wheel i made mine from 2 1/4 ply discs with a sandwich of chemiwood to stop the tyre deforming when the two halves are screwed together could have made them from ali but didnt want the weight. originally i got 2 lazer 155s and they did go in the cowl with a prop extension by moving the bulkhead,i did make a custom fuel tank but didnt have enough room at the rear of the engine once the carb was on,there was no way round it maybe if i would have done a pr16 there wudnt have been a problem any how converted to electric 2x axi 5333 motors 8s 6250 batterys and hobbywing 100 amp controller. Quote Link to comment Share on other sites More sharing options...
PeterF Posted February 22, 2023 Share Posted February 22, 2023 Fantastic build, I built the BT 81" Mossie and it flies great, keep the momentum through manoeuvres and it flies like a large sport plane. I hope yours has the same characteristics. I swapped mine to electric and that gave me a lot more confidence to explore the flight envelope, never risked a roll or a loop when it was IC. Quote Link to comment Share on other sites More sharing options...
Martin Harris - Moderator Posted February 22, 2023 Share Posted February 22, 2023 Great job on the tyres! Quote Link to comment Share on other sites More sharing options...
Chris Walby Posted February 23, 2023 Share Posted February 23, 2023 (edited) Following with interest and the scale details are top notch. Shame the Laser's didn't fit as the 70's just squeeze in my SG Mossie with everything else as far as forward in the fuz and nacelles. Have you tested where all the electrics need to go to get C of G, only ask as my BH mossie has over size motors (for the weight) and a lipo in the nose as far forward as it will go. All the best, keep posting and thanks for sharing PS any details on the UC mechanism please Edited February 23, 2023 by Chris Walby Quote Link to comment Share on other sites More sharing options...
brian wood Posted February 24, 2023 Author Share Posted February 24, 2023 Hi chris cg has always been in my thoughts the radio is all in the bomb bay which is part of the wing the servos are all at the front with the receiver and switch just behind the only part not in the wing is the battery which sits in the machine gun bay at the front ime using the jeti 6200 power lon battery which is fairly heavy,dont know if i will have to put ballast in hope not wont know till iput it on the scales prior to flight. regarding the u/c it follows the geometry the same as only ive made mine from ali tube the ends are machined plugs which are glued and pinned in the tube and have either a slot or tongue machined in them there is a down lock where the arms break which is an over centre joint which locks the u/ down the actuator does the up lock. the legs are normal looking that i made with a machined bracket 3 Quote Link to comment Share on other sites More sharing options...
brian wood Posted February 24, 2023 Author Share Posted February 24, 2023 sorry last post has gone pear shaped big time ile re do it later Quote Link to comment Share on other sites More sharing options...
Chris Walby Posted February 24, 2023 Share Posted February 24, 2023 Thanks for the reply Brian and a couple of questions spring to mind, firstly does your U/C have any "suspension" its that I only have one model that does not have either oleo's or coiled (is my TN DC3) and that suffers from non scale landing loads being imposed. A bit like the non scale 4 ft high grass and large potholes in the runway resulting damaging loads transferred into the UC mounting plates. Are you going for single flight battery in the fuselage and ESC's in the nacelles or something else? Quote Link to comment Share on other sites More sharing options...
brian wood Posted February 25, 2023 Author Share Posted February 25, 2023 HI Chris yes it has sprung oleos but they are a bit stiffer than i would do normally due to the fact there are 2 working in tandem if they were too soft i think the wheel might wander under load,ive got a single jeti 6200 radio battery in the nose reason being ive got 10 servos plus the retract actuators altho i may decide to run these off a seperate 2s battery the escs along with the 2 4s 6250 lipos in the nacelles as far forward as i can get them may go to 5s at a later date when i get round to testing Quote Link to comment Share on other sites More sharing options...
Chris Walby Posted February 25, 2023 Share Posted February 25, 2023 Well as long as the springs have the same rate of compression you should be ok + pity you could not make the wheel shaft one piece and clamp it with the UC yokes to stiffen things up. Impressed with that RX battery, sure has some capacity for a light weight, although that might no help with you C of G so putting a couple of NiMh's might work for the U/C supply and C of G? Only my opinion, but I think you will find your C of G quite rearward, unless you can mount the Lipos under the motors. Don't tell Jon, but my SG mossie has good size brass prop nuts and everything else in front of the C of G including a pair of Laser 70's. If I was to do it again then a pair of 80's weight wise would be better. The mossie has a long fuselage and fair size tail feathers compared with others, but as you say if the tail is made light it might all work out. Might be worth temp mounting all the hardware and seeing where the C of g is, appreciate covering etc will be a factor, but might avoid having to put lead in when you could have moved things about in the build stage. All the best Quote Link to comment Share on other sites More sharing options...
brian wood Posted March 2, 2023 Author Share Posted March 2, 2023 Done the machine guns and cannons another job ticked off. 4 Quote Link to comment Share on other sites More sharing options...
brian wood Posted March 13, 2023 Author Share Posted March 13, 2023 started to sand the planking much the same as the full size.glass cloth covering 48 grm for the wing seat area and front and 25 grm aft of the wing 1 Quote Link to comment Share on other sites More sharing options...
brian wood Posted March 15, 2023 Author Share Posted March 15, 2023 ive sanded the fuz and its now got the glass on just waiting the flow coat then a final sand,ive moved onto the tailplane and fin as i want to get these items more or less done before i join them to the fuz, the fullsize is ply covered followed by doped fabric you can see the ribs and spar thru the covering bit like a starved horse appearance but not as severe,to obtain the illusion i first masked the area out then sprayed with undercoat removed the tape and rubbed down followed by another overcoat of primer and sanded backwhich leaves a very slight impression when sprayed in colour should give the desired effect. 4 Quote Link to comment Share on other sites More sharing options...
brian wood Posted March 19, 2023 Author Share Posted March 19, 2023 Fuz now primed ready for the fitment of tailplane fin and tailcone. 3 Quote Link to comment Share on other sites More sharing options...
brian wood Posted April 16, 2023 Author Share Posted April 16, 2023 update glassed the wing with 25 grm cloth just need to do the ail and flaps,ive made the plugs for the wing pylons and flame dampers just need some more sanding prior to making the silicone moulds,also done the bomb bay doors. Quote Link to comment Share on other sites More sharing options...

Recommended Posts
Join the conversation
You can post now and register later. If you have an account, sign in now to post with your account.
Note: Your post will require moderator approval before it will be visible.