Nev Posted April 1, 2015 Author Share Posted April 1, 2015 I hesitate to show off my attempts at scale like features in such company but I have been giving it a go. I now have wing tip lights. They are based on 8mm LED’s as I intend them to work and 8mm is about the right size. The green one is a water clear type with a clear blue lacquer applied but lights up green when powered. TBH this is about as far as my dexterity and eyesight will go but I will be happy if I can get a few more touches done like this Nev. Quote Link to comment Share on other sites More sharing options...
Andrew Price 2 Posted April 1, 2015 Share Posted April 1, 2015 That looks the Bees Knees Nev. Well done Quote Link to comment Share on other sites More sharing options...
onetenor Posted April 1, 2015 Share Posted April 1, 2015 When making horns and things to fit over wires and rods do the following First drill a small hole in the flat plate then take a punch or broach and tap it through the hole until it will slip onto the wire or rod. Tighter the better but not so tight you have to distort it to get it on. . This should leave a dimpled hole with a small projection other side. This gives a larger area for t he solder and makes stronger jointst. Actually a filleted joint in effect. Actually additional solder can be built up on the !hollow ! side as an additional fillet. This punching holes method gives additional metal to accept self tapping screws. Quote Link to comment Share on other sites More sharing options...
Glenn Stratton Posted April 2, 2015 Share Posted April 2, 2015 Hi Nev, you have produced a neat pair of wing tip lights, can you give some more information on how you made the housings please. Quote Link to comment Share on other sites More sharing options...
Nigel Day Posted April 2, 2015 Share Posted April 2, 2015 Very nice Nev. Quote Link to comment Share on other sites More sharing options...
Martin Fane Posted April 2, 2015 Share Posted April 2, 2015 Hi Nev The wingtip lights look great, I think I may have ago fitting dummy ones myself Martin Quote Link to comment Share on other sites More sharing options...
john stones 1 - Moderator Posted April 2, 2015 Share Posted April 2, 2015 Yes they look good but lets be knowing a bit more Nev John Quote Link to comment Share on other sites More sharing options...
Danny Fenton Posted April 2, 2015 Share Posted April 2, 2015 Those wing tip lights look great Nev well done Cheers Danny Quote Link to comment Share on other sites More sharing options...
Nev Posted April 2, 2015 Author Share Posted April 2, 2015 Well thanks for the comments lads but I’m not that good. But seeing as you asked, I have a couple more photos. I tried to build up a layer around the LED with aluminium tap. It smother around the curve a lot better than you would think, pressing the creases out with a bit a hard wood. The tape gives you an edge to work to and also acts as a reflector. I did ty to build it up with a few layers of tape, which would have worked but I went for the short cut by adding modelling putty. I tried some Tamiya basic but didn’t get on with that very well and it went on in blobs, so after it dried and a bit of sanding I used light weight filler to smooth it out a bit. Then a bit more sanding and trimming and finish with the paint of your choice, I went for Humbrol Matt Dark Grey. It all depends on how much patience you have and how much time you want to spend. As you can see I went for the 50 years of hard service look not the factory finish. Nev. Quote Link to comment Share on other sites More sharing options...
Colin Leighfield Posted April 2, 2015 Share Posted April 2, 2015 Super job Nev. Quote Link to comment Share on other sites More sharing options...
Tony Bennett Posted April 2, 2015 Share Posted April 2, 2015 love the lights. very neat. Quote Link to comment Share on other sites More sharing options...
john stones 1 - Moderator Posted April 2, 2015 Share Posted April 2, 2015 Nice work Nev thanks for enlightening me John Quote Link to comment Share on other sites More sharing options...
Fatscoleymo Posted April 5, 2015 Share Posted April 5, 2015 Great job Nev. Fats Quote Link to comment Share on other sites More sharing options...
Nev Posted December 31, 2015 Author Share Posted December 31, 2015 Hi. Hope everybody had a good Christmas and is set up for a bit of revelry tonight. Been a while since I did anything in the Chippy, lots of reasons and I’m not sure I will have anywhere to fly it when it’s done but I do like to build so I'm going to try and get it finished. One of the reasons for the slow return, I had come to the tricky bit of joining the fuselage halves together, although thinking back there have been lots of tricky bits, so I put some new batteries in the camera and started fiddling again. I got the stabiliser and fin in place and keeping it as simple as possible for now, went for snakes and a fixed tail wheel. Servos are going behind the dashboard but can be accessed from underneath. Several dry fits to see if everything still waggles as it should I think I have remembered to fit in all the bits, the elevator snake can be threaded from the back. Time to go for it I think. That’s it for now, just a little post to get the ball rolling again. Have a good new year everybody. Nev. Quote Link to comment Share on other sites More sharing options...
Andy Muckley Posted December 31, 2015 Share Posted December 31, 2015 Nice work Nev Quote Link to comment Share on other sites More sharing options...
Nev Posted January 3, 2016 Author Share Posted January 3, 2016 Well with as many clips as I could fit on and trussed up with masking tape it went together. So I now have a beautiful fuselage, ok it may be in the eyes of the beholder but I am well chuffed with it. I’ve even made a start on the office floor, this bit may have been easier if I had done some work on it before I joined the halves together but it’s getting there. Now I’ve actually got back into it, I’m quite enthusiastic about this again, especially as I have a lot of the tricky stuff behind me. Only thing I haven’t figured out what to do with yet is the cowl but I’ll worry about that later. Nev. Quote Link to comment Share on other sites More sharing options...
Danny Fenton Posted January 3, 2016 Share Posted January 3, 2016 Nice one Nev, certainly looks like a Chipmunk to me Cheers Danny Quote Link to comment Share on other sites More sharing options...
john stones 1 - Moderator Posted January 3, 2016 Share Posted January 3, 2016 Looks very good to me Nev John Quote Link to comment Share on other sites More sharing options...
Andy Muckley Posted January 4, 2016 Share Posted January 4, 2016 Brilliant Nev great job and you should be proud. Will be back on mine in a couple of months as new workshop now, well on the way and can't do any more till that's done Quote Link to comment Share on other sites More sharing options...
Silver Wolf Posted January 4, 2016 Share Posted January 4, 2016 Looking good, will be awhile until I get to that stage, I will be pleased if it looks that good. SW Quote Link to comment Share on other sites More sharing options...
Nev Posted January 10, 2016 Author Share Posted January 10, 2016 Thanks Chaps. Warning. Inspirational shot coming up ! Had to put it together to make sure it all fits, cowling is just for show at this stage. I am actually very surprised that it’s all square, good enough anyway, considering how much of this you have to put together off the board, free hand so to speak. Getting to the time when I will have to think about covering and try and find Danny’s videos on glassing. Cowlings a bit of a loose fit though. Hmm ! Nev. Quote Link to comment Share on other sites More sharing options...
Danny Fenton Posted January 10, 2016 Share Posted January 10, 2016 Hi Nev that looks great the cowling only touches across the top thats correct i will try and find a good pic CheersDanny Quote Link to comment Share on other sites More sharing options...
Danny Fenton Posted January 10, 2016 Share Posted January 10, 2016 Don't centre the gap, in the cowl Nev, make it touch at the top but open everywhere else. I believe the plan shows this too. Cheers Danny Quote Link to comment Share on other sites More sharing options...
Nev Posted January 10, 2016 Author Share Posted January 10, 2016 Thanks for that, I knew there were gaps at the sides but I expected it to touch the bottom but you are correct the plan does show a gap, mine about ¼”, so some good support blocks needed I think. Nev. Quote Link to comment Share on other sites More sharing options...
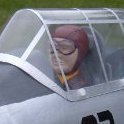
Nev Posted January 25, 2016 Author Share Posted January 25, 2016 I am in stick one piece of wood on a day mode at the moment so progress is slow but sure. I fitted some blocks to secure the cowl and smaller ones for the canopy, both are going to be secured with small screws. So I have the cowl sorted for the moment, it still needs a big hole cutting is in for the batteries but I have fitted some stiffening rings inside and got the basic mounting sorted. The spinner is a 2 ½” one with the skirt cut off, I think it looks Ok .Need to find a prop with a small hub though, this is only a 12” APC style one so when I get a 14” one I may have to do some careful carving inside as well. I have got a few of the other jobs done on the fuz as well but not much to show for it, definitely plodding along at the moment. Nev. Quote Link to comment Share on other sites More sharing options...

Recommended Posts
Join the conversation
You can post now and register later. If you have an account, sign in now to post with your account.
Note: Your post will require moderator approval before it will be visible.