David Ovenden Posted March 1, 2021 Author Share Posted March 1, 2021 Quote Link to comment Share on other sites More sharing options...
David Ovenden Posted March 4, 2021 Author Share Posted March 4, 2021 (edited) Finally managed to get somewhere with the folding wing struts and rigging. The system is all installed now and it works as I imagined. I spend half a day fabricating rigging brackets. Rigging wires were made and installed and the wing panels remove as a pair now (left side & right side) The wings have carbon tubes so are structually strong enough for the rigging to be "additional" rather than "essential". Each outboard panel is secured by a single 4mm countersunk bolt on the main spar. In addition the flying wires connect via 2 removable links to the engine nacelles. The landing wire connect to the underside of the top outer panels so can stay connected when the panels are removed and folded. So removal of all 4 outboard panels only means removing 4 screws and unsnapping 4 kwick-links. Edited March 4, 2021 by David Ovenden 1 Quote Link to comment Share on other sites More sharing options...
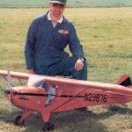
David Ovenden Posted March 4, 2021 Author Share Posted March 4, 2021 Could do with some good ideas. I want to create a decal/ sticker/ logo. How to create the Royal Air Mail logo to put onto a red film-covered fuselage? I don't want to try painting by hand! The black and white photo just shows the logo on the actual plane being modelled. The other 2 images give a bit more detail of what is required. 1 Quote Link to comment Share on other sites More sharing options...
David Ovenden Posted March 5, 2021 Author Share Posted March 5, 2021 (edited) Nearly there with the fuselage now. It's mostly covered with just the nose/cockpit area to do. It feels amazingly light without radio, centre section/motors etc. The rudder and elevator servos are in the tail accessed by a panel either side under the tailplane. I can just get in to make adjustments and it is possible to remove the servos if needed. I hope I don't have to though. Not much space to spare inside! Edited March 5, 2021 by David Ovenden 3 Quote Link to comment Share on other sites More sharing options...
David Ovenden Posted March 7, 2021 Author Share Posted March 7, 2021 Really struggled getting the BangGood film to go round all the double curvature of the nose. I'm not really happy with the result and may well strip and use glass-cloth and paint later. But I'm going to leave it as is until after the test flight, not least because I have no paint the right colour to match the film. I've still got the cockpit glazing to do, but pilots can wait. As the whole nose comes off it will be easy to add them later. I don't have any 1/12th scale 30's US commercial pilots so I will need to make some from foam I guess. 3 Quote Link to comment Share on other sites More sharing options...
David Ovenden Posted March 11, 2021 Author Share Posted March 11, 2021 Getting towards the final stages of the build now. I still have to glaze the cockpit windows and fit the motors and props. I needed to move the motors a little further forward to give the correct clearance between the propellers and the cowl. I am waiting for the screws to arrive. In the meantime the model balances on the plan-marked CG so that is positive. 6 Quote Link to comment Share on other sites More sharing options...
GrumpyGnome Posted March 11, 2021 Share Posted March 11, 2021 That is one sweet machine! GG Quote Link to comment Share on other sites More sharing options...
Murat Kece 1 Posted March 11, 2021 Share Posted March 11, 2021 Well done.. Looks great.? Quote Link to comment Share on other sites More sharing options...
David Ovenden Posted March 12, 2021 Author Share Posted March 12, 2021 (edited) The receiver and servos are all fitted and the linkages are set up. I have now weighed the completed model (well cockpit glazing and registration lettering still to add -but only a few grams there)) and it comes in at 4.77kg (10.5lbs) complete with lipo pack. It balances spot on the CG marked on the plan so there shouldn't be any extra weight to add (I hope) My target was 5kg (11lbs) so I'm happy to have come in just below that. I added some sprung oleo legs that added a bit; but used film rather than Tex covering so lost some potential weight there. I calculate wing area of the model at 8.9sq ft so that's a wing loading of 19 oz / sq ft which is not too bad I reckon. Power from the 2 motors is 1200w max so the power to weight ratio is 114watts per pound (250w per kg) which should prove be sufficient to give good performance for this type of plane (1930s biplane airliner). Currently I am planning to use a 7000mah 5s pack to run both motors. These are from BangGood and I have my doubts that they really are 35C batteries (as claimed) They only weigh 660gms, which is great to keep the weight down and they do come with 2 output leads (one XT60 and the other Deans)which is useful for a twin ESC setup. (See photo below). I do also have a Zippy 8000mah 5s pack that will fit in but is considerably heavier at 900gms. However, this could be moved further back in the fuselage so no extra (compensating) weight would be needed but it would still add a porky 240g to the AOW but give longer flight times. We shall have to wait and see how it all works out after the first test flights. Next step is to get on with the detailing (pilots and markings) Edited March 12, 2021 by David Ovenden picture added 1 Quote Link to comment Share on other sites More sharing options...
David Ovenden Posted March 14, 2021 Author Share Posted March 14, 2021 I managed to get some lettering cut out and applied today. Unfortunately the white solartrim seems to have lost its adhesive powers so it looks like I will have to re-do the fuselage lettering. 2 Quote Link to comment Share on other sites More sharing options...
David Ovenden Posted March 16, 2021 Author Share Posted March 16, 2021 I've now cut out another set of letters and replaced the "non-stick" ones. I need to work on the small lettering and the "Royal Air Mail" logo next. I'm thinking of trying to paint it on clear film. We shall see how that works out!! 2 Quote Link to comment Share on other sites More sharing options...
Danny Fenton Posted March 16, 2021 Share Posted March 16, 2021 Looking great David, I did something similar on a Hawker Fury, printed the artwork onto clear decal paper, then a coat of clear Humbrol to seal it. Then once attached to the fin a layer of KlassKote to blend it in. Cheers Danny 1 Quote Link to comment Share on other sites More sharing options...
David Ovenden Posted March 16, 2021 Author Share Posted March 16, 2021 Great work Danny. If only I had your painting skills. When at secondary school my Art teacher came to very happy arrangement with me. If I did a couple of things each half term I could do homework in the other lessons. He didn't have to suffer so much of my less than great art; I got some other work done; so both of us were happy. On the other hand; I could never get enough of Wooodwork, Metalwork and Technical Drawing classes and was always good at those subjects. Horses for courses. Quote Link to comment Share on other sites More sharing options...
Danny Fenton Posted March 16, 2021 Share Posted March 16, 2021 The Cockerill is a printed decal, The tricky bit is removing the background, but software can do that, I used Photoshop. That was also used to flip the image. The white and black are all using paint-masks. It's not to difficult. I cannot paint free-hand for toffee! Cheers Danny 1 Quote Link to comment Share on other sites More sharing options...
David Ovenden Posted March 16, 2021 Author Share Posted March 16, 2021 (edited) I had a go with photo shop and managed to come up with this image. Its not completely correct (spacing and horn got cut off a bit!) but I think it will have to do for a sport scale model. I printed it onto decal paper so it should be nice and thin and not show up too much on the model. I also know that the "crown" is not the correct version. In the photo it is a "rare" 1936 Edward VIII crown however, maybe they repainted the logo later once he didn't become king? That's my story anyway! Edited March 16, 2021 by David Ovenden 1 Quote Link to comment Share on other sites More sharing options...
David Ovenden Posted March 17, 2021 Author Share Posted March 17, 2021 On 16/03/2021 at 12:39, Danny Fenton said: The Cockerill is a printed decal, The tricky bit is removing the background, but software can do that, I used Photoshop. That was also used to flip the image. The white and black are all using paint-masks. It's not to difficult. I cannot paint free-hand for toffee! Cheers Danny Thanks for the input Danny. I appreciate you taking the time out from building your models to share your knowledge. Hope the Auster build gives less "annoyance" now the major construction work is substantially finished. 1 Quote Link to comment Share on other sites More sharing options...
Martian Posted March 17, 2021 Share Posted March 17, 2021 David this is an exquisite build a real treasure . re the decals there is a chap that does vinyl decals for Richard Wills and they are very good and cost effective if hyou like I will dig out his and e-mail addy 1 Quote Link to comment Share on other sites More sharing options...
David Ovenden Posted March 17, 2021 Author Share Posted March 17, 2021 2 hours ago, Martian said: David this is an exquisite build a real treasure . re the decals there is a chap that does vinyl decals for Richard Wills and they are very good and cost effective if hyou like I will dig out his and e-mail addy Thanks for your kind words Martin. It has been a fun project to do. I can't think why it took be 35 years to get started on it! Re the decals - Thanks for your kind offer, but I think I have manged to create something that is satisfactory enough for me, given that this is a sport scale model. I am not going to add too much detail until after the tests flights. Looking forward to seeing your Tigercat model finished. That is quite some project. More planking than I'd be able to deal with I'm afraid. Keep up the good work! Quote Link to comment Share on other sites More sharing options...
David Ovenden Posted March 17, 2021 Author Share Posted March 17, 2021 This afternoon I made the lipo holding "cradle" that will fit in the nose of the model. The whole cabin and nose cone unit just unclips (held on my magnets) to change the lipos. Its big enough to take two sizes of battery -7000mah or 8000mah. I also started work on a pilot figure. Not sure how that is going to work out though! Quote Link to comment Share on other sites More sharing options...
GrumpyGnome Posted March 18, 2021 Share Posted March 18, 2021 Great work. Sure looking forward to a flight video. GG Quote Link to comment Share on other sites More sharing options...
David Ovenden Posted March 18, 2021 Author Share Posted March 18, 2021 Managed to produce some lettering to go over the cargo door. Once again its not perfect, but its OK I feel for a sport scale model. Nobody at the field will have the photo to compare the model with! 2 Quote Link to comment Share on other sites More sharing options...
Eric Robson Posted March 18, 2021 Share Posted March 18, 2021 I would be happy with that David, 99% would probably not know what type of aeroplane it is. 1 Quote Link to comment Share on other sites More sharing options...
David Ovenden Posted March 19, 2021 Author Share Posted March 19, 2021 I am somewhat held up at the moment as I am still waiting for some (longer) screws to arrive so I can fit the motors. Once that is done I can finalise the positioning of Rx and ESC's and ground test the motors and assess the thrust etc. I gave up on fashioning a pilot figure as it ended up looking like Voldemort from the Harry Potter films! I have ordered something from HK and I will try to adapt that to look like a 1930's commercial pilot. I also should fit some tail to rudder fairings to hide the elevator horn and add the tail bracing wires. 4 Quote Link to comment Share on other sites More sharing options...
David Ovenden Posted March 19, 2021 Author Share Posted March 19, 2021 I have made an attempt at the tail fairings. They are formed from litho plate and painted. They will be glued in place when the paint is properly dry tomorrow 4 Quote Link to comment Share on other sites More sharing options...
Danny Fenton Posted March 19, 2021 Share Posted March 19, 2021 Terrific job well done ? Quote Link to comment Share on other sites More sharing options...

Recommended Posts
Join the conversation
You can post now and register later. If you have an account, sign in now to post with your account.
Note: Your post will require moderator approval before it will be visible.