Leaderboard
Popular Content
Showing content with the highest reputation on 10/08/22 in all areas
-
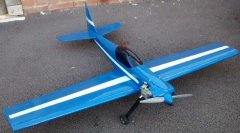
Here's my Eyelash. Not exactly new, I built it in 1975(!) from a MAN article and plan, (which I still have) and flew it extensively then over the next few years in Bermuda. Powered by a Cox TD.049, it was fast, with no throttle on the TD! A miniature Pattern plane, it was a very small version of the .60 powered Eyeball, 0-0-0set up, exciting to fly. I remember a 50 turn power on spin from a height that I could just see it (it's very small- good eyesight required!) Anyway, we returned home, the Eyelash went into the loft, in lieu of other models, and I only brought it out a year ago, after a 20+ years period when I was too busy working to fly. I now had entered the new mystic world of electric motors and lipos! So, on advice, the TD was hauled out, and replaced with a (Banggood) cheap and cheerful 2212 2200kv electric motor on a 1300mah 3s battery and a 6x4 prop. Wingspan 38 1/4" Area 215sq in Weight 24oz. Ace rigid foam wings, with fibreglass tape top and bottom. Solarfilm finish Well it flies as I remember it, with the added luxury of a throttle! It's fast! On flying it again, it still requires quick reflexes- and good eyesight, but it behaves perfectly, like the small pattern model that it is.5 points
-
I'm not going into details about the financial position of our club and what we are trying to achieve to raise the overall experience for members and indeed new flyers to the hobby. What |I will say is that It's certainly not "out of order, milking it or prohibitive" for us to charge £140 as a one-off contribution to the considerable sums that have been invested by the existing club members over many years via their subs that have been steadily increasing to give us the wherewithall to achieve something worthwhile and very much above the average UK club offering. It's not an existential issue at all. We've had no complaints, far from it. If your club has no interest in such a project for whatever reason or where a club's landlord will not permit anything more than cutting the grass and nothing much else then that's that.3 points
-
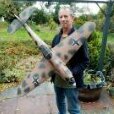
Little bit more done on the Mossie . The rear fuselage is skinned in 4" long sections of maker foam with no card . Attached with Uhu por . Then you fill the gaps with light weight filler . Sand the whole lot with 400grit wet and dry (very easy and quick ) . I then put one coat of slightly (10% water ) Pva on the foam . Let it dry and then brown papered with pva . Iron carefully (just keep the iron moving ) All very easy . Beautiful cigar shaped rear fuz . only weighs 4.75 oz . Stiff and very nice smooth resilient finish . i'm inspired to have a go at other things ! BTW , a nicer surface than the best EPO artfs......3 points
-
Just a quick PSA. Due to the general shambles that is more or less everything globally at the moment i am up the creek with neither a paddle or a boat when it comes to valve springs. We get these made in the UK and the lead time is usually 3-4 weeks. Noticing i was getting a little low we have ordered more but have been quoted 16 weeks as a best case scenario as that is the lead time quoted by their supplier on the material needed to make the springs. Oh and they have doubled in price too, which is just great. The upshot of this is i will be rationing my remaining supply to try and finish new engines. This means i will not be accepting any more orders for valve springs, carbs or needle valves (the valve spring is common to the needle valve) as a spare part and will also be unable to offer engine servicing unless the customer is happy to stick with their current springs as these are normally replaced during a service. Orders all ready in hand will be fulfilled but no more will be accepted. If you have an engine with a broken valve spring or damaged carb then unfortunately it is going to be out of service until i am able to get more springs. I appreciate that this may be frustrating if your favourite model is out of action because of this, but holding valve springs as a spare and not selling a whole engine with them in it is not a financially viable option. I have to try and keep engine sales going and this is the only way to do that in the sort term. Sorry for the bad news.2 points
-
Well i cant really sugar coat it so i might as well be straight with everyone.2 points
-
The bearings have arrived the wheels will be going onto Richards Website in about a week.. These are going to Richard for someone who has the Hurricane kit. These have a 5mm axle.2 points
-
Well, it was quite a few weeks but Smoke Trail has finally flown! The mods mentioned above have been incorporated and the calm weather forecasted for yesterday prompted me to pack the model and a can of diesel fuel along with my RC models for the regular Tuesday morning trip to the field. I was fortunate that scale free-flight guru Andy Hewitt was also there and he helped me greatly to re-trim Smoke Trail (more negative incidence on the tail) with some test glides over the long grass in the outfield. It must be 15 years since I last ran a diesel engine and it took me quite a while to get the Boddo Mills running sweetly but I got there in the end. With just a sniff of fuel in the clear tank, and the engine pop-popping away, Smoke Trail was launched into the lightest of winds and climbed up to around 20ft before the engine cut and it headed back to earth. Big cheer from the crowd in the pits and a big grin on my face! I had a couple of further flights with the same engine setting then leaned it out a bit for more power. This time the climb was more positive and, with a lot more fuel in the tank (too much!), Smoke Trail climbed to around 60ft or so and did several circuits before the engine cut and it drifted down just inside the field boundary. Phew, no tree climbing today. Overall I'm really happy with how Smoke Trail turned and I'm looking forward to the next outing. I've just got to get rid of the smell of diesel fuel from my clothes now!2 points
-
Martin , you can remove the card from the Hobby Craft foam board by ironing the back and peeling at the same time . Dont force it too much and it will come off clean . try it on a small piece first . The same foam board can be curved with a little patience . I dont think much of the 109 is sharply curved so you may get away with that board throughout . A lot of this foam board modelling is about learning the techniques of what you can do with it . I've just brown papered the cigar shaped Mosquito fuselage and I have to say , I'm very impressed . It is lighter and still resilient and yet way less time than consuming than the Heinkel which was wood skinned . The shape and finish is as easily as good.2 points
-
Flown a while back now (earlier this season) with the wing tanks fitted - they dropped of nicely before landing - finishes the model of nicely IMO well worth the effort! 🙂2 points
-
Gentle start on the 109 FoamFighter this evening one plan sheet of six has had all the shapes cut out and the first of those transferred onto the Hobbycraft 5mm foam board for cutting out, some advice i received recommended Gorilla white expanding glue for these large parts that are doubled up, it is lighter than the hot glue. Not the most available of glues, most places in the UK only stock the similar brown stuff, got some white ordered and on it`s way though, plenty of drawing round shapes and cutting out to keep me busy till that arrives.2 points
-
Finished this plan built Chris Golds Kawasaki KI-61 yesterday, waiting to maiden it later this week. 36" span electric on a 1300mah 3s, flying weight is 1lb 1 oz.2 points
-
Plenty room in there to fit an Elmic Commander escapement and a loop of 1/4 rubber.1 point
-
Still rather slow progress. A bit unusual as the complete canopy is a one piece hatch. The first wing. The Skray will have quite a modest span of 660 mm but there is plenty of area. The 3.7g servo buried flush with the underside. When filled and painted the only bit sticking out will be the tip of the servo arm. The alarming bit is the wing will be simply glued on to the fuselage. No reinforcing or bandages, just glue.1 point
-
It appears that the Easy Glider is a firm favourite and best placed for someone like me to get started again in thermal soaring. I would like to thank all those who gave me advise/opinion, which I have greatfully recieved. Thanks Harry Glover1 point
-
I have a T18SZ which is essentially the same and there are a number of ways to achieve what you want but probably the simplest is: 1. Setup your main motor in the usual way 2. Setup the secondary motor on another channel that you are not using and make sure that the control is set to the throttle stick (either J2 or J3 depending on which mode you fly) 3. Setup the throttle curve for the secondary motor to whatever works best, which is probably the same as the main motor. 4. Setup a dual rate function on the secondary motor channel to be operated by the switch that you want to turn the motor off 5. Flick the switch to the 'motor off position' and then use the AFR function to setup a throttle curve on the seocndary motor that is just a flat line at minimum setting (best to use the point or spline type curve). If you are used to using flight modes (conditions), then I would recommend doing the above except for setting up different flight modes and then setting up the throttle curves as per above. The advantge of using flight modes is that you can also change any other thing, like the rates, trims etc all at the same time. I hope thsi makes sense? As I said, this is a very versatile TX and there are many ways to achieve the same thing, what I am suggesting is only one way of getting there and there may be others that work better for you. Good luck Simon1 point
-
If the motors are both inline with the fuselage this might work but if it's a conventional twin with motors mounted in the wings then the extra drag from all the rudder trim to fly straight would dramatically effect the efficiency.1 point
-
We discussed this only a few weeks ago - search is your friend... 😉1 point
-
1 point
-
I also have the V2 of the Tundra. I bought a newish DX6e so I could set up the flaps. (definitely not required). Nothing but problems with the flaps. Could not get them to deploy evenly. Bought some $32 metal-geared servos for the flaps and still have problems. Took it to Alliance Rc, in Mesa, AZ, and Steve spent quite some time helping figure out the flap thing. As it turns out, the flaps on the left wing tend to have sticky hinges. I tried loosening the hinge screws and lubricating them and still sticky movement. So, I'm about to give up on the flaps. Didn't contact Hobby King to try to get a new set of hinges. So, probably I'll glue on some popcicle sticks on the wing bottom to hold the flaps flush with the wings. Maybe then I can get the plane to trim up and fly straight & level. Also, I bought the AR637T receiver to get the AS3X to help stability. Well, I must first download upgrades from Spektrum to get the DX6e to work with that stuff. So, I put in the required micro chip into the computer and downloaded 2 upgrades. However.....they are .saw programs and my computer will not open them. Seems everyone is having trouble opening the .saw stuff. So....short answer to long problem.....forget the flaps and AS3X and fly it like a 4 channel plane. End of story.1 point
-
Here are a few photos of some of the formation flying from the weekend The Jet Provosts of Harry Twist and Steve Kemp. And the Alpha-jets of Phil Stone, Harry Twist and Phil Cooke1 point
-
Actually, I am the club chairman and we've had to tread very carefully more than once to retain permission to fly. So nerrrr! 😛 I make the light hearted troll comment because that was one post (the first and maybe only post) by someone who is immediately taking an aggressive stance against what other people have said and has zero information on their profile. In fact, now I think of it, "The Bush" is quite similar to "Neil Bushall..." probably a coincidence, but both profiles were created on the same day and you've only posted twice...1 point
-
I take it you have a lot off experience of running a club and virtually loosing a field because of one sour apple ruining it for every one else. Having to then go to the farmer to plead your case to keep your flying field1 point
-
I have had this model for a number of years, but yesterday was the day. Maiden went well, a few clicks of down and right and big loops and rolls were the order of the day. VQ/Hobbyking Sea Hurricane. RCGF Stinger 10cc rear exhaust two stroke petrol. FrSky X20 with R8PRO 8ch RX 5x 6.5kg standard metal gear digital servo`s1 point
-
Hi All, Just finished my Flair Black Magic, covered in encapsulation/laminating film. Powered by an SC 30fs, I still need to add 100g lead in the nose to balance it. I bought the lit on a well know auction site and was listed as new, however, parts were missing which I replaced using the drawing and the bowden cables and I had to use snakes which is probably why I have to add the weight at the front. Note to self, check kits when bought and not leave them for years in the cupboard. Looking forward to the maiden Regards Robert1 point
-
My latest, Elcipson model R, 3D print in LW-PLA, this time with undercarriage. The first one suffered from some disasterous hand launches.1 point
-
I think that the point David was making was that if the uncle's neighbour objected to Nazi markings on the model he would also have objected to Spanish markings on the model as General Franco was a supporter of fascist Germany and Italy at the time.1 point
-
1 point
-
Shorts Sperrin from the Chris Golds plan, 74" wingspan. 4 x 55mm Vasa fans, running on 6S, 53,000rpm producing over 800g of thrust each and using 450W. Successfully maidened today. Will take off from grass runway (not bowling green smooth) but would be better of tarmac. Will happily cruise around on 150W per fan so 9 minutes flights are possible. The Sperrin was designed late 40s early 50s as a fallback in case the Vulcan, Valiant & Victor, all revolutionary designs failed to live up to expectations. The Sperrin was very much a conventional design, rounded rectangular fuselage, basic wing with the unusual (in hindsight) stacked engines rather than side by side. 2 prototypes were built and ended up being used as test beds for other engines and for flight research.1 point
-
1 point
-
My Sabre was flown again in good strength winds at the Orme last weekend - it went really well too - the model putting on a lovely show of speed and feeling great in both roll and pitch. The Sabre proved fully aerobatic with some lovely big loops and reversals!! I was a bit lucky in landing getting the model caught in ground effect after an intial touchdown and bounce reduced the speed below that of normal flight but remaining airborne close to the edge in the high winds. The model veered to the right more akin to a kite than a radio controlled soarer but thankfully my full left aileron input with the headwind was just authoritative enough to level the wings again before the second touchdown. I got away with it and thankfully the model came home without any damage! Ill wrap it in cotton wool now until the Mass Build Event September 18th.1 point







.thumb.jpg.632415da66ae2d3b91c91514c153e5df.jpg)
