Leaderboard
Popular Content
Showing content with the highest reputation on 23/11/22 in all areas
-
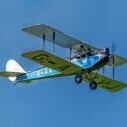
Yes it’s an Acrowot, I didn’t particularly want an Acrowot. I’ve had them before and they are a decent medium level aerobat, but wouldn’t necessarily feature on my letter to Santa these days. However, being a member of the RSPCA (Royal Society for the Preservation of Classic Aircraft… I think a few of us must be in this club for addicts), this 20yr old part built kit was offered to me by a mate who is sadly giving up the hobby due to failing eyesight, for what was basically beer money. I had all the gear and a modicum of an idea!, and preferring a lightly wing loaded model I aimed to keep it on a slight diet, but wished for a bit of performance via an OS 70 surpass. Not being the biggest fan of snakes and wishing to tail mount the tail group servos I lightened the rear end, by throwing the fus in a cupboard full of mice in a Swiss cheese factory, and what a neat job they did too. I unashamedly stole the scheme off tinterweb, ( I’m not imaginative, but am not a bad plagiarist) and made templates before hand cutting the film adornments, Looks alright. Balanced bob on where I wanted it, (slightly aft of Mr Foss’ recommended) AUW 5lb 7oz, which should be enjoyable. Not a skilful build, more an assembly, but more of a tale of how I couldn’t see it go to waste and has given me something to fertle with whilst saving a classic from the bin. Quite a nice winter hack.3 points
-
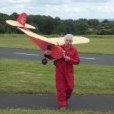
Here it is gentlemen, resplendent in Miss Blue Eyes' chosen colour scheme. Started on 23rd June and finished on 23rd November! If we allow £30 for the glues, pushrods, clevises, hinges and horns, the total cost of the build is £163.04. This is about £30 less than an ARTF WOT 4 and nearly £100 cheaper than a Speedair. Of course, it's taken me six months to build it so that has to be taken into account. I could have built it more quickly if family obligations had not interrupted the building process. I was also building another model at the same time as this one, something which I will not do again. With a 3000 mAh battery in the nose it weighs 4lbs 9 ozs and balances on the marked cg. I hope to maiden it tomorrow depending upon the weather. I've flown three different types of WOT 4, my favourite is the ARTF, and if this model flies as well as one of those I will not be disappointed. Graphics by Pyramid Models. Pin striping from white Solartrim.2 points
-
The KK Falcon build continues very slowly, I'm way behind my onetime expectation that it would fly this year! The fuselage is almost 85% finished with the u/c silver soldered and ready to bolt in. The tail feathers are also almost done with the intention of fitting the rudder servo in the fin area and the elevator servo to the rear of the fuselage- both powerful Micro units. The mammoth wings should be started in the next week or so. I'm really glad that I purchased most of the wood before the huge price rises of late 21-22. As for covering material I sourced 5yds x 5ft of SIG Koverall from the US for about £25 + PP much cheaper that the now expensive Oratex type materials. Koverall dopes on to the airframe and is then heat shrunk before finishing...only comes in white unfortunately. I'll keep chipping away through the winter months and hope to fly in 2023?2 points
-
I had a chat with Manny at the BMFA and he has confirmed a few details. It will be a tenner on the door for pilots, spectators are free. Camping will be around £16 and must be booked ahead of time. No A or B cert required to fly but all flying will be supervised to ensure we keep to the required standard. It is also the responsibility of the pilot to ensure their model is in good mechanical condition and they themselves are fit to fly. Insurance/CAA stuff is also down to the pilot and the guys from the centre have the right to make a spot check on anyone at any time. Beyond that they are very supportive of the event and are offering an indoor space so we can duck and cover if it rains and for any other activities we may decide to put on. It looks like we already have a nice variety of models lined up and hopefully we get the weather on our side.2 points
-
1 point
-
One, two...miss a few...99, 100! I have been making steady progress, posting build photos in the Chris Foss Facebook group. I'm probably going to pause the build now until next spring as sanding in the house upsets the management! I have plenty of photos, if anyone has any interest in this build I can post here. Cheers Gary1 point
-
1 point
-
Older models had a fibre washer but would often come loose until washer compressed fully. A small drop of threadlock will hold it and should also seal the thread from oil leaks . Personally I'd used a little Aradite Original as this wil make a permanent seal for the nipple. This can also be used to seal the exhaust to engine fitting. Just make sure that the screw threads are lubricated before tightening them. Makes a really good seal and unlike a gasket will only come loose when you want it to.1 point
-
I have just had 2 of the no.7 nipples delivered from RCJapan, they do not come with washers.1 point
-
Ben Buckle positioned his CoG at 213mm IN FRONT OF THE TRAILING EDGE. Latter bit done in caps as it is an unusual way of measuring. Source of this info is Outerzone1 point
-
Current OS56 weighs 404g Chris, & don't forget the position of the fuel & tank1 point
-
Offering a different view... My KK Falcon maidened just a year ago, and has had a lot of flying since. The elevator and rudder servos are in the tail, the battery is at the trailing edge of the wing, and there is no ballast at all. Powered by an OS56 four stroke originally on a 14x4 prop, now on a 15x4 prop, takes off at half throttle, flies around just above idle, and only sees full throttle for the occasional loop or roll. It was modified slightly to allow access to the undercarriage in case of bent legs, but not needed so far. Touch and goes are interesting! https://forums.modelflying.co.uk/index.php?/topic/49098-ben-buckle-kk-falcon/&tab=comments#comment-9051971 point
-
If it doesn't come with a washer you can always buy a lathe and make one. just being silly, now where did I put that glow plug washer ?.1 point
-
Don't want to " muddy the waters " Tim, But a poll round my club has come back 50/50 on washer fitted or not. But the washer does seem to solve some of the problem.1 point
-
Fit servos as far forward as you can. Use Dacron fishing line to run closed loops to the rear. No weight behind the CG. Plenty of these things have a pound or so of weight up front. look up the original weight of the 10 cc spark engines those things were designed for.1 point
-
I used nylon quite a lot as a youth, I'm seventy-four now, and I covered the fuselage of my first successful r/c model, a Junior 60, in Olive Drab parachute nylon. The flying surfaces were covered in Neutral Solartex. It was the drabbest looking Junior 60 in the world! My abiding memory of using nylon is that it absorbed lots of dope and each coat penetrated the coat below. On a wing for example, it can apparently penetrate the top surface and pool on the lower covering making the final result rather heavy. Polyester dress lining or chiffon is often used these days and can be applied over doculam or mylar. The doculam prevents the dope from penetrating the material and produces a lighter finish. I've never used doculam on a model though I have made up a few test pieces and applied tissue over the top. It seems to work as does tissue doped over fully transparent Solarfilm or Oracover but I have considerable stocks of Solartex to work through first and I'll probably die before they're exhausted! 😉 There is that little Sharkface to finish off mind. Picture of a model covered in polyester dress lining attached.1 point
-
Please do not do this. While the intention is probably good, you really must not add unnecessary weight to the tail of models like this. Look at the lovely side view on the photo Chris has posted. There is approximately 1/3 of the fuselage in front of the CoG (I have guessed) and about 2/3 behind. Allowing for the fact the motor will be at the very front end the proportions may even be 1/4 & 3/4. Let us say you fit a 15g servo at the back for the rudder. At a 1:4 proportion, 15g at the back will need 60g at the front to balance the plane. This is not a good idea when you are likely to struggle to get the CoG anywhere close to where it should be when it is finished. Fit your servos either under the CoG or in front if you can. I know you can add weight but planes fly much nicer the lighter they are especially vintage ones. Cracking building, by the looks of it it should fly well.1 point
-
Next is a dob of P38 car body filler, rubbed down to smooth.1 point
-
I'm already tired of the hype. The football world cup is already dominating the general news bulletins. It's impossible to avoid and I'm totally uninterested in it. I'm not a great spectator even in my own sports. We used to go to the TT every year but, to be honest, it was meeting friends and looking at the bikes lined up Douglas prom that was the attraction. I'm not a snooker player but I occasionally watch it with interest and the results of the UK Championship that ended last night wasn't even mentioned.1 point
-
Oh no here we go again🙄 a player coughs and the media panic and you hear nothing but football for weeks on end, pity the weather is not too good for flying........1 point
-
Surprised no one here has apparently built one of these, especially as Sarik sell a woodpack.1 point





.thumb.jpg.6e9ca6f431386c6c58ab30794f332751.jpg)


