Leaderboard
Popular Content
Showing content with the highest reputation on 21/05/21 in all areas
-
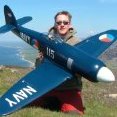
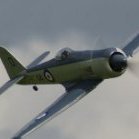
Hi all, here is the latest model to fly out of the lockdown workshop. Focke Wulf 190 D. Basically the Clive Smalley free plan from the 1979 rcm&e Scale Special . Enlarged to 48" wingspan, takes off from a drop off undercarriage, 4s lipo. In the air it feels as if it's on rails & has all the presence of a powerful fighter. Cheers John.5 points
-
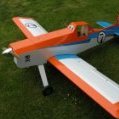
Bye bye Jolly Green Giant Couldn’t stand the green so a new scheme beckons!3 points
-
Something a bit different A birthday present from my eldest son! Today.3 points
-
Hi all. Some details of the Dora. Wing span 48", 4s 4000mAh lipo, motor is Turnigy 35-48. 840 kv, 12 x 6 prop, weight is 4lb 12oz,wing loading works out at 29 oz/sq ft. So it's not a lightweight. A drop off dolly is a much safer & more reliable way of getting into the air than a hand launch. The photo's are self explanatory, the fuselage is supported at the le & the dolly hooks over the te. The ' hooks' are flexible foam, don't make the fit too snug or it will hang up. This dolly was quickly cobbled together from bits that were to hand, it's not pretty but it works ok. The photo also shows an earlier dolly that gave reliable launches to a P40 for many years. Hope this helps . Cheers John.2 points
-
The 400ft rule for over 7kg models has been in place at least since 2003, probably longer. Extract of ANO from the BMFA members' handbook 2003 : This 400ft restriction was, and possibly still is, routinely ignored, by 7+ kg fliers. IMO this is probably because they had/have no idea what altitude their model is flying at & most don't have any working altimeter telemetry.2 points
-
35oz/sq.ft......dream on ? My Vulcan is pushing beyond 45 oz/sq ft....that doesn't have flaps and lands without a flair...or not much! Still think its worth a go with a little aileron (at height) to see if you can squeeze a little bit out without a impacting the stall characteristics. I need to try this with another model that has a vicious tip stall and lands like a rocket so not much choice for me (I'll keep you posted)2 points
-
Last year -when this thread was started - was one of building and kitting out my workshop, so a substantial outlay. This year has mostly been like Nigel says above, some kits and pre-owned airframes, so relatively modest expenditure -it varies. This hobby isn't expensive when set alongside some other hobbies and if it comes out of disposable income and gives you pleasure then every penny is well spent IMO. The amount you spend on the hobby doesn't seem to be a determinant of the degree of enjoyment that aeromodellers get out of the hobby.2 points
-
My current machine which is now getting tweaked, this was a Covid scratch build from a plan.2 points
-
I see on facebook pages they've a story, the club has secured it's future to fly on their site, after talks with the Council, ably assisted by the BMFA in said talks, well done all.1 point
-
1 point
-
Hi Jon, l did it as Paul suggests. It has the advantage that you can lay the parts flat and true on the building board before gluing them together. The rear fuselage is very flexible without the fuselage sides fitted so having the sides complete for assembly makes it easier to true up the fuselage exactly before clamping it up. I am doing a D model so can’t help you on the B model profile. Good luck1 point
-
If I was flying a model of >7.5kg at a site not sanctioned for flight above 400ft, yes I would only fly with a telemetry altimeter. If you have a model that big it is likely to be fairly expensive, and that means the vast majority will have some kind of telemetry already. Adding an altimeter is cheap insurance and would provide invaluable data in the event of an incident.1 point
-
None of us know everything but the important thing is that we help each other through what can be quite a complex subject.1 point
-
I would have thought that any B Cert holder should be aware of theb7 kg /400 ft limit if they had read the BMFA Handbook and CAP 658 (as it was) as you are required to do. I fly F3A aerobatics. Weight is limited to 5Kg for electrics or 5 kg dry for IC. Top of the box at the recommended 150 mtr flight path is 850 ft but if you fly further out you can easily breach 1,000 ft. Until I fitted telemetry I wasn't aware I was regularly at 1 ,100 - 1,200 ft. Key point is at <7.5 Kg, there is no height limit, provided you don't infringe controlled airspace, and you maintain unaided visual contact with the aircraft. It worries me that there are Club Committees that are unaware of these facts that have been around for well over 15 years. It doesn't do our hobby any good if those running Clubs are ignorant of the law. There really isn't any excuse.1 point
-
Accuracy? I don't think a few percent is likely to be quibbled over but in the event of an incident, a trace showing that the Typhoon with a 1/4 scale Cub shaped dent in its tailplane was at 350ish feet over a model field would give a strong indication that the model flyer wasn't totally to blame... When the questions are being asked, being able to state that your model was being flown within the permitted height as measured by a piece of equipment designed for the job rather than "Old Bob" saying "that looks OK boy..." will help reinforce your position in asserting that you were satisfied that you were taking adequate precautions to fly safely. Same with the digital scales you've checked the model with - an ounce or two due to inaccuracy might put you the wrong side of the law but the fact you'd taken steps to measure it might help in mitigation. Bottom line is that compliance is the responsibility of the pilot but anything that helps support you can only be a good thing.1 point
-
Really good news and a victory for what I'd assumed must have been a reasoned approach by the club and - if memory serves me correctly - BMFA advice and/or intervention.1 point
-
1 point
-
I think it’s difficult to justify flying a larger model without one unless you can explain how you are ensuring you’re not exceeding 400’ AGL. Few people in my experience have ever given me anything approaching an accurate estimate. While not preventing a transgression with a zoom climb, I have programmed a telemetry control which closes the throttle to idle before a model exceeds 400’ in a steady climb. This can be overridden should an exemption be active or some as yet to be imagined emergency occur.1 point
-
IMO yes, because I’ve not seen many flights by models of >7.5kg that stay below the 400ft limit. That’s pretty low, especially if you have a model in the faster end of the scale where pilots tend to use the vertical more when turning. Telemetry has shown me most of my flights exceed 400ft (especially the thermal gliders), though I have nothing in that kind of weight range so it’s not such an issue. The big thermaller (3m+ F5J) I generally only fly with an observer though.1 point
-
That's what shockies are for - exploring the outer limits of the envelope (model and pilot).1 point
-
Limit is clear Gary, always has been, meetings coming up Covid permitting put your case at one. And for the record, been watching Gary fly for years, not seen any cause to worry when he flies his big stuff, his shockies ? My lips are sealed. ?1 point
-
Exactly as it should be John. I wouldn't even be thinking about it if I thought that there was any risk to full sized aircraft.1 point
-
I agree that last sentence in the BMFA handbook is a little confusing and should probably be tweaked, but ultimately that doesn't matter - it's the law we have to comply with, not BMFA guidance (which is all the handbook is). That means getting the right permissions as per the relevant sections of the Article 16 authorisation if you want to fly powered models of >7.5kg at >400ft... Article 16, process for permanent authorisation for 7.5-25kg at >400ft: ...and as per Cassandra's post above, we have needed to request permission for a long time before Article 16 came along.1 point
-
AT a point now where the fuselage is nearly done and ready to have the very thin balsa areas glassed, more of that later. But I have to attach a tail plane seat to do that I need a tail plane so have commenced construction on this. This made up of 1/16th core with leading, trailing edges and ribs added to both sides. The plan show the leading edge of this done in three pieces but I decide to go with one piece by way of lamination after wetting the balsa with Windex. Seems to work OK.1 point
-
No need for any special treatment for the end of the comp screw . The Mills contra-piston is hard iron and will not be affected by the screw . I have a few mills and all have just normal screw ends ( not polished ground etc ) . If Contra-piston is a good fit it wont come undone in flight. The top of the screw is just like a normal 4 BA screw with an untapped part approx 4mm long . This is drilled and tapped to accept what looks like a 8 BA screw with a long plain shank. All simple stuff and is easy to make . Once made it can be heated and cooled in oil to get a nice blued effect as the original had. The small stop post is again just a short threaded 8 BA screw with a plain shank . A nicer looking comp screw can easily be made from a 4 BA cap screw then bent as per picture1 point
-
1 point
-
Depends on the model. Going up, they will dump some lift. Gives a steeper, if perhaps slightly faster, approach. Viable solution. If you're happy I'd stick with this. Going down may risk tip stall. Model dependent I think. In theory you should get drag and some lift. You could try this as well. Maybe make your flap switch do up for pos 1, neutral at pos 2, and down for pos 3. Then try them at height. Or get a bit more serious, modify the model, you could saw the ailerons in half and add a pairs of servos - the outboard bits of ailerons do most of the hard work. Other leftfield answers? Add a fuselage mounted flap (a few full size lightplanes do this, ex: http://flykr2s.com/bellyboard.html ), add some spoilers to the wing upper surface, add some thin, flat (i.e. ply) split flaps to the wing underside (forward of the existing ailerons).1 point
-
1 point
-
Thanks, Matty - I'll look for one! I have no experience of these at all, but even I should be able to find one. As usual, the manual assumes the reader is the designer (who only speaks Mandarin!).1 point
-
1 point
-
1 point
-
You built a Luftwaffe radar station as a backdrop for the night fighter taxi trials? Now that is true dedication to scale fidelity! ?1 point
-
Some may say this was unnecessary but I wanted to apply some extra strength to the tail so I made some 1/64" ply doublers each side, which are very light, and hopefully won't affect the balance too much. I added the 2nd fuselage side and applied some weight in the form of ballast sets for some of my gliders. Once the fuselage had dried I was able to see that everything was square. I laid the construction over the plan, and brought the tail together. Everything lined up. I used Epoxy and masking tape to bring everything together. Next one adds the remaining formers - as some of them slot in between the fuselage sides with little support until the top sheeting goes on I used engineers squares again to ensure they are vertical. I lined up the angled former to ensure that the top sheet will line up correctly. I then applied clamps until the aliphatic dries.1 point
-
It is slow going making small thick bits of plank fit but one side is more or less complete. No visible but a part of the root underside is open to give access to run the servo wires. I have used a small bit of 2mm Depron to surround the tail end of the jet pipe. I will also use some 6 mm Depron sanded to shape to give a small bell mouth radius on the inlet. Depron is much harder than the XPS foam so should give a bit more 'ding' resistance. Will probably do the wing panels next.1 point
-
Plan- built Gloster Gladiator courtesy of my pal Jim. 48" span, 6.5lbs, 17oz/sq ft wingloading. Runs on 3s2p2250mah G-Power lipos. She's a real beauty, with fantastic cockpit detail excellent flying characteristics and I hope that I can live up to thiose very high modelling standards. Delighted to have the Gladiator in my fleet for the future.1 point
-
Hi Paul, That's quite a buy , I hope you were wearing a mask when you did that. I have a used one that cost me £220 and I thought I'd done well. NIB one went for $1600 a a while back in the states? Is that around £1400? I was shocked, but spoke to another collector who had purchased on a few years back for £700. So the Mark 1 with Carb that looks like Enya and a Machined head as opposed to cast is the mark 1. One of my worse buys in the last few years was a Saito 30 Mk 1 Open Rocker brand new in the box. I got it from the states on eBay and it arrived looking new. The seller said it had only ever been mounted to a stand and on display at his home. Probably had, as it had not run and the mounting holes were huge. Something like 5mm across. Most Metric bolts were slack or too tight. Turned out to be an American size. I expect the original bolts would have been 3mm to 4mm. I cant recall which. One was even off center. I complained it wasn't as described but he'd covered it as he put the engine had been mounted on a stand. Quoting that to eBay Robots was not going to help as they probably thought they had to be drilled. Looking back at the pics there wasn't a pic where the bolt holes were in shot. I plan to use it as its not a collectors engine anymore. Cost £300 getting it and into the UK. Tax. I was as annoyed as I can get which is less laid back than usual. Nothing I could do about it and the seller is doomed. The Karma Police will get him, mark my words.? So how did you manage to get a classic Mk1 collectible for £100 ? and did you know what you were getting? Keep an eye out for the Karma Police ? The first day Open was a super success, better lay out then re opening Mk 1 - Very difficult as we have to stay within guidelines to keep the public safe and the staff. My duty of care to the staff is mega important as they will see a lot of possible contacts in ones days trading. If you going over, don't forget to wipe your feet, we have a new carpet as well ? better still take slippers ? Thanks for the continued support in advance Steve1 point
-
OK the tanks have been modified to correct their balance point relative to the GoG of the aircraft, meaning now the aircraft CoG remains at 172mm rear of F4 regardless of whether the tanks are fitted or not. I bought some 16mm dia stainless steel ball bearings off ebay, each weighing in at 17g, which has done the job nicely I'm hoping. Here's how... I chopped the tanks noses off ? and used the dremel to mill out half a sphere just bigger than the diameter of the BB. The BB's were epoxied into their pockets and then given a blending coat of P38 (I didnt fancy having bare metal on the outer surface of the tank) Like little Easter cup-cakes with their fondant! Finally this was all sanded back and blended, then primed ready for a bit more blue paint in the Airbrush. Total weight gain is 18g per tank and their CoG has been pushed forward to the required position relative to the balance point of the aircraft. Should all be relatively stress free now when we release the payload at low level over the LZ!1 point
-
In light of the recent debate regarding SUV's/4x4 in the towns and cities.... SCHOOL RUN RULES 1. Vehicle use is compulsory when the school is more than 50 yards from your house 2. Vehicles must be, as a minimum, a Chelsea Tractor, 9 seat people carrier, 4 x 4 or small HGV as appropriate. 3. Vehicles must not, under any circumstances, carry more than 2 persons i.e. driver plus 1 child as a MAXIMUM 4. In the event that you have more than one child attending the same school then find a friend/relative/partner who must obtain a vehicle of the same type and accompany you on the school run at the same time. 5. It is not allowed to give any other child a lift to school. If their parents cannot afford a suitably sized vehicle (see section 2) then their children don’t deserve to be educated. 6. On arrival, the yellow zig zag lines will be kept clear for your exclusive parking. In the event that the lines are occupied please feel free to park on blind bends, double park, park in front of peoples drives or park completely on the pavement. If possible demand to park on school property. It is your God given right as a 4x4 owner after all! 7. Take as long as possible to deposit your child at the school directly at the school gates. In the event that no parking is available immediately outside the gate you may park on the yellow zig zag lines (see section 6) for as long as necessary until a space becomes available. 8. At no time should your child be required to walk any distance to the school gates. High levels of strenuous exercise such as this can be harmful to your child’s obesity level. 9. Once the child is in school do not be in a hurry to depart. Leave your vehicle parked wherever it is and look around to find drivers of similar vehicles. 10. Having found other drivers please engage them in totally meaningless conversation for at least one hour. This will ensure that other road users will be inconvenienced as much as possible. Gathering in a large group on the pavement is also a good way of antagonising pedestrians as well. 11. When collecting your child at the end of school ensure that you arrive at least one hour early and please follow the parking instructions as above. 12. To occupy waiting time, follow the instruction is section 10) until your child comes out of school. 13. All drivers are to attempt to pull up outside the school gates at the same time. This is to ensure that no child has to wait for long before being collected. 14. On the way home please call in at your local supermarket for some shopping. Don’t forget to park in the ‘Mother and Baby’ area even though your offspring is 16. Allow your child to run riot when inside if possible and encourage him/her to scream as loudly as possible whilst running about. After all, checkout operators do need some form of distraction in their mundane job. 15. On arriving home make sure your child rests properly, after all he has to do it all again tomorrow!1 point
-
...and for you animal lovers out there; HOW TO GIVE A PILL TO A CAT 1) Pick up cat and cradle it in the crook of your left arm as if holding a baby. Position right forefinger and thumb on each side of cat's mouth and gently apply pressure to cheeks while holding pill in right hand. As cat opens mouth, pop pill into mouth. Allow cat to close mouth and swallow. 2) Retrieve pill from floor and cat from behind sofa. Cradle cat gently in left arm and repeat process. 3) Retrieve cat from bedroom, pick up and throw soggy pill away. 4) Take new pill from foil wrap, cradle cat in left arm, holding rear paws tightly with left hand. Force jaws open and push pill to back of mouth with right forefinger. Hold mouth shut for count of ten. 5) Retrieve pill from goldfish bowl and cat from top of wardrobe. Call spouse in from garden. 6) Kneel on floor with cat wedged firmly between knees, hold front and rear paws. Ignore low growls emitted by cat. Get spouse to hold head firmly with one hand while forcing wooden ruler into cat's mouth. Drop pill down ruler and rub cat's throat vigorously. 7) Retrieve cat from curtain rail, get another pill out of foil wrap. Make note to buy new ruler and repair curtains. Carefully sweep up figurines and vases from hearth and set on one side for gluing later. ? Wrap cat in large towel and get spouse to lie on cat with head just visible from below armpit. Put pill in end of drinking straw, force mouth open with a pencil and blow into drinking straw. 9) Check label to make sure pills not harmful to humans, drink glass of water to take taste away. Apply sticking plaster to spouse's forearm and remove blood from carpet with cold water and soap. 10) Retrieve cat from neighbour's shed. Get another pill. Place cat in cupboard and close door just enough so that head is showing. Force mouth open with dessert spoon. Flick pill down throat with rubber band. 11) Fetch screwdriver from garage and put cupboard door back on hinges. Apply cold compress to cheek and check records for date of last tetanus shot. Throw T‑shirt away and fetch new one from bedroom. 12) Ring fire service to retrieve cat from tree across the road. Apologise to neighbour who crashed into fence swerving to avoid cat. Take last pill from foil wrap. 13) Tie cat's front paws to rear paws with garden twine and bind tightly to leg of dining table. Find heavy‑duty pruning gloves from shed. Push pill into mouth followed by a large piece of fillet steak. Hold head vertically and pour 2 pints of water down throat to wash pill down. 14) Get spouse to drive you to the local casualty department. Sit quietly while doctor stitches fingers and forearms and removes pill from right eye. Call furniture shop on way home and order new dining table. 15) Arrange for RSPCA to collect cat and ring local pet shop to see if they have any hamsters.1 point








.thumb.jpg.6e9ca6f431386c6c58ab30794f332751.jpg)

