Leaderboard
Popular Content
Showing content with the highest reputation on 04/08/23 in Posts
-
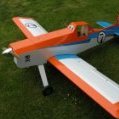
This one is from last week, but I only got the piccies last night from Derek. My 1997 RCM&E plan build - Little Mo. Still going strong after 26 years. Derek did a great job to capture Little Mo in flight - not the easiest task, for sure.4 points
-
Some piccies just received of my KK Outlaw in action from the other day, courtesy of my pal Derek, who's Algebra is the red and tartan glider featured landing in my earlier pictures. It wasn't that hard a landing, honest and my other two clubmates who had both showed me pictures of their Outlaws, flying from the field in the 70's were delighted to see that my 2023 Outlaw had the same retractable undercarriage. 🙂3 points
-
Everything at the ready ... sandwiches, crisps, chocolate, juice and a fresh flask of coffee made in the morning. I'm planning on getting dug in. The weather gods shall be with me .... they are busy creating my own little micro climate .... nothing can go wrong ...... Toto2 points
-
Glad you were careful typing that David2 points
-
Am aware. Years ago, on a course, had to do a stupid lecture on safety equipment. Rubber boots got an astonishing photo of the members of the association of New York Gay Firemen.2 points
-
That's the major wing repairs sorted out, just the covering and attaching the ailerons but before I do that there's the issue of the discoloration of the wood to deal with. The natural finish polytex will expose the difference in colour quite starkly, looking around the workshop I found this In the previous picture of the wing tip repair I have applied a coat of the paint and sanded it lightly and I think it gives the appearance of being from one piece of fresh wood? Well it does to my eyes lol ! this is perhaps a better illustration Now back too fitting out the fuselage U/C on,simples! Servos fitted in the same position as it was received in,however with the engine it was nose heavy? The joggle, cheap and effective. Works this end as well So far it's cost £20 for the airframe ,a small amount of wood, paint/fuel proofer and covering that I had to hand2 points
-
I think that they’re specifically designed to prevent ‘run on’ if you land a bit too hot. As I understand it they were the forerunner of brakes / arrester hooks and were unique in that you can adjust the point of break away by increasing / decreasing the retention by the number and strength of rubber bands used. Unfortunately they were really only suitable for use on grass strips, not concrete / tarmac.2 points
-
Some years ago there was a very young lad, barely able to hold the transmitter, who was fearless ... but they were his dad's planes and his dad did all the repairs 🙂 To be fair he got even better as he aged. His dad test flew my Precedent FunFly powered with an Irvine Q40. It was barely off the ground before he rolled it inverted and climbed away - my heart missed a beat! So ... like father, like son, I guess.2 points
-
When I bought my Maxlocks I was urged to buy a spare set of 3 connectors as they had had a number of folk getting grumpy having wrecked the odd connector. It took me some time to become competent with making DIY servo extension leads but it's been worth the learning curve. The important thing is to buy a crimping tool that has a preset crimping pressure. Worth the aggravation to have the inbuilt locking mechanism on the plug/socket comnection.1 point
-
😉 Aidan ..... I think that will do the trick ..... I get a feeling about this. what a team ...... 😄 cheers toto1 point
-
So ..... here we go again ....... summonsed for 10.30am tomorrow morning . At least its not raining so there is hope. RX battery on charge ..... 2 x trannies on charge. Done a quick run over the Arising Star and all looks good. Changed out what looks like 2 and 1/4 inch wheels ........ for the Dubro 3 and 1/2 inch wheels ...... and .... All the doofers are done in with some thread lock .... I wonder if kwik Fit will give me some credit for the 2 and 1/4 returns .....😄 I'm confident that there will be some flying time tomorrow but hasten to be too confident as it just seems to be let down after let down. If not ..... there is always Sunday. I have taken a break from any assemblies tonight in order to make sure I have my ship in order for tomorrow. I am sitting here with my mate John Smith watching batteries charge and checking out my kit to make sure that everything is covered that needs to be. I can't do any more than that. I am also about to wreak havoc on the SIM. So there ........ until tomorrow toto1 point
-
1 point
-
The Kestrel ribs are flat bottomed which is ideal for building over the plan. To me a wing jig would add complications with no benefit with regard to accuracy. Steve1 point
-
1 point
-
From the same company they also made a couple of low wingers, the Skyraider and Alligator, they were great fun.1 point
-
One point to notice. My wings are set at zero degrees incidence so in fact it does not give lift unless it is fractionally nose high. I keep telling people to read Kermode's "Flight Without Formulae"1 point
-
Rods are 1 metre length on mine, that would be enough for a 78 inch span wing built in 2 halves or more with wing tips and a centre section. 4ft could be unweildy in the workshop and 5mm rods might sag anyway,so standard 1 metre lengths would do. However rod type jigs need to have the ribs produced with holes accurately placed or the wing would be useless. Do your kit ribs or lasercut rib sets have pre cut holes for jig? If not it will be very difficult to cut the holes afterwards especially for tapered wings where every rib is different. Re consider before you construct a jig and even try plasterboard first! Only if you cut the ribs yourself ( or they are lasercut with jig holes) would a wing jig be useful- you bore holes in balsa blanks first using a template then put the blanks on a rib template with stubs to align. Or if you have plans with jig holes shown then you print every wing rib and stick onto balsa then cut. On the other hand a fuselage jig is so useful and well worth the trouble making one. If you want to make a fuselage jig I will describe a simple way of making the slotted parts without tools.1 point
-
Hi Christopher, I'm getting there. On my 4th ARTF and it's been fun but a bit " samey ". Still have a way to go yet as I need to sharpen up on setting servos, setting the TX as well, but from a model making position.... you are correct. I am already looking at a Kestrel for this winter. Many laser cut parts but still dome balsa bathing involved. To me it's the next natural progression. I can't say I've completely exhausted the ARTF side of things as there are still some slightly more involved versions that I have and can still tackle. Twins, Bipes etc, and I'll get around to them. However from a satisfaction point of view, I agree that it would be excellent to look at a good flying model and know that " I've put a load of wood " up there to fly. The flying aspect, I only have limited control over but I'm keen as mustard and I'll get there as well. The building or assembly aspect ( however you view it ) is something that has definitely kept my interest buzzing during the drought for flight time otherwise I may have got bored waiting for the flights to come along. I enjoy the forum side of things as well as there ie nothing stopping you from learning the ins and outs of all the facets of the hobby whilst you patiently try and get your wings. I checked out the barnstormer and that does look or interest.... for now though ..... the kestrel beckons and the other ARFT's fight it out between themselves for taking up the remaining shed space. Many thanks for posting up. Toto1 point
-
Well Toto, as Dorothy said back in 1939 "We're not in Kansas anymore". To get the true aeromodelling satisfaction I suggest that you slow down a bit and learn to fly your ARF's and meanwhile build a new model from the ground up. Something like this Barnstormer is not too difficult and a great introduction to learning how to select materials, cut parts accurately and fit them together using the appropriate adhesives. Believe me - to proudly say that 'I built this myself' is quite therapeutic. OK, it won't be built overnight but you will learn invaluable skills from the exercise. Regards - Chris1 point
-
One of my early trainers used to do that Brian. Fit the engine on a pod on top of the wing modify the fuselage and you will have an amphibian, take off on land, land on water. 🙂1 point
-
I too use the 4-Max ones (Ashlock) and my only criticism is that the metal pins are not quite the same as standard servo ones so you have to replace them. Small gripe for a good bit of kit.1 point
-
I’d also recommend the 4-max Maxlock connectors, I’ve been using them for a while, they have a good latching mechanism too. Crimping up your own wiring is the best and most cost effective way to use them.1 point
-
I can't quite read the brand from the photo. Previously, I've used (and like) the multiplex MPX connectors.1 point
-
Sketchers shoes, wife and daughter have them and think they are brilliant, really comfy. Not sure they know about the no bending to put them on though! Personally I use a 3 foot long shoe horn and elastic laces 😂😂😂1 point
-
A couple of links about jigs that may be of interest: https://outerzone.co.uk/plan_details.asp?ID=6254 https://outerzone.co.uk/plan_details.asp?ID=11465 Graham Edited to add, I use the SLEC fuz jig. I marked up a piece of board with pencil lines, so didn't use they sticky back plastic. Not saying it's better, or worse, it's just what I did. SLEC do sell additional captive nuts (at a very competitive price) and brackets - although I may 3D print a few brackets in alternative sizes. I do have a model in the build queue that the designer recommends a wing jig, so will be giving it a go in the fullness of time.1 point
-
Hi Aidan, I'll check them out. I'm all for that. As you point out ordinary Philip's heads seem to get chewed up quite easily. Maybe cheap soft steel as well if course. Also good to have a few spares in the box. Cheers Toto1 point
-
I used the singular as the generic term. We have them in the north of England probably in the same sort of density as most other small towns. I actually actively support some by donating clothing & other goods also have cards for their tax reclaim benefit.1 point
-
I am the lucky owner of Peter's Peggy Sue. I can testify that it is rigged zero/ zero (I converted it to electric!). Whilst I could argue a case for downthrust, I can't really say that the model needs either. With a bit of attention to the rudder trim, it loops straight, and flies circuits fast or slow without significant retrimming. As Peter has seen, it flies uplines for stall turns pretty straight, and I can tool around in slow low circuits without any real issue. However, it is extremely aerobatic if you open the taps, If I were you EB, rig it zero zero. If you can fly solo, you won't have any trouble and you'll love it. Graham1 point
-
You ideally want to stand at the mid point of the runway, and beyond that the mid point of the airspace you fly in. Not always possible, but that is the ideal. My current field i guess we stand about 30-40% of the way down? something like that. I have flown at clubs who have movable pilot areas and its just a pain. One club i flew at insisted we all moved from one end of the runway to the other as the wind changed half way through the day, only to move back a half hour later. If you are in the middle you just swap ends on the fly. I cant count the times i have attempted a landing one way only to change my mind and come from the other end as the wind shifted. Not a fan of the US layout's though as you tend to be about a half mile from the runway centreline which makes everything more difficult.1 point
-
Well believe it or not I will be, weather permitting, flying again next week. Nursie signed me off today after a somewhat miraculous recovery.1 point
-
That's not my mystery glider in the pictures Steve - I think it's our bungee guru Mike's Flinger - that's him in the picture above preparing to launch. My wee red mystery glider is the one to the left and right of Mike's Flinger - from Round #1 of this year's Bungee Competition, held in July.1 point
-
A bit off track, but "Swings and roundabouts" you can ride to the Butchers, or eat the Horse,,,1 point
-
How basic do you want? I trickle charge mine with a 12v power brick, and a dropper resistor. This is chosen to give around 100mA current At some point along the way I got all fancy and added an LED to let me know when the lead was plugged in.1 point
-
If you don't fancy soldering up a lead for your existing charger you can buy ready made leads. The vast majority of decent chargers ought to be able to charge different chemistries, including NiMhs, if that is what you are using for receiver batteries.1 point
-
I wouldn't worry about it and just have fun, of our 46 members there is only one capable of doing that, and it's with an electric Epp plane and the triple axis gyro, and it isn't me.🤢1 point
-
How longs a piece of string, some new lads I have taught to the solo stage never go on to become more than average, others have progressed rapidly, some of it is inherent ability, most is self discipline and practice/practice/practice. A question that can only be answered by the individual.1 point
-
I think it takes flying to another level. I'm sure with practice ...... lots of it ...... you would get there but maybe not anytime soon. I dont think this level of attainment happens overnight. Whilst I understand its horses for courses, to be honest this kind of flying doesn't really interest me personally but I do like to watch others practice their craft, By the sounds of your previous posts Paul, you seem to pick things up very quickly ( inverted flying for instance ) so keep going and I'm sure you will get there. The best of luck with your endeavours. Some progress videos would be amazing. Toto1 point
-
Some may get that good fairly quickly. Some may never get that good. Get a simulator and get practicing...1 point
-
File this under the 'E' of RCM&E A while ago on another thread there was talk about the transponder that is required to operate a uav outside of registered clubs in France. I realise that this will have little interest to the vast majority of UK fliers but the way things have a habit of spreading I doubt it will be long before the CAA begin to make noises. I also realise not everyone has any confidence in making electronic projects but as projects go this is one of the simplest!. It contains two components, a L80-R gps module from Quectel and a SeeedStudio xiao ESP32C3 development board..... and that is it! There are 4 connections between the boards and they sit almost perfectly with the gps module placed on top of the xiao, secured with double sided tape, three of the 4 connections are made with a simple vertical strap with only the Vcc connection which is routed between the boards with a wire. Power is supplied to the unit via the dedicated 3v3 connections on the xiao reverse. Do not feed it with 4.8v.. I'm not sure it will like it. The completed unit is shrink wrapped and weighs in at 9.8grams. There are instructions in the .ino file to modify your ID string according to the regulations. Balaise.mp4 BaliseDGAC_L80_GPS_XiaoESP32C3.zip1 point
-
Great stuff there, out of electronics since 1986, on the L 80 are gnd, and Vcc the battery connections ? would it work on a 7803 on 3 volts ?.1 point


