Leaderboard


Popular Content
Showing content with the highest reputation on 28/02/21 in all areas
-
The second, and final, build video on my Drone to Lancaster conversion, now all we need is lockdown to be over. Video4 points
-
I have two wings, or depending on your point of view, one big one. D.D. Marking out AGAIN. More of the same. The Skeletal framework. The sun was shining, can you get your hat on ??3 points
-
I have started the rebuild using the thicker section balsa. Let's see how long it takes me to finish it. Metre rule in the second picture lends scale to the project. It is being built with the door!3 points
-
Good morning Chris, I had given this some thought too! ? Truth be told, I'm really not sure if the black is more decorative than functional, gloss or matt? I can only find a couple of grainy, B&W photographs of the real jets in this scheme on the net, and it's impossible to tell. My logic was I couldn't see them paiting the canopy frame in the matt 'anti-glare' paint, I don't think its as hard wearing as the gloss paint (same with the models!) and in keeping with the overall gloss of a military display team jet I was going to put the gloss finish all over! Of course there may be a little artistic license required here, as there is already in other areas of my chosen scheme if I'm being totally honest! The events scale police with have to take the magnitude of this decision into consideration on the day! ?3 points
-
Taken yesterday afternoon, I’ve not seen this many cobwebs before, the field was covered in them. They looked even better this morning in the mist with the dew on them, alas, I didn’t have my ‘phone with me!2 points
-
two years ago i went to the doctors...he said "your going deaf"..............i haven't heard from him since.... ken anderson...ne..1...happy sunday dept.2 points
-
https://youtu.be/ILocarsxLvE This is the link to the video on painting your model pilot2 points
-
I think it's fair to assume that should your Wot4 be found impaled in the fin of an A380 shortly after landing at Heathrow that anyone with a professional interest would be given full details of where to come to take you away with little delay. The need for the name is only to protect against casual enquiries and possibly nefarious purposes.1 point
-
A bit repetitive, but progress. About to do the capping strips on the port wing upper side, then it can be lifted from the board. Cheers Danny1 point
-
I think that perhaps perspective makes the model look a little bigger than it actually is. However, at 82" span (top wing) it's not small. Hence the desire to make the outer wing panels remove and fold down to aid storage and transport. The original had one-piece wings. The lower wing was complete with u/c and the engine nacelles with the upper wing mounts and nacelle-to-fuselage struts still permanently attached. The plan shows that there would be 24 screws or bolts to undo each time you wanted to remove it. Not convenient at all. My method means there is one retaining screw for each outer panel (so 4 in total) plus 2 kwik-links each side to remove the lower rigging wires.1 point
-
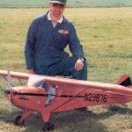
Horay, managed to load a piccy, better late than never. Bas1 point
-
Hi Danny I have made a few scale exhausts over the years. For larger models I have used thin steel sheet 20 / 22 gauge and brazed or silver soldered them together and it very strong . Any large areas need internal bracing to stop resonance that will eventually cause cracks. As John says they should be mounted on the engine mounts with braces to stop all the vibes going through the exhaust mount on the cyl head. I have made a couple of exhaust with aluminium sheet and brazed that with alloy brazing rods ,no flux needed, plenty of rods aavailable on eBay or look for Technoweld a branded . Flexi mounts are tricky and the stainless so called Flexi tubes are really stiff and are only intended to be easily bent into shape and not to absorb engine vibes. Good luck and let us know what you decide and show us any pics ?1 point
-
Lol what are you trying to say ? There is a part of me that agrees with you though!1 point
-
Ooops missed that' This is what I was looking at.1 point
-
Go on Danny, you know you want to go down the DIY route, it wouldn’t be you if you just bought ‘off the shelf’!1 point
-
Whatever you want Steve.1 point
-
I remember these with affection in my late teens, along with the 550 four and the 750 four. The days when you could ride a 250 on a provisional licence, the bikes had more character back then and you could tell what was coming down the road by its sound. Now, it seems that just about every bike looks very similar to the next. Or, perhaps I'm wearing my rose tinted glasses today? This is what I had in 1977.....would still look good today in my opinion.1 point
-
... just wait a moment here please, Phil... Isn't the black nose paint supposed to be truly matt 'anti-glare' scale wise? If so in your scale book as well, you can remove the cockpit tape and have it 'all' covered before having some 'clear gloss' in your airbrush leaving the gloss for the rest of your fuse? But then, I'm just an apprentice here. Chris1 point
-
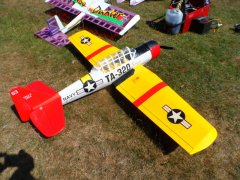
Thanks Ron and DD for the helpful advice + the anybody else with words of support. the new razor blade worked today and I'll try the scissors out on the C47 tomorrow. Things are coming along, but still can't say I am overly happy with the quality of covering however that's just down to me! To do Grumpy's office and canopy Tail stripes Aileron servo plates Glue all the hinges Control horns and clevis's Set control throws and check C of G I have a check sheet that I use on all of the models developed with the idea of no surprises for the club inspector or me come the maiden (I'll share it later on) PS, black spinners on order from George, teach me for changing from yellow!1 point
-
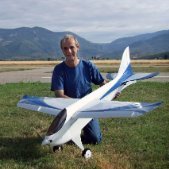
Thanks GG, Somehow the finishing off stages seem to take much longer to sort out than the building the main airframe structure itself. Still I think its getting there now. Only got the LiPo battery bay to build into the nose and to sort out the cabin window framework, then I can cover the fuselage.1 point
-
So today I started the wing end sections and oh boy did I wish I hadn't the balsa parts are small and extremely fragile, especially when you've got a head cold and the concentration of a goldfish. one of the ribs, note the thin cut out. So next I had to fabricate a new central rib spar as I glued the ribs into the wrong slots ?♂️ This wing is basically the same as the others apart from some small differences, Note the gap between the two ribs along the spar, this is to accommodate a wing joiner later on. If I've got the patience I'll try and finish the wings tomorrow.1 point
-
You mentioned that I must have popped inside your head Andy , Well , I did , a while back ,and I have to be honest , I found it a bit weird . There was this rabbit running around with a watch, and a cat with a constant grin on it's face that seemed to be in and out of focus . Understandably , I am not keen to go back in , so please don't ask .1 point
-
I won't be on the forum for a while, I ate a daffodil bulb I thought it was an onion. I have to go into hospital, the doctor said I will come out in the spring.1 point
-
Basil The AOP 9 like all Austers has a generous elevator so I would not worry too much about the wing incidence. If on its maiden it tends to climb readily just trim nose down a bit. That is all the full size did. It had an adjustable trim tab on the elevator that caused it to ride down or up a bit as required. Nothing else was adjustable. If after you have flown it a bit and you find the elevator is not inline with the tail plane in normal flight then you can considering adjusting the tail plane incidence. The position of its Centre of Gravity can have an influence as well. If you are a member of a club it is quite likely there will be an experienced pilot who would be willing to do the maiden flight for you and will be able to quickly diagnose what if anything is wrong, maybe before it is even flown, and what to do about it.1 point
-
If you feel it is to flexible it probably is. Even the tail plane of the Easy Pigeon [ a slow flyer ] I am fixing up does not flex anywhere near that much. Could you perhaps insert a carbon rod spar ? Just an idea. ?1 point
-
Thanks Alan, I love working in wood. A bit more done, now this is a real chore to me, I hate fitting radio and linkages, a real struggle for me. I made a slight error in that I mounted the aileron servo after I had figured out where the horn would be. ended up having to put a bend in the pushrod, not enough to be a problem, but enough to upset my OCD. First a couple of shots of the flap completed but not yet fitted. Now I know how I am going to mount the servos I will position the horns accordingly. The linkage may look a bit Heath-Robinson, but there is not much slop and wont blow back, as I said I hate doing linkages. There is bags of deflection and the aileron is still detachable for covering. Cheers Danny1 point
-
1 point
-
Hi Chris, I've recently painted my electric Mannock biplane with Valspar matt emulsion, brushed on, two or three coats sanding lightly between, then finished with a clear matt laquer, the brush marks are hardly visible.1 point