Leaderboard
.thumb.jpg.632415da66ae2d3b91c91514c153e5df.jpg)


Popular Content
Showing content with the highest reputation on 07/08/22 in all areas
-
I have had this model for a number of years, but yesterday was the day. Maiden went well, a few clicks of down and right and big loops and rolls were the order of the day. VQ/Hobbyking Sea Hurricane. RCGF Stinger 10cc rear exhaust two stroke petrol. FrSky X20 with R8PRO 8ch RX 5x 6.5kg standard metal gear digital servo`s6 points
-
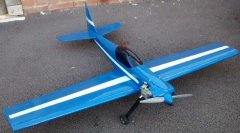
Finally got to fly the barnstormer from the mass build a few years ago,it's really pleasant to fly and looked great doing loops and stall turns in the blue sky Also got to maiden the powerhouse leaks a bit !3 points
-
Just a quick update on the wheels, specifically the Mustang, one step back.... Birds nest soup anyone? (I wouldn't it's a bit rubbery) The print had come off the bed so it did it's own thing! I was trying a print to get a diamond pattern for the tyre but even on the piece that had printed wasn't very good. So... back to the CAD and after a lot of thought and re-design tried again. Now THAT'S looking better. Also solved the print release issue as well so now it stays put. The finished print and fit on the hubs. Also managed to find out how to add the text to the surface. These wheels are going on my P51 and decided to use up the last of the bearings as my wire legs are definitely 4mm exact. All the future wheels will have Oilite bearings in. As My model is the Berlin Express I just had to paint the white walls and red hubs. Fitted to my Mustang. I am currently working on the Hurricane wheels and Tyres will keep you informed, if your interested of course?3 points
-
Hi All, Just finished my Flair Black Magic, covered in encapsulation/laminating film. Powered by an SC 30fs, I still need to add 100g lead in the nose to balance it. I bought the lit on a well know auction site and was listed as new, however, parts were missing which I replaced using the drawing and the bowden cables and I had to use snakes which is probably why I have to add the weight at the front. Note to self, check kits when bought and not leave them for years in the cupboard. Looking forward to the maiden Regards Robert3 points
-
Join our club and you'll pay a £140 one-off joining fee so with BMFA and the normal subscription the sum comes to almost £250. Very rarely get any reaction from prospective members when they see what they're getting for their money. The curse of running a club on a shoestring and dickering over a few rotten pennies here and there has kept the hobby back for far too long IMHO. Fly on a rough bit of old pasture that may well be unusable in winter etc with absolutely no facilities and yes, maybe a few quid a year will cover it. Have a decent and welcoming flying site, able to cater for all models all year round and more akin to to what one might find in the full size world of private club aviation, then you'll need to be far more realistic. People will pay a fair price if they feel that they're getting value for money.2 points
-
When I joined our club, I learnt that the members had put a lot of time and hard graft, also a fair amount of money into turning some scrub land into a flying field. I paid same fee as these people and it remains that way today. New members keep my fee low, they help pay to get grass cut that I use, they help do the work that gets done, and they're the future of the club when us older ones turn up our toes. Combination lock, change it and non payers can't dodge their fee. Late payers ? existing members pay full fee no matter when they pay, unless there's been working away or problems at home preventing their attendance, then the treasurer usually welcomes them back and knocks sumat off.2 points
-
This stuff worked great and its A3 sized. A4 is also available ... https://www.amazon.co.uk/gp/product/B07NGM3CCR/ref=ppx_yo_dt_b_asin_title_o04_s00?ie=UTF8&psc=1 This is useful for a the plastic pipe that fits Henry styke vacuums ... https://www.ebay.co.uk/itm/182227316539?var=484422434514 the oher essential is a wife who is happy for you to use her oven. mike PS the vac boxes are actually 3/4 full of foam to reduce the volume of air that needs sucking. Big one has a socket each side as she has a house Henry and I have a workshop one. In the end i only needed one vacuum cleaner, the other socket being ‘blanked off’.2 points
-
Hi foam works just fine depending how much heat you are using. Ive recently gone from ‘zero to hero’ in my own estimation 😀 using vac forming. Like a lot of things, its a lot easier than it looks. Ive used foam, liteply and 1/16 ply, glassed, to ‘build’ the plug. Glassed with 3/4 oz and wet sanded smooth. Takes a couple of hours end to end but us very rewarding.2 points
-
My latest, Elcipson model R, 3D print in LW-PLA, this time with undercarriage. The first one suffered from some disasterous hand launches.2 points
-
Having repaired the Dammit and inserting a carbon spar it was out for another round of flights, it is very, very quick!2 points
-
'Stephen Jones RC Aircraft' took some great footage of me flying the Terra 2.5 today, thank you! 🙂👍 Stephen's YouTube channel - https://youtu.be/Xc144cgeKXc http://www.practicalrc.com1 point
-
A few photos I took yesterday at our meet in Peterborough, couldn't of asked for better weather. One of the local modellers turned up on his bike with his gyro suitably mounted on the back. Rich1 point
-
Cheers for the interest.... Piston, liner, crank. They’re hard to find now. As I’ve got 4 sc46s, be handy to have to any spares for the future. Just Engines are getting low as well.1 point
-
My saito 45's and 45 specials all run on the laser 5 optifuel mix as do my OS, Enya and ASP's. In fact, i dont run any of my lasers on laser fuel any more as they are all on low oil so laser 5 should probably be renamed 'everyenginethatisnotalaser 5'1 point
-
our club is based on one of those bits of scrub land , not fit for anything so the farmer says ,and lets us have it virtually for free to do what we like . "We" are a very very small group of mainly elderly folk who have been flying together for 50 years or so , We have no facilities or ameanities or financial burdens , just the petrol for the mowers ,and just a small patch on which we can fly happily all year round and at any time for the odd pint or two . our club motto Is to have fun !! and we still do ! cheers1 point
-
Elevator pushrod on the wrong hole at the elevator or servo end reducing the throw? Just found this Reduced elevator throw You may need to reverse the switch used for panic mode.1 point
-
Although this is the tyre for the Hurricane I've nailed the way to get tread patterns, I've used a block pattern this time. This has been printing for 6hrs and is at 50%1 point
-
Darker on lighter colours not the other way round!1 point
-
We were burgled twice in the first two years of my membership but since then we've added shutters, bars and a steel door to our club hut and so far no-one has got through those. As for the grants, a few years ago the local mayor was hosting a meeting of all of the mayors in the Department of La Creuse which is the equivalent of an English county. This meeting included the Mayor of Mayors and we were asked to put on a flying display. Instead of being some dour local government officer, the Mayor of Mayors was an attractive lady perhaps no longer in the very first flower of youth, picture below. While everybody else was flying about doing fancy aerobatics, I plodded about the sky with my Junior 60. I walked over to the lady explained how the transmitter worked and handed it to her. She made the usual beginner's mistake of moving the sticks too much. Once I'd convinced her to make only slight movements she continued to fly the model for several minutes without any input from me. We gave her a certificate in the evening. We do this to all beginners who have a go on the sticks! Since then we have received 150€ each year from the Department!1 point
-
EPP is not styrofoam so it is not necessary to use foam safe glue. Infact I remember reading (somewhere) that regular cyano rather than ‘foam safe’ glue was recommended as it gives a better bond. Thick cyano is easier to use as the thin stuff tends to run everywhere but both work. I usually use Zacki on multiplex models with a kicker. Rocket and Zap cyanos are both good too. Just don’t use PVA or epoxy on EPP.1 point
-
Without reading all of that, the reason for a joining or rejoining fee is to stabilise the membership level and deter people from coming and going at will when it takes their fancy. A club needs to be able to forecast its possible incoming finances for field rent etc.1 point
-
I agree with you Jon about the half turn being madness. I’m talking about one or two clicks, that’s all.1 point
-
Quite a few years ago club I belonged to proposed a joining fee. I opposed it and even though I was chairman and voted against it the committee passed the rule. The reason for the joining fee was to get members to renew their club fees within the first 2 months of the new year - it had been found that some members were likely not to pay their fees until the treasurer found them at the field and demanded they pay up. It was thought that some members never paid and just flew when they thought the treasurer would not be around! Actually there was only 1 member who was named as doing that. But of course not paying the club fees also meant the ( non ) member didnt pay BMFA membership fee to the club either and therefore was not insured as far as we knew. This convinced the committtee to pass the joining fee rule. In effect the joining fee meant the club 'fined' those who tried to evade paying their fee unless caught. I still oppose the rule in principle but concede that it has some merit. I expect that most clubs have the joining fee for exactly the same reason even if they don't explain it and just say it's for paperwork or keys etc.1 point
-
Going back to this earlier post. May I just defend myself: By saying that I run engines on the rich side, I'm following the manufacturers instructions; in that as per the instructions for both 2 and 4-strokes, I run them slightly to the rich side of peak RPM when on the ground. I.E. In accordance with the following diagram, which appears in the instruction manuals for a number of OS engines. And also: The instructions for the RCV58-CD which say, "Main needle (high speed) adjustment: The main needle should be adjusted with the engine operating at full throttle. The engine should be leaned out until the RPM peaks, then enritched a small amount. This will allow for the leaning out that normally occurs in flight.". The instructions for an OS MAX-25FSR I also own, which say, (after running in) "After six to ten flights, it should be possible to run the engine continuously on its optimum needle setting. This setting is with the needle valve adjustment 1/4 to 1/2 turn on the rich side of the position at which the engine reaches its very highest speed. Your engine can be said to have completed its running-in period when it holds a steady speed at this optimum setting. Never attempt to gain a few more RPM by running the engine on a lean setting; it will run hotter and may eventually become damaged by over-heating.". I'm just doing what the books say 🙂.1 point
-
I thought i would persevere with the foam plug idea as it so much quicker to shape and sand, i used some of that insulation board that has the silver foil on both sides. The heat gun didn't seem to melt it so i made the plug, gave it several applications of Easy-kote then primed and top coated it yesterday. Today i shoved it in a pop bottle and formed it with my heat gun. Some of the paint came off on the canopy but i removed that with thinners and trimmed it down. Here are the results, very pleased with it, canopy glue has just gone on in the picture, i will paint the frame tomorrow. So result is you can use foam but obviously only certain types.1 point
-
Danny, I know these are not quite the same as your situation, but here are a couple if photos of how I added stabilising brackets to exhausts. Both are Saito engines and both are linked to the engine or the engine mount1 point
-
Shorts Sperrin from the Chris Golds plan, 74" wingspan. 4 x 55mm Vasa fans, running on 6S, 53,000rpm producing over 800g of thrust each and using 450W. Successfully maidened today. Will take off from grass runway (not bowling green smooth) but would be better of tarmac. Will happily cruise around on 150W per fan so 9 minutes flights are possible. The Sperrin was designed late 40s early 50s as a fallback in case the Vulcan, Valiant & Victor, all revolutionary designs failed to live up to expectations. The Sperrin was very much a conventional design, rounded rectangular fuselage, basic wing with the unusual (in hindsight) stacked engines rather than side by side. 2 prototypes were built and ended up being used as test beds for other engines and for flight research.1 point
-
About 45" span measuring the wings on the plan, the full size plans can be downloaded on this page, https://forum.flitetest.com/index.php?members/whit-armstrong.49164/#resources ME 110 plans on there as well. these ones give a smaller version on this post 109 plans.pdf1 point
-
Our field is still a lovely (?) shade of brown..... the troublesome Wheat field not yet harvested, but a dozen or so trailers of grain drove past the house yesterday so hopefully normal flying will resume soon.1 point
-
Up early and at the field by 07:30 the idea being to get my flying done before the heat builds up. I think I was a bit too early as I had to put a fleece on. The field is green 😲 and the crops have been harvested. Test flew this in the still morning air. Nice start to my day 🙂 Steve1 point
-
Thanks Shane for clarifying. I agree that the initial investment, being a bit too much, it will be paid off quite soon, especially if you're a "compulsive" builder...1 point