
Leaderboard


Popular Content
Showing content with the highest reputation on 03/07/22 in all areas
-
well might have taken awhile, but standing on its own legs at last, awaiting ground runs , too run engines in ?4 points
-
two slices of bread got married........everything went well until someone decided to toast the bride and groom.... ken anderson...ne...1...... bread dept.3 points
-
I absolutely agree with you. These classic pattern planes make really good sport planes now. Not too big, not too small and fly very well. I'm 3/4 through scratch building a 'Dirty Birdy' myself but progress is being slowed down by othe projects jumping the Q...2 points
-
Not sure my mind should be associated with great LOL but yes I can see the tape in your piccy now! Well done Cheers Danny2 points
-
It’s simpler than that. After a misadventure with the front numberplate while posing on the bike, the scooter was the only means of transport available to him!2 points
-
Here are a few photos of the example at Yeovilton. The restoration to its end of service condition is superb and really evokes the raw purpose of such a unique fighter. Rib tapes and stitching in abundance (stitches all in line with ribs as per the Fw 190 I am doing). Imo if you go for 1/16 on the fuselage you will need great accuracy on the formers to avoid a starved horse appearance. Personally I would stick with 3/32 and sand the tail end thoroughly. Obviously hard to judge when you have got it thin enough but the shape will be better.2 points
-
Hi Danny , That's exactly what i did ! Great minds think thesame !2 points
-
From an original by Roger Bale, circa 1998, to this:- # I wonder what happened?? To this 121 " span, zenoah 80 power and 38lbs! Strictly non aerobatic, it 'preambulates with purpose' The flag can be raised in flight and the Nav raises his hand to the onlooker In terms of storage and transport, its a bit of a monster!2 points
-
Hi all ! Another month has passed and the wing shells are about to being closed ! Sinds the last post i installed the wiring for servos , lighting , and retracts. This wing is ready to be closed after i dry-fitted the top shell (out of the mould). Before glueing the two halves together , i prepaired the second wing , thesame way , and made copies of all the parts needed for future wings. The second wing (R) I used some tape to protect the wiring from epoxy when closing the shells. The last test , to see if the ribs dont touch the top shell , or the gap between ribs and shell isn't too big (to much glue ),is done by placing a small plasticine ball between ribs and shell ,before dry fitting the top shell (in the mould ). After closing ,bolting together, and seperating the moulds again ,you can see how much the plasticine ball is crushed. In this case , the ball is reduced to aprox. 1mm , just fine !! This is done in several spots , just to be sure . Touching ribs make the wing surface bumpy ! Too much glue is ballast !! That's all for today , tomorrow is closing time !!2 points
-
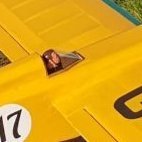
Well not flown yet but have added a few simple graphics and lettering just to finish things off and of course a suitable pilot (quite normal on this occasion) I have kept things really simple and just gone for basic lettering down the fuselage side. Tail wheel also now added, this is just a screw fixed commercial unit I picked up some time ago The wing graphic was created on cad and then cut on my Cameo Vinyl Cutter from some stock black film. The pilot is an old Flair ABS moulded affair with a bit of a repaint and of course ribbon scarf added. I also made up a basic windshield from scrap timber and clear acetate sheet. The original idea was a wrap around affair but this simple unit just felt more appropriate. Final addition was a battery monitor on the dash for those important visual check! After installing a 5cell nmh under the tank i checked the CG and did need to add a little nose ballast bringing the all up weight to 6.5lb and a wing loading of just about 23oz a square foot so not a floater but not a fighter either and should be fine. just need time and the weather to align now for test flights Linds1 point
-
Forecast wind and rain at the local strip, with a slightly better forecast for Kerloch, so loaded up a few models for maiden flights. The day didn't start well, with the entire herd of coos occupying the pits area and having to be persuaded to move away, leaving behind many of their calling cards. First flights with the Dallas Doll were fine, but though the maiden of the FMS Zero started off well, the wee fighter tracking straight, taking off at just over quarter throttle and surprisingly quick and agile. Then after a few circuits the canopy departed and, deciding to land I made the error of deploying the flaps and gear whilst turning onto the crosswind leg. The Zero flick rolled into a terminal spiral dive and after a bit of a search I found that she'd broken her back on a pile of rocks. The model is repairable, but it was going so well that it's a disappointment to have such extensive damage due to a silly error. As Trevor Howard might have said "That damned well shouldn't have happened!" Not a maiden, but next up was my Durafly Me163 and after a squirrely first attempt to get off the ground, the second attempt went better and a gentle climb out ensued. Clearing the fence I hit the Gear switch to drop the dolly, except that I didn't. I heard the nice DX9 Lady exclaim Throttle Cut! and the Komet fell to earth. No damage other than the aluminium hatch dowel was dislodged, but that was the Komet hors de combat. Finally the FMS Hawker Typhoon 1B had a better maiden, though well over-elevated and twitchy on full rates and felt a bit tail heavy throughout the flight, as if just waiting to bite and drop a wing if slowed down. To get the balance I'd fitted a 4s1p 2600mah pack and that gave a very rapid flight, but I think a bit of weight in the chin scoop won't hurt. No flaps this time and a faster than needed landing gave a spectacular somersault, but no damage. Photo credits Derek Robertson - thanks D!1 point
-
Good progress made over the last few days. Wing is made along with the nacelle sides. As can be seen have departed from the plan with a fully sheeted wing and to avoid scarfing in the nacelles each side goes full depth into the wing which in theory should be a lot easier.1 point
-
Frank I had this a year or so ago until I googled the DX6i model and found it was DSM2 , there was a lot of head scratching until then . As far as wireless buddy boxing goes once setup our club has no had no issues at all with them despite some sceptics saying otherwise . The only issue we ever seem to have is keeping the trims on both TX the same as the trim on the Master does not automatically transfer to the slave .1 point
-
Luke Metcalf flying this in true scale style at Weston Park International Airshow 2022. Lightning by name and he flies it like Lightning. I had trouble keeping up. Full after burners and tight turns. TERRIFIC ! Span: 176 cm Length: 284 cm Engine: B300F turbine (320N thrust) Built by Paul from the Airworld Modellbau kit. 9 litres of fuel onboard in two 4.5 litre tanks.1 point
-
I use similar products at work, and have never been tempted to put them in models. 1. They are very low powered (this is how they have a reasonable lifespan) so the transmission range is not much, only meters. 2. They transmit their GPS obtained location via bluetooth to a receiving bluetooth device (e.g. a phone). 3. This location data is transmitted by this receiver to the manufacturer's (or their agent) server, and subsequently the data relayed to you as the owner who actually wants their stuff back. Points to note: a. The transmitter (fob) device has to be in range (see point 1 above) of a receiver (see point 2) to know where it was last. This works great for kids in shopping malls, dogs in the neighbourhood etc as the transmitter is regularly coming into range of a receiver (or vice-versa) so the location is regularly being updated to the server. Does not work so well out in the wilderness, as there are just not the transmitter/receiver interactions going on. b. The GPS receiver is low powered for the same reason the bluetooth transmission is, so any kind of tree/long grass coverage will likely block the satellite view. c. If you as the owner need to have internet access to get the location data from the server. Seems obvious, but if your flying site is out of cell coverage, you won't get the data you're after. So to summarize, if you're considering this because you're slope soaring over large bushes at the coast, or the farmers fields are covered in tall corn, this will likely add little value, because it likely won't tell you anything until you're standing on the remains of your plane anyway.1 point
-
Thanks JD8. My concern is that as it's a gull wing then the wing tubes would not be continuous and due to the angles involved the inboard sections could end up being only 5" long. Is that sufficient? obviously the locating tube (carbon) would be well bonded to the laminated spar but its size and position are somewhat governed by the retracts and their recess in the main laminated spar. Of course an alternative to the CF wing tube could be an aluminium or laminated ply 'tongue' spar fitting into ply boxes in the outer wing panels, much like I've got in my Dane RC Leprechaun. The following photo is taken from Dane RC's build instructions and shows the ply joiner box.1 point
-
First attempt and I couldn't assign the 3 position switch I wanted, but got it assigned to the "gear" switch (all or nothing) which was not an issue as it was on a foamboard Versa (delta). The three or four goes I had today have resulted in success with the three position switch and hopefully AS3X and safe working. IMHO my advice is follow the instructions to the letter and in particular the order in which things are selected/adjusted. Although the tutorials are long winded I think when I fast forwarded/skipped sections I missed vital steps out. Plus some of the advanced videos cover ways to check things and adjust setting you really don't need to at this point. This might be a red herring, but when you are setting the model up (wing type etc) I needed to assign my preferred 3 position switch in the F-mode menu (before you select your model screen) this then gave me to option in the forward programming to select/configure it. If your RX powers up, twitches twice then AS3X and Safe is enabled + the switch has everything off, AS3X only and AS3X/safe put it in a model and go test it out out! I might have been lucky but with the Versa it makes launching a total doddle (after testing the settings at height), simples as 1,2,3 Power up and let the RX calibrate itself, select safe mode Select throttle cut and once on the flight line throttle stick to max Throttle hold off and let go of model - it will gently climb away and when ready switch safe off and start having fun In summary AS3X has its place in very windy conditions as any gyro would, Safe, can work if you the model (pilot) does something unexpected, flick the switch and its flying straight and level. For me the real area of interest is when hand launching high power models with low throws on the control surfaces (fun fighters etc). The sort of model that will catch a prop as you try launch or loop or just roll to inverted with the torque of the accelerating motor! Oh and never does the same thing twice. I have a couple of models that are rather challenging to hand launch and it this means I can get them away on my own in a reliable way then its worth the extra money even if I don't use any of the features in flight.1 point
-
Looking at the queues at the petrol stations today the nearest one to me has 8 pumps with each one takes around 4 minutes to fill a tank, with a queue of around 20+ cars, now work out how many charge points at 1 hour to charge an EV how many pumps will you need,,,?1 point
-
Glad you're not letting the standards drop Ken.1 point
-
Currently wind turbine manufacturers are looking for places to dispose of the blades. They are now starting to crack and stress. The balsa cannot be reclaimed as the assemby coats and bonds the balsa in a resin. This has carcinogenic effect when burnt. So looks like burial is the preferred option. The joys of a green future.1 point
-
As much as I really do want to be able to support my local model shop, it can be a very frustrating experience to go in with a list of items and only find one or none of them. It is ultimately far more logical and efficient for me to find an online vendor who has everything I need in stock. That £5 p&p is not such a sting when a package of £50 of everything I need arrives at the door. We hear a lot about how we should support our local shops and of course it would be great to do so, but ultimately, spending petrol money to get to a shop which has nothing I need doesn't help either them or me, nor can I realistically afford to buy things I don't need just to put some cash in the till. Of course, I can ask for the shop to order things in, but ultimately, as much as "browsing the boards" is an absolute joy and chewing the fat with the staff is lovely, leaving empty handed feels awful, so I suspect that people just avoid it. Again, another nail in the coffin, especially for those (unlike me) for whom building is a means to an end, rather than an intrinsic part of the hobby, and a big driver in making the choice between ARTF and plan/scratch/kit.1 point
-
My biggest bug bear from a building perspective, and something that does make a substantive difference to the overall cost of a build is those "bits and bobs" which one tends to forget. Threaded rod, hinges, screws, horns, a single sheet of wood etc which are fairly cheap but come with a minimum shipping charge that is often double the item cost. Petrol prices now have a significant impact too, a round trip to my local model shop uses a gallon of unleaded at getting on for £10, which is doubly annoying if they don't have the right thing. I realise that there are a lot of forum users with apparently inexhaustible wealth, but for those on a tight budget, these things have an impact on the choices made and for a lot of people, an rtf with everything in the box avoids those issues.1 point
-
Well i nearly got this finished for my planned day (today) but with the wind howling through the trees it is a none flying day at least for new models anyway so with that in mind I can resume a more leisurely pace in adding some finishing touches. I though it worth posting a couple of pics though as the model now in a fully assembled condition and ready for flight if not in her final colours and markings. The forward fuselage has some paintwork but the wings still have some detailing required on this front. Note the silver centre section, you never have quite enough covering do you! I will get this to blend into the final design somehow although i actually think it looks ok. British racing green with a slight metalic hint adds some period charm i think. I need to work on getting the clearance hole around the needle valve better, you would think after all these years i could do that but a little detail plate over the top will disguise that guff! the details remaining are the tail wheel steering linkage, windscreen, pilot and more paint and graphics so just a couple of leisurely hours should see things complete and then just wait for a descent day for flying. Linds.1 point
-
Looking good Keith. I think you might have your prop sizes the wrong way round. 1000kv motor spins slower for the same voltage than the 1250kv motor so will need a larger (or higher pitch) prop. 1250kv on a 9x6 and 3S will sing nicely!1 point
-
Sorry @Ron Gray, the errant wheel showed in quite a few. @Ron GrayI will sort some full size images out for you in a week or so.1 point
-
After the 110 doing a lovely take off and circuit before the gremlins set in . It was decided to hand over the very beautiful 109 to an increasingly impatient small dog . Unfortunately , the motor defied his attempts to start it , answering only with a repetitive bleep bleep . This further infuriated him to the point where I cannot begin to describe his verbal and visual abuse at both machine and mankind . We have had to up his dose as soon as he got home . Green Graham says we should have him somewhere near normal in a week or so .1 point
-
Laydeeez and Genulmen, I give you.... Regianne RE2005 The latest product from the G Davies/ E Robson/ R Wills skunkworks, a foamboard scratch build. Built using a mix of FliteTest Maker Foam and Hobby craft foam board with a small amount of ply, lightply and balsa. It's a full-fat flaps and retracts warbird at 55" span.I had hoped to fly it on my little 2200 3S packs, but I've been guilty of a heavy back end, which is a repeating theme in my life... Had I got away with the 3S packs, it would have been 3lb 10 Oz ready to fly. Sadly, I will need to use big 4S packs to get the thing to balance, so will now tip the scales just over 4lb. Hardly porky though. Some scale liberties have been taken with the undercarriage position in order to make a practical model. Our strip is bumpy and doesn't suit tall, narrow undercarriages. The positions are cribbed directly from My (originally Peter's) Ballerina. That copes perfectly with the strip, so is a great role (roll) model. It's covered in brown paper and PVA, although the tail feathers are not covered at all, just painted directly onto the hobbycraft board. It's then sprayed with watered down emulsion paint. It's a really cheap build. I reckon the material cost in the finished and painted airframe is no more than £25. If I can satisfy myself that everything is ok, I will maiden her tomorrow... Graham1 point


.thumb.JPG.051c5bb1d446ab8af8a2c911cbae321b.JPG)


.thumb.jpg.632415da66ae2d3b91c91514c153e5df.jpg)
