Leaderboard
Popular Content
Showing content with the highest reputation on 02/11/23 in all areas
-
To ensure it goes into extra time, please put me down for both, Richard. I've been quietly watching this and your earlier threads from the shadows and have enjoyed the entertainment so I'll be pleased to join in and help keep the project (and hopefully future ones) going.5 points
-
4 points
-
Got my old Saito .45s powered Bristol M 1 the other day,,, And like my Os .30fs it doesn't like my new fuel,,,3 points
-
Hi Piers, It's more to do with my slow rate of progress with regards to learning to fly than anything else. Having went with IC in my Arising Star, it's just been one drama after another trying to get things set up properly. I think that I should keep things a bit simpler for the time being and stick with electric until I am less reliant on others to train me. Provided the initial set up is done properly then it's just turn up at the field with the model and half a dozen batteries and away you go. Any drama's should really be down to my flying skills rather than faffing around with dead sticks and other IC related issues. I will still use IC and petrol as I have five glow engines and two petrol but shall wait until I have the time and experience to master them first .... right now .... it's all about stick time .... or the lack of in my case. I hope that makes sense. Toto3 points
-
The Bigger Skyray is now at last structurally complete. It still needs the receiver adding although it has all been connected and it works. The very last operation will be a light spray of clear acrylic to 'harden' the paint finish The spray is on order but there is no rush as the weather forecast for next week is for lots of wind & rain and the field is plenty wet and muddy enough already.2 points
-
2 points
-
I would strongly advise against using any food preparation equipment for warming epoxy, engines or any other model related activity as you do not want any off gassed residue contaminating your food. If your epoxy is cold and stiff a glass of warm water will sort it. Just stick the bottle in there or on the radiator for a short time and its problem solved.2 points
-
Airframe count seems to be rising Rapidly, getting ahead of ourselves i know but hoping this leads on to persuade Richard to do an American and Japanese pairing sometime next year.........I would buy 😁2 points
-
Hello everyone sorry my limited english. I built the fuselage with various modifications. Next step elevator+rudder. I want to show some photos where i had problems during fuselage assembly. The balsawood in this kit has natural curvature. I solved the problem by heating with hot airon +steam. Immediately when i got the sides straight i glued the nose with 15 minute epoxy glue.1 point
-
We (ie my wife and I) keep our spare/stock cyano in the fridge all the time. It's the best way to keep it fresh and usable.1 point
-
I've been a busy boy on this wet and windy day. The Stealth Quark prototype is now fleshed out with foam and I am liking what I see. All ready to try as a chuckie when the winds abate. Cheat holes underneath double up as a hand launch grab point. But it's a bit narrow and needs opening up a little. The fuselage width is just about comfortable to hold it on the sides for a hand launch if it comes to it. The canopy area and turtle deck is easily made from two flat lengths of 3mm white foam which rest on the front wing and fuselage top edges and is guided over the canopy profile. I think I could turn this into an easy to build model. At the moment I am thinking balsa wings and fuselage spine/crutch. Then foam fuselage surfaces and fins. Apart from the wing outlines, everything has been cut on the hoof. So I will need to reverse engineer it for a plan. But I need to try the chuck glide first before getting carried away. Wish me luck.1 point
-
OK .... back in the shed ..... stored the 1st wing build up out the way ....... replaced the wing drawing on the build board to take the second wing ..... and now I'll use the board to sit the fuselage on to change out the Engine..... first installing the motor mount .... which is only dry fixed at this point but the 30 minute epoxy is coming out as per the destructions in Part 20 .... then fix the motor which arrived today ...... and remove the throttle servo and push rod linkage .... I'll be back once I have this stripped down and ready to install the mount.... cheers toto1 point
-
1 point
-
A mixture, without any Castor oil, I will add 2% of it tomorrow and see what that does. Ps, don't tell Jon,,,😂1 point
-
I deliberately placed an order for goods that were "in stock" Order placed 28-10-2023 Had notification today 02-11-2023 that the goods have been dispatched. The tracking number is currently not showing though. Good job as the plane I ordered the battery's for is also due to me tomorrow.1 point
-
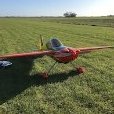
Out today with my 1940s Red Tailed p51 Mustang. The weather was perfect today for flying and i had a few successful flights and home in one piece.1 point
-
I use a hot air gun to warm glues up, works a treat and adds some heat to the workshop at the same time.1 point
-
I'm with Peter - cover, hinge, assemble. Simple and works for kits as well as ARTFs....1 point
-
Hi Peter, I'd thought of that and what I intended to do was once I had cut the hinge slots, take measurements of where they are and transfer to the drawing. I would measure to both slot edges and maybe even a measurement to the centre of each hinge for good luck. When it comes to gluing the hinges in place ..... its CA glue and I will smear a little vaseline or something around the surface edges to prevent the CA getting onto the covering....... or so it goes in theory ..... Hi Nigel ... excuse my not very well explained plan. What I should have said was ..... cut the slots for the hinges first, then cover then glue in the hinge. I think we are on the same page. Thanks for the com,ents chaps. Toto1 point
-
Well, I'd cover first, then cut the hinge slots otherwise it's the devils own job to find the slots you've made! Use a centring tool to get the hinge slots cut in the middle of the structure and control surface.1 point
-
Always hinge first, cover second, glue third.1 point
-
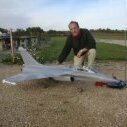
Beautiful Lippisch EDF model. Just the lightest bit of hanger rash going on..... 😲!!!1 point
-
Speak to a car paint factors they should be able to help . Many paint finishes specify different coloured primers to get the required finish and white is often used for bright reds ,yellows and so e metallics. Many of the high build prmers these days are 2k so not an option fir many . All the 1k high build primers i used over the years were either grey or yellow often refered to as spray putty. Normal white cellulose primer is readily available but is mostly a light primer with little or no filling properties. Water based paints are , as far as i know for finishing and not high build . Correct me if you know othewise. They are brilliant for fading in repairs but have very low build and still have to be finished / protected by a clear laquer usually 2k. The high build primer i currently use is a very light biege and is 2k . Beware if you try 2k as it uses isocyanates in hardener with associated health and safety issues paint factors can advise.1 point
-
Well there was the time when I put my BSA Gold cylinder head in the oven and a new set of valve guides in the fridge ... My wife (a tolerant woman) was unfazed but then, we'd only been married a couple of years - fortunately, she's still the same 50+ years later 🙂 I once decked a racing dinghy over a winter in the garage. It was very cold and the main problem was getting adhesives to set properly even with warming. Fortunately my current small workshop is an extension I built onto the house and is heated so it's not an issue.1 point
-
I ordered up some replacement matt white and clear self adhesive vinyl for laser thanks to DickW's link. Today though I'll be printing some laser printed waterslides, using a differrnt brand of paper and will see how those go.1 point
-
Agree completely - think about it for a second, if you use the microwave to warm the bottles then you are liberating the vapour from both the resin and the hardener into the environment of your microwave. At best you are contaminating the surfaces inside with chemicals that will be further vapourised with subsequent microwave use. At worst you are potentially offering up a mixture of the ingredients of hardener and resin into your microwave, to mix and partially set, thereby hanging around for even longer.1 point
-
That makes a lot of sense Toto. I think you are definitely going down the right road. Once you are comfortable with electric, then that will give you the confidence to then try your hand out with IC.1 point
-
Interesting that the scores on the doors are exactly even at 17 each . Tempest v Fw190 It will probably go to penalties . 😁1 point
-
Scratch built B&Q foam simple EDF. 64mm fan off a 4s 2200mAh. Own design - after people suggesting it looks a bit like a Gnat I think I’m going to christen it the “Flat Gnat”. 🤣1 point
-
Same process for the throttle lead on the other side encased in protective tubing. Next I removed the choke and throttle servo cut out pillars and refitted the lipos. All good. Next I tested the motor again without the prop and all was well thankfully. Back on with the cowl and with me being a happy bunny. Really now I am not too far from thinking about the maiden. The only things left to do are to drill out the spinner base plate to accommodate the prop driver bolts re-check the CoG and if necessary slightly reduce the elevator throws if she is still a bit tail heavy.1 point
-
A new camp commander was appointed and while inspecting the place, he saw 2 soldiers guarding a bench. He went over and asked them why do they do it. "We don't know. The last commander told us to do so, and so we did. It is some sort of regimental tradition!" The new camp commander searched for the last commander's phone number and called him to ask him why he wants guards in this particular bench. "I don't know. The previous commander had guards, and I kept the tradition." Going back another 3 commanders, he found a now 100 year old retired General. "Excuse me Sir, I'm now the CO of the camp you commanded 60 years ago. I've found 2 men assigned to guard a bench. Could you please tell me more about the bench?" The retired General said," What!? The paint is still wet?"1 point
-
Electric every time, no messing about fueling, starting, dead sticks, cleaning the mess off afterwards, no noise. Just plug and go. Yes you do have to invest in some battery packs up front but when you get to the field just plug in a battery and fly, no tuning and fiddling required. Ok so I'm biased I sold all my glow engines years ago and never regretted it.1 point
-
That's a shame. We also have indoor sessions, so guaranteed a 'flying fix' once a week...1 point
-
1 point
-
As always Andrew , its the lack of numbers . Ive enjoyed doing the 190 but it still takes a lot of time to get a new kit up and running . Plus of course , I have to build and paint the proving kit and document it with photos and explanations . Right at the beginning of this thread , we had this conversation . I clearly design these kits as a passion but we still need to sell at least 20 to break even, realistically . I see my customers as friends really, because they are like minded and they want the same as me , but even though I dont want them to become "Warbirds Replica Reps " as we are not salesmen and dont want to bring that tacky side into our hobby . I've pretty much spoken to everyone on my threads , what other company designer can say that ? My point is , (in a rambling way ) that if we want to continue being able to continue enjoying the building of good looking and practical scale models we need to try and bring on just one person each . Right now for example I have committed on here to do the Tempest . I wont let my lads down , and if I say I'm going to do something I pretty much will , but I doubt if I have more than five people who want the Tempest at the moment . That's a long road to walk for five kit sales with small profit margins . It sounds bleak and I know there is another thread on this forum at the moment that is going through the same old argument. But on the other hand I moved to a new home and club two years ago and I can feel my models beginning to appeal to some of the members every time I show up . So I think the answer is just that. Keep your antenna up for those that show interest in your scale models , they may be thinking of having a go and just need a shoulder to lean on . We've got some newbies here and I don't mind what questions they ask , because if they dont know , others wont know either . In fact I have real soft spot for our newbies . Imagine what it feels like to be swimming in a pond full of people like us Andrew , who have decades of mistakes under our belts? The worst thing we can do is retreat to the shed , slam the door shut and gloat over our balsa stocks and unstarted kits . What we should be doing is emerging from that shed in the spring , like an old grizzly bear , sniffing the wind and carrying a Warbirds 190 under our arm. And maybe during that winter build we should have taken it to the club meetings and explained how simple it was to make . In a nutshell , bringing on one protégé each would secure the future for all of the grizzlies.1 point
-
Needs a bit of colour now doesnt it ? So , I was going to paint some red , but then thought it would be more like your build (with decals ) if I made up some decals instead . They will go over the grey with nice solid colour so no need to mask anything . First a close up of the soft edge as described earlier . Then on with the numbers and fuselage band . Canopy just resting on at the moment . OOhh ! Suits you Sir ! Something for the weekend Sir ?1 point
-
its hilarious that you all think my models are as bent as a 9 bob note. Its not stated, but its at least implied, and i find it really quite amusing as the utter dogs dinner of a P51 i rebuilt recently is as straight as an arrow despite the insane amount of work i did to its wings, and the Hurricane which came before it was bent as received and straightened by looking at it. In any event, clearly you missed the point i was trying to raise. So to reiterate it yet again...As with all things in engineering there are tolerances at work. Materials, processes, etc. And in the case of a newcomer to building, as our OP is, the objective is to not discourage the poor chap by making the whole thing seem far more complicated than it is. The model in question would fly just fine if one wing was an inch longer than its mate and the fuselage totally flat on one side with the other curved to meet it. Would be perfect? of course not, but it would fly fine and still be a valuable tool for learning. On the subject of learning, if you cannot build a box fuselage with nothing more than a flat board and some squares then a fuselage jig will not help you. in fact it may well be a hinderance as any tool is only as good as the person using it. I have no idea how many box fuselage models i have made over the years and a jig was never needed at all. So to finally answer your question, yes i would build as accurately as i could, but a fuselage jig (the type we use anyway) is not any guarantee of accuracy so i would not use one. RE the laser beams, awesome work on the tin triangle, it really looks fantastic, but its not the same as a 40 size trainer. The two models are in different leagues and their builders have vastly different skills and levels of experience. The vulcan is an exception being a delta, but you can level wings/tails by eye very easily without the need of a laser level. In any event, presenting a model like the vulcan as a justification for needing X,Y or Z is pretty disingenuous as the two are not comparable. You also need a large space for the laser level to be of any help at all. Certainly it would be utterly useless to me in an 6x8 shed. I also have one final question. What about the wings? Warped wings are far more likely to impact the performance of the model than a slightly bent fuselage and yet no comment is being made about them. i would recommend putting more focus there rather than worrying needlessly about the boring box that keeps the engine, wings and tail spaced out from eachother.1 point










.thumb.jpg.632415da66ae2d3b91c91514c153e5df.jpg)


