AVC Posted January 8, 2016 Share Posted January 8, 2016 Thanks Martyn, I may give this mylar a go! Quote Link to comment Share on other sites More sharing options...
Jimbo565 Posted January 8, 2016 Share Posted January 8, 2016 Edgar I can tell you that the ailerons need a fair bit of differential my Flair 1/4 scale tiggy had 2" up and 1/2" down,and it flew a treat I now have a 66" tiggy from the premier kit and have the same ratio just scaled down a little,eg 3/4" up and 1/4" down approx. I have 1" either way on elevator and rudder as much as you want,bear in mind the rudder is very powerful,I would suggest 1" either way for starters. JIm Quote Link to comment Share on other sites More sharing options...
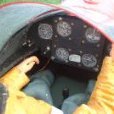
Erfolg Posted January 8, 2016 Share Posted January 8, 2016 Jon That is one tidy and well organised work space. I am not sure about the spanners though. Quote Link to comment Share on other sites More sharing options...
Geoff S Posted January 8, 2016 Share Posted January 8, 2016 Posted by Jim Carss on 08/01/2016 10:58:56: Edgar I can tell you that the ailerons need a fair bit of differential my Flair 1/4 scale tiggy had 2" up and 1/2" down,and it flew a treat I now have a 66" tiggy from the premier kit and have the same ratio just scaled down a little,eg 3/4" up and 1/4" down approx. I have 1" either way on elevator and rudder as much as you want,bear in mind the rudder is very powerful,I would suggest 1" either way for starters. JIm I would certainly agree about aileron differential. My DB 58"ws Tiggie has 20mm up and 10mm down on the ailerons and turns easily without needing rudder input. I've increased that a bit for future flights after the maiden a couple of weeks ago. For details of the control throws see my post further back in this thread. Geoff Quote Link to comment Share on other sites More sharing options...
Myron Beaumont Posted January 8, 2016 Share Posted January 8, 2016 One aircraft I have built two versions of over the years was the Piper Cub .It probably would fly best with only up aileron (no down) but never tried it ! My first experience of aileron reversal and scary . Edited By Myron Beaumont on 08/01/2016 15:11:12 Quote Link to comment Share on other sites More sharing options...
Jon Laughton Posted January 9, 2016 Share Posted January 9, 2016 Erf - the picture looks better than reality! And the spanners were for the prop nuts! Quote Link to comment Share on other sites More sharing options...
.. Posted January 9, 2016 Share Posted January 9, 2016 Posted by Jon Laughton on 09/01/2016 08:03:41: Erf - the picture looks better than reality! And the spanners were for the prop nuts! Looks nice Jon , good to see that you have gone for the Eflite retracts as a few seem to have had problems in that department in the past. Have you run it up yet ? Quote Link to comment Share on other sites More sharing options...
Jon Laughton Posted January 9, 2016 Share Posted January 9, 2016 Thanks Justin: the engine is well runin (4+ hours) as it was previously in a YT Spitfite that now has a 180 Magnum in it. I will check all systems/ ground run for the on board glow in Spring when there is a chance of flying / landing on a drier patch! Quote Link to comment Share on other sites More sharing options...
Robert Parker Posted January 12, 2016 Share Posted January 12, 2016 Hi All, I'd just like to share with you my completed own design Short Stirling. Span 72" Length 64" Weight: I was aiming for around the 8lbs mark but it crept past this a little and is nearer 9lbs Functions: 5 plus landing lights. Construction: Balsa / ply Covering: Tissue & Dope with Spectrum paints Power train: As the TN Sunderland from 4 Max using a single 3s 11.1v 6000mAh Lipo, May 2014, It all started here by accident, literally - I broke my right hand whilst swimming and ended up in plaster and unable to drive / work and after the first week of boredom I had an idea. Thankfully I'm left handed. A roll of lining paper, some drawing and measuring equipment and of course a 1/72 Stirling that I had hanging in the workshop. January 2015, Finished. Since taking this photos I have put a lens on the landing lights With such a big open cockpit it needed a crew Homemade main canopy and bomb aimers canopy. I must thank Real Model Pilots for the crew and gun turrets they are brilliant and take the model to another level. For the bit in between the before and after shots take a look at Design and Build Short Stirling blog. When the weather improves I'll take some better shots and maiden her I hope. Regards Robert Quote Link to comment Share on other sites More sharing options...
Peter Miller Posted January 12, 2016 Share Posted January 12, 2016 That is really something!! Impressive to put it very mildly Quote Link to comment Share on other sites More sharing options...
john stones 1 - Moderator Posted January 12, 2016 Share Posted January 12, 2016 Cracking job Robert. John Quote Link to comment Share on other sites More sharing options...
Robert Parker Posted January 12, 2016 Share Posted January 12, 2016 Thank you both very much. I just noticed I put the wrong finish date. It should have been January 2016 and not 2015, still not used to 2016. Regards Robert Quote Link to comment Share on other sites More sharing options...
A.A. Barry Posted January 12, 2016 Share Posted January 12, 2016 NIce work Robert.......the men set it off ...love it... Barry Quote Link to comment Share on other sites More sharing options...
Geoff S Posted January 12, 2016 Share Posted January 12, 2016 I thought you must have a very big workshop when I saw the first picture with the 1/72 model on the table. Fantastic job and superbly finished. If it flies as well as it looks then it's a double winner. Best of luck with the maiden though with the weather as it is I suspect it'll be a few weeks yet. What motors, battery etc have you got in it? I think your weight estimate was pretty accurate. I find models always end up heavier than you hope but you weren't too far out. Geoff Quote Link to comment Share on other sites More sharing options...
Chris Barlow Posted January 12, 2016 Share Posted January 12, 2016 Just stunning! Excellent job Robert! Quote Link to comment Share on other sites More sharing options...
Robert Parker Posted January 13, 2016 Share Posted January 13, 2016 Hi Geoff, The design part was done on the breakfast bar in the kitchen. The majority of the build was done in my workshop which was a spare bedroom and the final months were done in my newly fitted out attic which I was going to use as a workshop but I'm a bit too tall that and my wife has allowed me to remain in the spare bedroom. She does sometimes complain that there are planes everywhere. As for the motors etc they are as follows Motors: 1100kv, 345w Props: 8x6 three blade Esc: 33Amp Battery: 3s 6000mAh 40c cont 60c burst Plus a 5amp ubec Regards Robert Quote Link to comment Share on other sites More sharing options...
ken anderson. Posted January 13, 2016 Share Posted January 13, 2016 well done from me robert...send the photos to young Beth...she may put them in the mag..... for all to see. ken anderson...ne...1 well done dept.y Quote Link to comment Share on other sites More sharing options...
AVC Posted January 13, 2016 Share Posted January 13, 2016 Impressive job Robert! Quote Link to comment Share on other sites More sharing options...
Geoff S Posted January 13, 2016 Share Posted January 13, 2016 Thanks, Robert. I think you should have plenty of power available for a 9lb model so few worries on that account. Geoff Quote Link to comment Share on other sites More sharing options...
mightypeesh Posted January 13, 2016 Share Posted January 13, 2016 Gorgeous bit of work there looking forwards to some flying shots! Quote Link to comment Share on other sites More sharing options...
PeterF Posted January 18, 2016 Share Posted January 18, 2016 Here is my Christmas present all assembled and now waiting for that elusive first thermal. This is the 3.0m span Gracia from Topmodel in the Czech Republic. Straightforward assembly, the wings are very nicely put together. The motor is one of the GliderDrive models from HobbyKing, an outrunner inside an outer can with rear exit bullet connectors so no wire to rub inside a narrow nose. I am glad I did not go for the 3.5m span version, room is tight in the workshop with the one I do have. Quote Link to comment Share on other sites More sharing options...
Fredrum Posted January 18, 2016 Share Posted January 18, 2016 Nice. Quote Link to comment Share on other sites More sharing options...
Paul Marsh Posted January 24, 2016 Author Share Posted January 24, 2016 Quote Link to comment Share on other sites More sharing options...
Masher Posted January 30, 2016 Share Posted January 30, 2016 Inspired by Percy Verence's comments and help together with the blogs from Stevo and Jim Newbury, I had to build a Ruhig Tigre. This is from the original Colin Dickinson plan at 60" WS. Not flown yet because of the hideous winds and state of the strip. This is a great model to build (and fly according to PV) but was the reason I couldn't take part in the mas build - I had already started the Tigre and you may see some similarities. Saito 56 up front. Stickers are completely over the top due to the fact that I gave myself a vinyl cutter for Xmas - great machines! Edited By Masher on 30/01/2016 14:33:42 Quote Link to comment Share on other sites More sharing options...
john stones 1 - Moderator Posted January 30, 2016 Share Posted January 30, 2016 Made a good job of that Masher John Quote Link to comment Share on other sites More sharing options...

Recommended Posts
Join the conversation
You can post now and register later. If you have an account, sign in now to post with your account.
Note: Your post will require moderator approval before it will be visible.