Leaderboard


Popular Content
Showing content with the highest reputation on 12/11/23 in all areas
-
This short BBC video is well worth watching, especially so today. It's one of a series of shorts currently on BBC News site from all of the services of WW2 veterans telling their own individual story. Plus this one of John Hemingway, the last known surviving BoB pilot.7 points
-
Don't beat yourself up too much, at the moment your concentration is focused on flying the plane as you get more stick time, you'll be able to devote more brain power to it's position in the air. I find when instructing at the beginning I have to instruct the student when to make turns adjust throttle etc while he concentrates and flying the plane, but as experience is gained then the flying becomes more natural and focus shifts to positioning the aircraft with respect to the field layout etc.4 points
-
That's good advice Andy. I was at the field today and flying alongside a fellow club member who was practising for his B certificate. He was obviously a competent pilot but I noticed him struggling to align his landing with the centre of the strip. After he landed I explained the visual cues that I use (tall tree, 3rd cooling tower on power station, etc) and he realised he had been making his final turn much earlier than was ideal. He was initially surprised how late I left the turn but was convinced when he saw my model go straight down the runway every time. As I was packing my models and equipment in the car he was walking around the patch, eyeing up the visual cues for other wind directions.4 points
-
Gorgeous day today, perfect flying conditions with a heavy frost which soon burned off,, deep blue skies, bright sunshine and a really good turnout of club members. Flew a bunch of models until the light started to go a bit off - all in all a marvellous day. Here's clubmate Jim's beautiful P38 Lightning which shone in the brilliant sunlight.3 points
-
I had my Maiden flight today with my latest depron and foamboard model 65" span weight 6.5lb ready to fly, no problems apart from my fingers freezing in the cold N E wind second flight 4.5 minutes 71% left in the battery. Must be my age but I did not feel like hanging around in the cold so pleased with the result I went home some hit soup.3 points
-
Hopefully not the aeroplane!🤣🤣3 points
-
Glad you had some more flying time today Toto. The "Flying Start" comment is a good one. Regarding flying too close in, when no one is flying and all is clear, walk out onto the strip and stand in the middle of it. Then look up the runway and notice any features which line up with your view. Now do the same in the other direction. You can now use those visual clues to help you line up with the centre of the runway as you come out of your turns. Please, do not get fixated on being in exactly in the right place. Once you get familiar with flying, you will not need the clues any more. Today was a good day for me too, as one of my students went solo - first time off buddy lead. He had 2 successful flights like that and then we went back to buddy for some aerobatics, having been overflown by a full size Yak doing aerobatics in the sunshine. I will let you imagine his smile - suspect it may still be on his face tomorrow. However he did comment on how tired he felt afterwards. That is what you have coming so keep at it.3 points
-
It's reassuring to know that all those extra taxes were successfully used by governments to avert each of those potentially disastrous scenarios.3 points
-
Bit bigger than our wet site, btw the last landing of my flying boat was deadstick after the ESC packed up...........2 points
-
2 points
-
I’ve built a few own design EDFs from insulation foam, and they all perform well - this is what I did. The most common recommendation I could find was that the outlet of the tube should be about 85% of the SWEPT AREA of the fan - that’s the area of the fan diameter minus the area blocked by the motor. Assuming your 70mm fan has a motor of about 28mm diameter (that seems pretty standard?) than 85% of the FSA would give you a diameter of 59mm the exit of your tube. I suspect the length is not as crucial - mine are about three times the fan diameter, but I think a bit longer or shorter won’t be make or break. Going a bit larger or smaller diameter will increase or decrease the static thrust and exit velocity of the tube. I tested adding an additional cone to reduce the area of my tube outlet - the intention was to sacrifice a bit of static thrust for some additional speed. It was an epic failure and I didn’t try it again… Good luck - here’s a short video of my latest design as proof of flight! This one is on a 64mm fan. Good luck!2 points
-
Hi All, I have now returned from 3 months away with work and hoping to get back into the spit. I'd love to try and get it flying next year. I have a fair bit of tidying and re-organising to do but I'm still on it and not given up yet! Gary2 points
-
I started installing LEDs. Tail and wing tip were straight forward. The landing lights will be a bit more work. I thought about attaching them to the landing gear, but they would have to be removable in case of servicing the oleos. So I chose to put them in the outer wing panel and have them retractable, like the original. I haven't found a picture of the original landing light. After looking closely to the drawings and plastic models, I changed the hinge type to a hidden version. Timo2 points
-
@Geoff S - did the Gladiator come from the UK warehouse, Geoff - they don't appear to be in stock 🤥 I've spent a lot of money with HK in the past and probably will do again, but the notion that they kept the model trade 'honest' is fanciful (and that's putting it several orders of magnitude more politely than the word I was minded to use).2 points
-
As some may have noted, the HK Gladiator I ordered back in September arrived on Friday evening. I've spent most of the weekend putting it together. It goes together very well and the parts fit where they should with few issues. There are one or two quite awkward operations nothing that can't be overcome with a bit of thought. Whilst it's not as straight forward as some foamie ARTFs (my Riot was together in less than an hour after I'd bought it at a show plus extra to set it up properly) it's still an assembly rather than a build. It's certainly not a model to take apart regularly. There are too many small screws into plastic threads for that but it's small enough to fit in most cars. Storage at home might be a problem. Mine is staying in one piece unless the flying gods decide otherwise :). The on-line assembly manual is comprehensive and (mostly) accurate - eg there's a carbon rod spar for the tailplane shown in a sketch but no mention of it in words. It wasn't clear until I found it in a packet with the propeller. The manual describes 2.3mmx 10mm self tappers but 8mm are supplied (and perfectly adequate). It's not a model for a first timer anyway. The wheel assembly is unique and tricky but looks good when finished. The final all up weight without batteries is 1.31 kg - 1.56 with 2200 4S LiPo and 1.72kg with a 4AH LiPo. This gives a very low wing loading of less than 1lb/squ ft though I'm not sure how adding the 2 wing areas in a bipe works. I'll test fly with the 2200 4S batteries as recommended but I may give the bigger batteries a try. The CoG comes out exactly as specified. My workshop's a bit small to take any meaningful pictures. I'll take a few tomorrow outside weather permitting as well as checking motor current/power etc. I've found a suitable pilot but how to gain access to the cockpit to install is a bit of a problem. The canopy is well stuck down. However, there may be a route.through the floor! Anyway, it certainly looks good and reports imply it flies well too. I shall see.1 point
-
Richard, Adjustment of my order! Two FW 190's and one Tempest. The second FW is for a fellow builder of one of the clubs I belong to.1 point
-
A very peaceful scene Aidan. Serene. Toto1 point
-
That’s great to read, picked up a beautifully built example today. 👍👍1 point
-
Hi Graham, As these transmitters are designed to be disassembled by the user to allow modifications, I personally would remove the back of the transmitter so I could view the antennae connections on the output board. These are normally quite small 90 degree co-axal connections and are locked in place by a dab of paint. Check if the paint is cracked, and if possible remove the connector and reseat it firmly. Then retest.1 point
-
i came at it another way but ended up with the same result. 2.2/11 x 60 was the formula i was trying to remember. in any event, 5/5 for me on that one and i think 5/5 for the new set too1 point
-
We used to have access to a small lake about 10 miles from my club but after we'd had a few 'splash ins' it became unavailable. Also took part in some events at Kielder reservior many years ago - great fun at both venues. 😊 PS forgot to mention - once went on an island hopping (local taxi service) DH Beaver flight from Coal Harbour, Vancouver. About an hour or so round trip. An interesting experience, also spent found it fascinating watching the various other waterplane activities in what was a fairly busy harbour.1 point
-
That's very true but there is a very active group of waterplane flyers in Scotland who hold events at least once a month on the many lochs there. Have a look for "Seaplanes Scotland" on facebook.1 point
-
I was in need of a wing bolt washer. Had non of the correct size, so I'll just 3D print it. As it is just as quick to print 20 as it is 1, just use a little more resin. Could have squeezed a few more on, but this will do me for a while.1 point
-
Finding it in a condition good enough to fly again is even better still!😁 Q. does anyone actually master landings? Even the guys and gals in the big stuff don't always have a 100% record.1 point
-
And landing it on water is even bigger.1 point
-
Funny, but off topic, nowadays I use 3 mm, 0.5mm carbon tube instead of steel for control rods. Roughen inside and epoxy glue (15 minute or longer) threaded stuff inside, as needed. Zero failures so far.1 point
-
Much nicer with the resin printer1 point
-
I'll try what you suggest ..... may just do the trick .... that .....and a bit experience / familiarisation. It'll come. Toto1 point
-
What a glorious morning.... one member was complaining that the sun was burning his neck!1 point
-
Yes, I think so. It was free P&P. When the first batch came into the country a few weeks ago there were several Gladiators (<10 IIRC) marked as 'in stock' - with an indication of the number left but they went within a week. I ordered and paid for mine in mid-September so I've been waiting a while. I've started putting it together and I'm quite impressed with the design and the fit of the components. Most of today was fitting the decals (there's a lot of them) and the quality is very high - they're no thicker than a coat of paint and conform well with irregularities of the foam. My main gripe is that there's no pilot despite a clear canopy.1 point
-
I performed a successful maiden flight of my second Top Quark prototype today on a nice sunny day at Epsom Downs race course. I tried a lower power outrunner – 2826 1400KV with 7 x 6 prop = 200W, compared to the first prototype – 2826 2200KV with 6 x 4 prop = 280W. The lower power was very noticeable and, whilst it flew perfectly okay, I did miss the power loops and knife edge that the first prototype (now 93 flights old) does with ease. I nearly put her into the ground a couple of times because I didn’t always compensate with a higher throttle stick position when cruising around. Also, she was a little tail heavy due to the slightly larger Rx and the addition of a battery tray. A club member took some Hi-res shots with his fancy camera for my intended plan/build article. When I get them they will supplement the build pictures I took during construction of the second prototype. I’m keen to get the article in the can and off to Kevin so I can resume work on my Strange Quark EDF variant.1 point
-
Lindsay, Poor solder connection on either the ESC or the motor wires would be my bet. I have just taken apart an ESC I was given after a motor failure, shows the same thing.1 point
-
In October I flew again with my brother. Someone at the field took some nice photos 🙂 Now it's really routine, flying the Whirlwind. Timo1 point
-
Fairly sure it's a weird thread specific to spokes. I've built a few wheels too. DT Swiss swaged spokes every time...1 point
-
Your getting on the motorway without ever driving before. With your experience You should only buy models youve actually seen at your club fly with a set up suitable for the plane, your ability and the availability of hands on advice. Your on your 5th model ? with 10 more in stock, most beginners would still be on there first.1 point
-
Let’s not go there!1 point
-
Its a bit like braking distances for cars, we could sing them out for the driving test but after so many years dammed if I know, more so now they are in meters. But I do know how much space my car needs at different speeds. If you asked a dozen people to point to a spot 100 meters away you would likely get a dozen different results. A bit like asking here Whats the best radio make/model to have?1 point
-
ken anderson....ne....1...ah so dept.1 point
-
Graupner Speed props and Aeronaut props are every bit as good as APC-E props. A couple of disadvantages with APC-E props, good as they are, may be seen in their inherently brittle nature-they break much more easily in an impact with the ground than some other props and in their extremely sharp trailing edges. The latter are dangerously sharp and I'll live with the slight loss of efficiency in a couple of swipes with a piece of fine sandpaper along that trailing edge to reduce the risk of an accidental cut in normal operation. I'm not talking about inserting a digit into a rotating prop, just general handling where a brand new APC-E can give you a painful "paper cut" just handling that razor sharp trailing edge.1 point
-
Not much progress but I have excavated out the inside of the cockpit canopy. As supplied it weighed 5.2g. It now weighs 2.6g. I am sure a 2.6g saving on what is likely to be a 360g plane will make no difference at all but its the principle of a 50% reduction that counts. The extra space it creates inside the cockpit might come in handy too.1 point
-
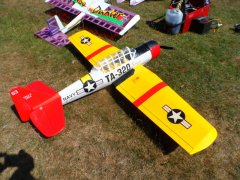
So apart from a few bits that I skipped ( wing reinforcement tape , wing bolt , servo pushrods ) , the Fw190 is done . I think you will agree that we achieved all that we set out to do . This is a very fast build , stiff and light model . I will be testing a very cheap dolly design I have in mind so that even if you turn up at the field alone , you can still fly . The aim is to build these as simple models to belly land , but a retro retract pack will be available later on . For now though, lets enjoy the simple approach and try to encourage some of those ARTF warbird flyers to have a go . Here are some pictures of the 190 basking in early winter sunshine .1 point
-
As I really don't like that big "V" slot (on my first not flapped FX707 I filled it in) I decided to go ahead and built a bigger, longer Depron flap using 2mm skin top and bottom. At the same time I printed the tailing edge extensions for the aileron and the short bits that go on the rest of the edge A comparison of the original & extended wings. It is the underside that shows the biggest difference. Of course the aileron will have to have a "V" slot added but as the ailerons will have differential movement the slot will be less pronounced. As I commented on the conversion of my first FX707 I doubt any of the changes will make a significant difference to the performance unless I do a conversion without any wing modifications and that I am not going to do.1 point
-
Finally some decent flying shots taken today by our club Chairman Chris Montagu. Engine is starting to bed in nicely now. Swinging a 26 x 14 prop topping out at a little under 6300rpm in the air and 5000rpm on the ground.1 point
-
Hi All, I skinned the bottom of the D section so that I could remove the tabs and lock in the washout. Everything other than the final servo fitting and retracts is done on the right wing (other than sheeting and the wing tip obviously but I want the retracts in first) so I decided to put it on the fuselage for a moral boost. I ended up putting a few bits on to see how she looks. It's all roughly sitting on so not perfect but she looks like a spit!! A little moral boost before it starts again..... Double check I have a left wing and not a second right (experience has taught me that) then tidied up all the cuts for the spar then added slots for the extended spar in front of the main spar. Fingers crossed it goes quickly and I can get these retracts in 🤮 Gary1 point
-
55 Years ago, age 13, I remember long hot summers at Callow Bank flying the first-of-many Veron Impalas with my Dads home-made copy of a Remcon 12 reeds set. Half a century on, one of my favourite pastimes is flying a Veron Impala, on Remcon 12 reeds, at Callow - for me this combination is a real nostalgia trip. I dont know if the Impala has 'soul' - it certainly has lengevity! You can have a tremendous amount of fun with it, its so versatile - single channel on the button, reeds, galloping ghost, pulse, slope, bungee, powerpod, aerotow, its done all that and more. It was my first multi channel model, and to recreate that era with the very same model, same radio and the same location is simply magical. Presently I've three Impalas, all on reeds, all regularly flown. The first pic is me as a kid attempting ailerons for the first time - they were totally ineffective! At that point the Impala had four Duramites and an 8.4v DEAC, and weighed nearly 4lb ! Min in the middle I've not seen since the scooter days, and little Steve on the right later took up model flying! So. The Veron Impala. A model that grows with you! 😀1 point
-
One final suggestion.... not wanting to hijack your thread Gary... I always struggled with balancing aircraft, particularly low wingers. It's easy to identify CofG on the plan, but once the model is complete not so easy. Secondly supporting the aircraft during the process of balancing. So for my latest builds I incorporate a brass tube into the wing at the correct CofG. The tube passes through the wing so that I can easily string up the model and check the CofG whenever I make any changes to the installation. In the below picture, note the component tray on the top of the cowl at the same position where ballast will be placed. I can then load up the tray until the aircraft hangs level and cycle the gear to check shift in CofG.1 point
-
When I was heavily into training new fliers 25-30 years ago, I recall that the Fly-boy and its bigger brother the Hi-Boy were very common and successful trainers. However, they weren't easy to fly by a raw beginner and did need to be set up correctly before they'd perform well. Try to fly either on your own as a beginner or rush the setup and rekitting was inevitable. As has been said they were designed to be robust and this did make them a bit on the heavy side compared to what beginners are used to today. The benefit, of course, is that you rarely finished up with a heap of unrepairable matchwood as is the case with ARTF wooden trainers after a crash, and you did manage to fly when it was breezy. Test flown by an instructor and set up correctly, I found the FB and HB excellent trainers Funnily enough I don't recall them to be overly sensitive to CG position - usually 25-30% of wing cord would do it and usually balanced on the fingers in time honoured tradition. I do recall that control throws needed to be set carefully, the rudder on the Fly-Boy being very powerful especially with motors at the higher end of the power range - the model would easily barrel roll given full rudder. No more than 1/2 inch either way for general flying IIRC and a bit less for a beginner. The HB needed a decent motor to give of its best and performed well with CG at the 25% mark - take off runs would be fairly extended giving the trainee experience of keeping the model straight on the ground and naturally the model needed to be flown right to touch down and roll out. Not a bad thing really, and stood newbies in good stead when it came to flying much more challenging aircraft later in their modelling careers. The Precedent trainers did get a reputation for being tricky, but I prefer to think that they actually taught a beginner more effectively than many of the much lighter models available at the time, as when incorrectly handled they could bite, although with a buddy-box this could be used to advantage. Just wondering whether modern lightweight, ready to fly, auto stabilized, panic buttoned, electric trainers are making it all too easy and taking away the euphoria of getting a challenging model to succumb to one's will? Edited By Cuban8 on 26/10/2015 08:14:591 point


.thumb.jpg.632415da66ae2d3b91c91514c153e5df.jpg)